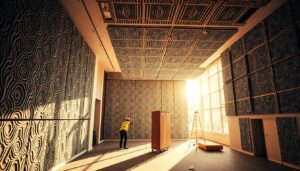
Are you looking to add some visual intrigue to your interior space without completely revamping the layout or decor? Textured walls are increasingly on trend, offering a tactile finish that can dramatically change the look and feel of a room.
When redecorating, many of us think about repainting or putting up new wallpaper, but texturing a flat wall can offer a lovely variation. By adding texture to your wall, you can hide imperfections and create a unique surface that adds character to your space.
Whether you’re looking to hide wall imperfections or simply add some visual interest, this guide will walk you through the process of applying texture to a flat wall, transforming an ordinary surface into a visually interesting feature.
Key Takeaways
- Learn how to transform your walls with texture for a unique interior look.
- Discover the benefits of textured walls in modern interior design.
- Explore various texturing techniques for a professional finish.
- Understand how to prepare and apply texture to your walls effectively.
- Find out how textured surfaces can enhance the aesthetic of your space.
Why Add Texture to Your Walls?
You can significantly enhance the aesthetic appeal of your space by incorporating texture into your walls. Textured walls are not just visually appealing; they also serve multiple purposes in interior design. By adding texture to your walls, you can create a more engaging and dynamic environment.
Benefits of Textured Walls
Textured walls offer numerous benefits, making them a versatile choice for home improvement projects. Some of the key advantages include:
- Serving both aesthetic and practical purposes in interior design
- Adding depth and dimension to a room, creating visual interest
- Transforming the feel of a space to appear warmer, more rustic, or sophisticated
- Creating a focal point or feature wall that becomes a design statement
Hiding Imperfections and Adding Character
One of the primary benefits of adding texture to your walls is the ability to hide imperfections such as dents, cracks, or uneven surfaces without costly repairs. Additionally, textured finishes can add perceived value to your home by creating a custom, high-end look. The tactile nature of textured walls also adds another sensory dimension to your interior design, engaging both sight and touch.
Understanding Different Wall Textures
When it comes to enhancing your walls, understanding different wall textures is crucial. The texture of your wall can significantly impact the overall aesthetic and feel of a room. With various techniques and styles available, it’s essential to explore the different options to determine which one suits your space best.

Popular Texture Styles
Several popular texture styles are commonly used in interior design. These include Orange Peel Texture, Knockdown Texture, and Skip Trowel Texture, each offering a unique look and requiring specific application techniques.
Orange Peel Texture
The orange peel texture is a popular choice, featuring a subtle, slightly bumpy surface that resembles the skin of an orange. It’s a beginner-friendly option that works well in most rooms.
Knockdown Texture
Knockdown texture starts as a sprayed-on texture that is then “knocked down” with a knife or trowel, creating a mottled, flattened appearance. This style adds subtle dimension to walls and is a favourite among homeowners.
Skip Trowel Texture
Skip trowel texture is a more artistic finish created by applying joint compound in a random pattern with a curved trowel. It results in a Mediterranean or Spanish-inspired look, adding a decorative appeal to your walls.
Choosing the Right Texture for Your Space
When choosing a texture for your space, consider the room’s function, existing décor, and the overall style you wish to achieve. Lighter textures work better in smaller spaces, while more dramatic textures can make a statement in larger areas. Additionally, consider how natural and artificial light sources will interact with your chosen texture.
Essential Tools and Materials for Applying Texture to a Flat Wall
Applying texture to a flat wall requires a specific set of tools and materials to achieve the desired effect. The quality of your equipment will directly impact the final result, making it essential to choose the right tools for the job.
Basic Tools You’ll Need
To get started, you’ll need some basic tools, including rollers, trowels, and brushes. Paint rollers with various nap lengths are necessary for creating different textures, while trowels are used for applying and shaping compound.
Rollers, Trowels and Brushes
Specialised brushes, such as stomp brushes or stippling brushes, are designed to create specific texture patterns.
Protective Equipment
Don’t forget to protect yourself and your surroundings with dust masks, eye protection, gloves, and drop cloths. These will safeguard against splatters and dust.
Compounds and Additives
The primary materials for creating textured walls include joint compound, textured paint with additives, or premixed texturing compounds. You can also mix additives with paint or compound to create different textures.
Optional Specialised Equipment
For larger projects or specific textures, consider using texture sprayers, specialty rollers, or patterned rollers. These can help you achieve unique effects and faster application.
Texture Sprayers
Texture sprayers allow for faster and more even application of certain textures, making them ideal for larger areas.
Specialty Rollers and Brushes
Specialty rollers, such as stippling or sponge rollers, can create distinctive effects without requiring advanced techniques.
Preparing Your Wall for Texturing
Before applying texture to your wall, it’s essential to prepare the surface properly. A well-prepared wall surface is crucial for achieving a professional-looking textured finish that will last for years.
Cleaning and Repairing the Surface
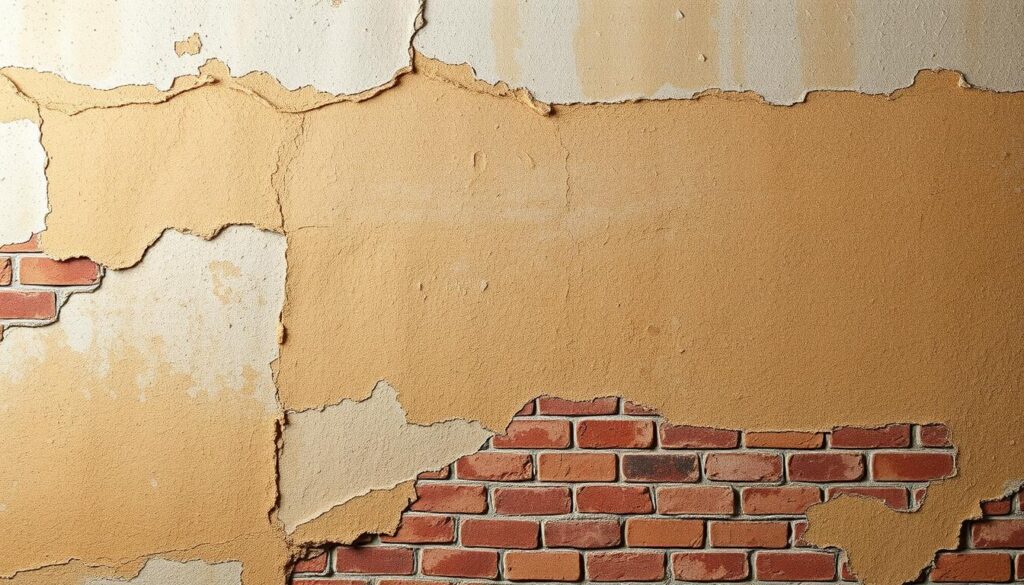
Begin by thoroughly cleaning the wall to remove any dust, dirt, grease, or cobwebs. Even minor contaminants can prevent proper adhesion of the texturing materials. Use a damp cloth or sponge to clean the wall surface, and let it dry completely. Next, inspect the entire wall surface for damage such as holes, cracks, or dents, and repair these imperfections using appropriate patching compounds or spackling paste.
Once repairs are dry, use fine-grit sandpaper or a sanding block to smooth the patched areas and roughen up the existing paint slightly. This helps the new texture adhere better to the wall surface.
Priming Your Wall
Applying a high-quality primer is an essential step that’s often overlooked. Primer creates a uniform surface that ensures even absorption of the texturing material and improves adhesion. For walls with existing glossy paint, lightly sand the entire surface to create a slightly rough texture that will help the new materials bond properly.
Protecting Surrounding Areas
To protect surrounding areas, remove furniture or move it to the centre of the room and cover it with dust sheets or plastic sheeting. Use painter’s tape to mask off areas you don’t want textured, such as trim, windows, doors, and ceiling edges, ensuring clean lines and professional results.
| Preparation Step | Purpose |
|---|---|
| Cleaning the wall | Remove dust, dirt, grease, or cobwebs for better adhesion |
| Repairing damages | Fix holes, cracks, or dents for a smooth surface |
| Priming the wall | Create a uniform surface for texturing material |
| Protecting surrounding areas | Prevent damage to furniture, trim, and other areas |

5 Popular Methods for Applying Texture to a Flat Wall
You can transform your flat walls into visually appealing surfaces with the right texturing technique. There are several effective methods for applying texture, each offering different aesthetic results and requiring varying levels of skill and equipment.
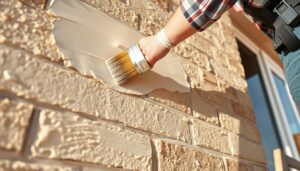
Using Textured Paint

Using textured paint is perhaps the simplest approach for beginners. These specially formulated paints contain additives that create texture when applied with a roller or brush, offering a subtle but noticeable dimensional effect.
Applying Texture with Specialised Rollers

Specialised texture rollers provide an easy way to create consistent patterns across your walls. Options include stippling rollers for a speckled effect, sponge rollers for a more organic feel, and patterned rollers that imprint specific designs.
Creating Texture with Joint Compound

Creating texture with joint compound offers the most versatility and artistic control. This method involves applying the compound with trowels, knives, or brushes to create custom patterns and depths, allowing for personalisation and unique finishes.
Spray-On Texturing Techniques

Spray-on texturing techniques utilise specialised equipment to apply a mixture of drywall compound and water to walls, creating textures like orange peel or popcorn that would be difficult to achieve by hand. While it requires more equipment, it provides quick coverage for large areas and consistent results.
Using Textured Wallpaper

Using textured wallpaper offers a no-mess alternative that can mimic various textures from stucco to fabric. Modern textured wallpapers are durable, available in countless designs, and can be painted over for customisation, making them a versatile option for adding texture to your walls.
Each of these methods has its own preparation requirements, application techniques, drying times, and finishing options. Choosing the right approach depends on your desired outcome, skill level, and time constraints. By selecting the appropriate method, you can achieve the desired texture and enhance the overall aesthetic of your room.
Conclusion: Maintaining Your Newly Textured Walls
Now that you’ve added texture to your walls, it’s time to learn how to maintain them effectively. To keep your textured walls looking their best, regular dusting is essential. Use a microfibre duster or vacuum with a brush attachment to gently remove dust from the uneven surface.
When cleaning, avoid excessive moisture, which can damage the texture. Instead, spot clean with a slightly damp cloth and mild detergent when necessary. It’s also a good idea to keep leftover texture material or paint for future repairs, as matching texture patterns later can be challenging.
For more detailed guidance on applying decorative texture finishes, you can refer to our comprehensive DIY guide. By following these maintenance tips, you can ensure your DIY textured walls remain a beautiful feature in your home for years to come.