Are you looking to give your living space a fresh new look without the hassle of traditional renovation methods? You’re not alone in seeking a quick and stylish solution to enhance your home’s interior.
Peel-and-stick 3D wall panels offer a revolutionary way to add texture and visual interest to any room. Made from lightweight yet durable vinyl, these decorative panels are easy to install and require no adhesives or special tools.
By using these innovative wall coverings, you can transform your home’s interior with minimal effort and maximum impact. Whether you’re looking to update a single room or your entire living space, peel-and-stick 3D wall panels provide a cost-effective and versatile solution.
Key Takeaways
- Discover how to enhance your living space with minimal effort using peel-and-stick 3D wall panels.
- Learn the benefits of using these innovative wall coverings for your home decor.
- Understand the step-by-step process for applying 3D wall panels.
- Explore the versatility and cost-effectiveness of peel-and-stick wall panels.
- Find out why these panels are a popular choice for DIY home renovations.
Understanding Peel-and-Stick 3D Wall Panels
If you’re looking to give your walls a makeover, peel-and-stick 3D wall panels are an innovative solution worth considering. These panels offer a unique blend of aesthetics and functionality, making them an attractive option for homeowners looking to enhance their living spaces.
What Are Peel-and-Stick 3D Wall Panels?
Peel-and-stick 3D wall panels are decorative wall coverings that can be easily applied to walls without the need for complex installation processes. They are designed to provide a quick and effective way to transform the look and feel of a room. Made from various materials, including PVC and other synthetic materials, these panels are durable and easy to maintain.
Benefits of Using 3D Wall Panels
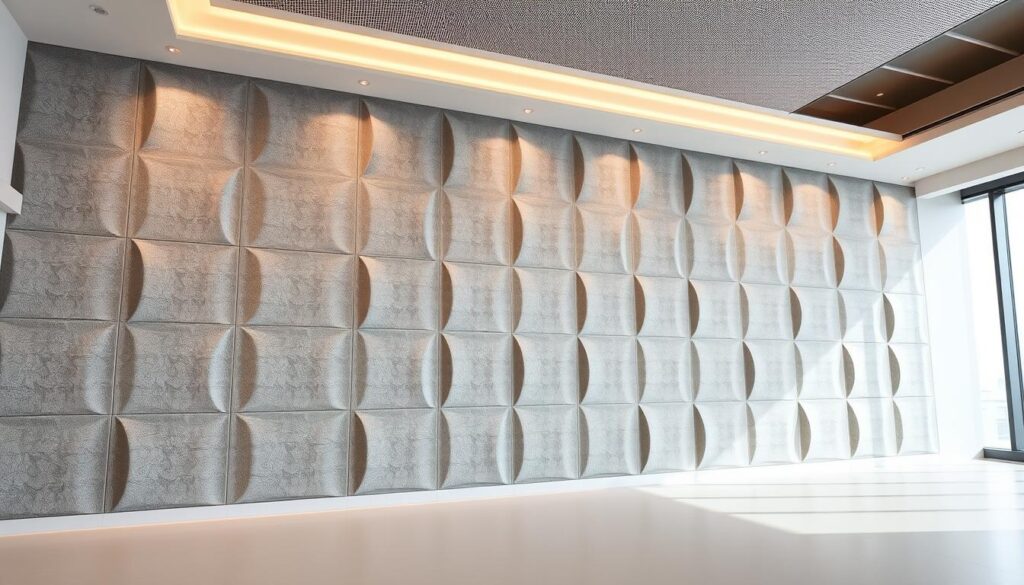
Using 3D wall panels can significantly enhance the aesthetic appeal of your room. They come in a wide range of designs, from stone and brick effects to wood grain and geometric patterns, allowing you to choose the perfect style to complement your interior decor. Additionally, these panels can help to create a focal point in a room, adding depth and visual interest.
“The versatility of 3D wall panels makes them an ideal choice for various interior styles, whether you’re aiming for a rustic charm or sleek modern aesthetics.”
Types of 3D Wall Panels Available
The market offers a diverse array of 3D wall panel designs, catering to different tastes and preferences. You can choose from various textures and finishes, including matte, glossy, or textured, depending on your room’s lighting and overall aesthetic. Some popular options include marble-effect panels, vintage-inspired designs, and contemporary geometric patterns.
| Type of Panel | Description | Ideal For |
|---|---|---|
| Marble-effect | Elegant and sophisticated, mimicking real marble | Living rooms, feature walls |
| Vintage-inspired | Distressed finishes, adding a touch of nostalgia | Retro-themed rooms, accent walls |
| Geometric patterns | Modern and dynamic, creating a visual impact | Modern decor, statement walls |
Materials and Tools You’ll Need
Before you start installing peel-and-stick 3D wall panels, it’s crucial to gather the necessary materials and tools. Having everything ready will make the process smoother and more efficient.
Essential Tools for Installation
The basic installation of peel stick 3D wall panels requires minimal tools. You’ll need a measuring tape to measure your wall accurately, a pencil to mark the wall, and a cutting tool, such as a utility knife or scissors, to cut the panels to the desired size. Ensuring you have these essential tools will help you complete the installation effectively.

Optional Tools for a Professional Finish
For a more professional finish, consider using additional tools. A level ensures straight application, while a rubber roller or squeegee helps remove air bubbles, ensuring proper adhesion across the entire wall panel surface. A sharp utility knife is useful for precise cutting around outlets or corners. These optional tools can elevate your DIY installation from good to professional-grade.
- A laser level helps maintain perfect horizontal and vertical alignment throughout your installation.
- Investing in these optional tools is worthwhile if you plan to install panels in multiple rooms or for future projects.
By having the right tools and materials, you’ll be well-prepared to achieve a professional-looking result with your peel-and-stick 3D wall panels.
Preparing Your Wall Surface
A well-prepared wall surface is the foundation of a successful 3D wall panel installation. Before you begin, it’s essential to ensure your wall is ready for the panels.
Cleaning and Inspecting the Wall
Start by cleaning the wall thoroughly to remove dirt, grime, or grease that might interfere with the adhesive. Inspect the wall for any damages or uneven surfaces. Any cracks or holes should be filled and sanded smooth to create an even surface for the panels.
Measuring Your Space Correctly
Accurate measurements are crucial for determining how many panels you’ll need. Measure the length and height of your wall, taking into account any obstacles such as electrical outlets or windows. For a room that is 2×3 meters with a ceiling height of up to 2.7 meters, the calculation would be ((2×2.7)+(3×2.7))x2 = 27 square meters of adhesive area.
Calculating How Many Panels You Need
To calculate the number of panels required, you need to know the size of the panels you’re using. For instance, if one panel is 700×770 mm (0.539 square meters), you’ll need approximately 2 panels per square meter. For the 27 square meter area, you would need 27×2 = 54 panels. It’s recommended to buy 2 spare sheets for undercuts and potential future damage.
When ordering panels with repeating designs, consider the pattern matching requirements to minimize waste. Efficient planning of your layout can also help reduce unnecessary cuts and save material, especially with more expensive panel options.
How to Apply Peel-and-Stick 3D Wall Panels Step by Step
With the right preparation, you can achieve a professional-looking installation of 3D wall panels in your home. Before you start, it’s essential to understand the steps involved in applying these innovative panels.
Planning Your Layout
Begin by planning your layout to ensure a seamless installation. Measure your wall space carefully and decide on the pattern or design you want to achieve with your 3D wall panels. It’s crucial to consider the room’s dimensions and any obstacles, such as electrical outlets or corners. Take your time to visualize the final result to avoid any mistakes during the installation process.

Starting the Installation Process
Once you have planned your layout, it’s time to start the installation. Begin by peeling off the backing from the first panel and sticking it to the wall, ensuring it is level and aligned with your layout plan. Press firmly to secure the panel in place. Continue applying the panels according to your planned design, ensuring each one is securely attached and aligned properly.
Working Around Obstacles and Corners
When installing around obstacles like electrical outlets or switches, measure and mark the position on the back of the panel. Cut out the shape using a utility knife or scissors, making the opening slightly larger than the actual fixture to allow for adjustment. For corners, measure from the last installed panel to the corner, add a small allowance (about 1/8 inch), and cut the panel to size. Apply the panel, allowing the extra material to wrap slightly around the corner.
| Obstacle | Measurement | Adjustment |
|---|---|---|
| Electrical Outlets | Mark position on panel | Cut slightly larger |
| Corners | Measure to corner + 1/8 inch | Wrap around corner |
By following these steps and tips, you can achieve a professional-looking installation of peel-and-stick 3D wall panels in your home, enhancing the aesthetic of any room.
Different Installation Methods for Various Effects
Choosing the right installation technique for your peel-and-stick 3D wall panels is crucial for achieving the desired visual effect. The method you choose can significantly impact the final appearance of your wall, making it essential to understand the different options available.
Seams Gluing Method
The seams gluing method involves aligning the panels edge to edge and gluing them in place. This technique is relatively straightforward and requires less precision compared to other methods. However, the edges of the panels may remain visible, creating a more textured look. To achieve a professional finish, ensure that the wall surface is clean and dry before applying the peel stick panels.
Seamless Installation Method
The seamless installation method creates a continuous surface by carefully cutting and aligning the panels to eliminate visible edges. This technique requires more precision and patience but results in a look without visible seams, making your wall appear as a single, cohesive unit. To achieve this effect, you will need to cut out small bricks at the edges of the panels and join them carefully while gluing. The end result is a luxurious, custom appearance that mimics expensive materials.
Some key benefits of the seamless installation method include:
- Creating the illusion of a continuous surface without visible panel edges.
- Requiring precise cutting techniques to achieve perfect alignment between panels.
- Understanding the additional time and patience required for this method.
- Matching patterns and textures across panel seams to maintain visual continuity.
- Achieving a more luxurious, custom look that mimics expensive solid materials like stone or wood.
Creative Applications for Different Rooms
3D wall panels offer a versatile and stylish solution for enhancing the aesthetic of various rooms in your home. You can use them to create feature walls, backsplashes, accent walls, and more, depending on the room’s purpose and your personal style.
Living Room Feature Walls
Create a stunning focal point in your living room with 3D wall panels. These panels can add depth and visual interest to the space, making it more inviting. You can choose from a variety of designs to match your decor.

Kitchen Backsplash Ideas
Use peel-and-stick 3D panels to create a unique and easy-to-clean backsplash in your kitchen. These panels are resistant to heat and moisture, making them ideal for kitchens. Choose a design that complements your kitchen’s style.

Bedroom Accent Walls
Add a touch of elegance to your bedroom with 3D wall panels. These panels can create a beautiful accent wall that adds texture and visual interest to the room, promoting a relaxing atmosphere.

Bathroom Applications
Transform your bathroom into a spa-like sanctuary with waterproof 3D wall panels. These panels are designed to withstand high humidity and moisture, making them perfect for shower surrounds, vanity backsplashes, or accent walls. You can choose water-resistant stone or marble-look tiles for a luxurious finish.
- Discover how to use water-resistant 3D wall panels to create a spa-like atmosphere in your bathroom without the high cost of traditional tiling.
- Learn about the specific types of panels designed to withstand bathroom conditions, including high humidity and frequent temperature changes.
- Understand installation considerations specific to bathrooms, including proper sealing techniques for areas exposed to direct water.

Conclusion: Transforming Your Space with 3D Wall Panels
Peel-and-stick 3D wall panels provide a simple, durable, and aesthetically pleasing way to transform your space. With their ease of installation, affordability, and stylish design options, these innovative products have revolutionised the DIY home improvement market.
Key benefits of using peel-and-stick 3D wall panels include their versatility, cost-effectiveness, and ability to enhance your home’s interior design. Whether you’re updating a kitchen, bathroom, or creating an accent wall in your living room, 3D wall panels offer an excellent balance of aesthetic appeal and practical functionality.
To maintain your panels and ensure they continue to look their best over time, follow simple maintenance tips. Experiment with different panel styles and installation methods to create truly personalised spaces that reflect your unique taste. By doing so, you’ll be able to enjoy a beautifully designed interior that suits modern trends and your personal preferences.