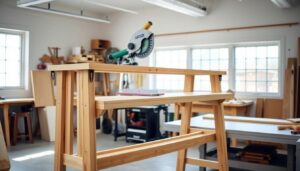
Transforming your workbench into a versatile woodworking station is easier than you think. By integrating a router lift into your existing setup, you’ll significantly enhance your woodworking capabilities, allowing for increased precision and convenience in your projects.
A router lift is a valuable addition to any workshop, providing the flexibility to adjust your router with ease, thus expanding your routing possibilities. Whether you’re using a commercial model or opting for a DIY solution, this guide will walk you through the process, from preparation to final adjustments.
With this comprehensive guide, you’ll be equipped to successfully add a router lift to your workbench top, creating a more efficient and effective woodworking system. By the end of this guide, you’ll have enhanced your workshop’s functionality, making it easier to achieve professional results.
Key Takeaways
- Understand the benefits of integrating a router lift into your workbench.
- Learn about different router lift options, including commercial and DIY solutions.
- Discover how to prepare your workbench for a router lift installation.
- Gain insights into the installation process and final adjustments.
- Enhance your woodworking capabilities with a more versatile workbench.
Understanding Router Lifts and Their Benefits
To maximise the potential of your router, it’s essential to comprehend the benefits and functionality of a router lift. A router lift is a mechanism that allows for precise adjustments of the router’s height from above the table, significantly enhancing your control over the routing process.
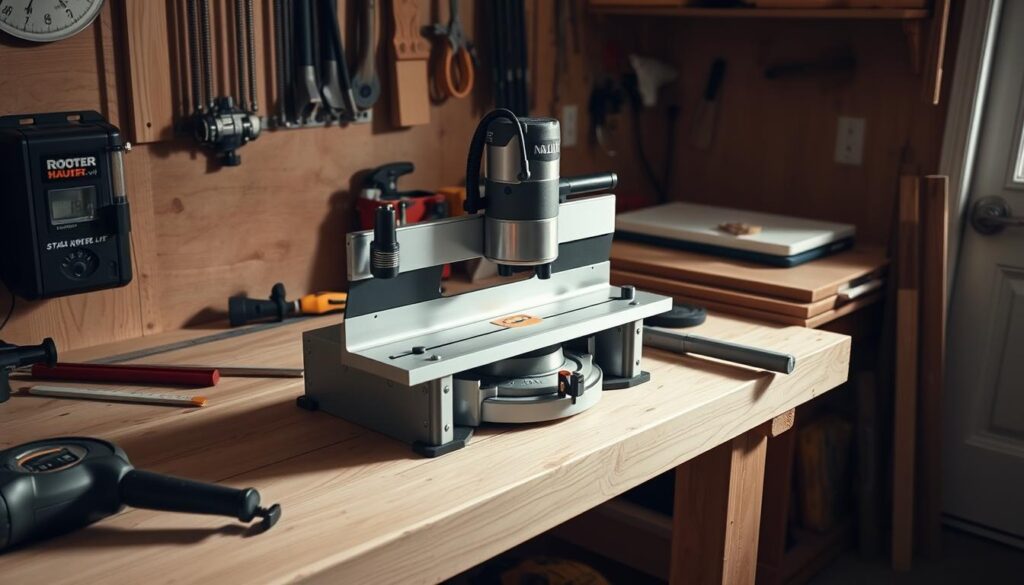
What Is a Router Lift?
A router lift is a system that enables you to adjust the router’s height easily and accurately without having to reach under the table. It typically consists of an insert plate that fits into a mortised recess in your workbench or router table.
Advantages of Adding a Router Lift to Your Workbench
Adding a router lift to your workbench offers several advantages. It allows for quick bit changes and precise height adjustments, reducing fatigue and improving safety during routing operations. Moreover, it enhances the overall precision of your work, making it an invaluable tool for serious woodworkers.
Types of Router Lifts Available
There are various types of router lifts available, ranging from premium commercial models to DIY solutions. Commercial lifts often feature a sophisticated system for adjusting the router’s position and height. DIY options, on the other hand, can include modified plunge bases with threaded rods for adjustment, offering a cost-effective way to achieve similar functionality.
Tools and Materials Needed
Before you start installing a router lift on your workbench, it’s essential to gather the necessary tools and materials. Having everything ready will streamline the process and ensure a successful installation.
Essential Tools for Installation
To install a router lift, you’ll need a range of tools, including a router with appropriate bits (straight bits and pattern cutting bits), guide bushings, a drill and bits, a jigsaw, a circular saw, and measuring tools. Ensuring you have these essential tools will help you achieve precision throughout the project.
Materials for Building the Router Table Top
The table top is a critical component of your router lift setup. Materials typically used include MDF or plywood, often laminated with Melamine for a smooth surface. Choosing the right materials will provide the stability and working surface quality you need.
Hardware Components for the Lift System
The hardware components for the lift system include the router lift mechanism or plate, leveling screws (often using knurled nuts and thumbscrews), and mounting hardware. These components are crucial for securing your router safely and ensuring the lift operates smoothly.
When selecting a router lift, it’s vital to choose one that is compatible with your existing router model. This compatibility ensures a secure and proper fit, making the installation process easier and more effective.
Additionally, consider sourcing quality materials that will withstand workshop conditions and provide long-term durability for your router table setup. Optional accessories, such as dust collection components and fence systems, can also enhance your router lift installation.
Preparing Your Workbench for a Router Lift
Preparing your workbench for a router lift involves careful planning and precise measurements to ensure a seamless integration. This step is crucial for the optimal functionality and accessibility of your router lift once installed.
Measuring and Planning Your Router Table Layout
To begin, you’ll need to measure and plan your router table layout carefully. This involves determining the position of your router lift and ensuring it integrates well with your existing workbench. Take into account the space required for the router and any additional features you plan to include, such as a fence or dust collection system.

Creating the Router Plate Mortise
Creating a precise router plate mortise is essential for the proper fit of your insert plate. To achieve this, you can use a template with a guide bushing and a straight bit. The template can be made from MDF strips held together with double-sided tape.
Using Templates and Guide Bushings
The critical dimension here is the offset between the guide bushing and the bit. Ensuring this offset is correctly calculated will result in a perfectly aligned mortise.
Cutting Techniques for Clean Edges
The mortise should be cut in multiple passes, starting shallow and gradually increasing in depth. This technique helps prevent splintering and ensures clean edges on your mortise, allowing the router plate to sit flush with the table top.
Laminating the Table Top for Stability
For stability, it’s recommended to laminate a single piece of 3/4″ Melamine to 3/4″ MDF. Use screws in a grid pattern about 6 inches apart to provide even pressure while the glue cures. This process results in a durable, flat working surface.
| Material | Thickness | Purpose |
|---|---|---|
| Melamine | 3/4″ | Durable surface |
| MDF | 3/4″ | Stable base |
It’s also crucial to consider the safety aspects, particularly when working with MDF, as MDF dust is toxic. Proper dust collection and protection measures are essential during the cutting and routing processes.
How to Add Router Lift to Workbench
Adding a router lift to your workbench is a game-changer for woodworking precision and flexibility. This upgrade allows for more accurate and efficient routing operations, making it an essential modification for serious woodworkers.
Installing Levelling Screws for the Insert Plate
To ensure your insert plate sits perfectly flush with the table top, you’ll need to install levelling screws. This involves press-fitting knurled nuts into each corner of the mortise, with thumbscrews running through them for height adjustment. A hex nut on each thumbscrew provides a way to tighten things down. The process can be broken down into several steps:
- Drill holes for the knurled nuts in the corners of the mortise.
- Press-fit the knurled nuts into place.
- Insert thumbscrews through the knurled nuts.
- Secure the thumbscrews with hex nuts.
By following these steps, you’ll create an adjustable system that ensures your insert plate is level with the table top, providing a smooth and even surface for routing operations.

Mounting the Router to the Lift Mechanism
Mounting your router to the lift mechanism is a critical step in the installation process. The attachment method may vary depending on the router model and lift system you’re using. Typically, the router is mounted to the insert plate or lift mechanism according to the manufacturer’s instructions. It’s essential to follow these instructions carefully to ensure a secure and proper fit.
To mount the router, you’ll need to align it with the lift mechanism and secure it using the recommended fasteners. Make sure the router is properly seated and tightened to prevent any movement during operation.
| Router Model | Lift System | Attachment Method |
|---|---|---|
| Router A | Lift System 1 | Screws |
| Router B | Lift System 2 | Clamps |
| Router C | Lift System 3 | Adapters |
Securing the Router Table to Your Workbench
Securing the router table to your workbench is crucial for stability during operation. You can use various methods, including Veritas Bench Anchors or custom solutions using dowels and bolts. The key is to ensure the table is firmly attached to the workbench while allowing for removal when needed.
To secure the router table, follow these general steps:
- Position the router table on the workbench.
- Mark the locations for the anchors or dowels.
- Drill holes for the anchors or dowels.
- Secure the router table to the workbench using the chosen method.
By following these steps, you’ll be able to enjoy stable and precise routing operations, knowing that your router table is securely attached to your workbench.
Enhancing Your Router Table Setup
With a few simple enhancements, you can transform your router table into a highly functional and versatile workstation.
Adding Miter Tracks and T-Tracks
Installing miter tracks and T-tracks on your router table can significantly expand its functionality. You can achieve this by using a guide bushing and bit to create a template out of strips of 1/4″ plywood. Routing is done in several passes, starting shallow and working deeper.
Installing a Fence System
A fence system is essential for most router table operations, providing the necessary support and guidance for precise cuts. You can choose between commercial options or DIY solutions that can be customised to your specific needs.

Dust Collection Solutions
Dust collection is crucial for router tables, as they generate significant fine dust. Effective solutions range from simple shop vacuum attachments to more elaborate cabinet-based collection systems, ensuring a cleaner and safer working environment.

By integrating these enhancements with your existing workbench features, you can create a cohesive woodworking station that improves your overall workflow and productivity.
Conclusion
A router lift can revolutionise your woodworking experience by providing improved accuracy and flexibility. By integrating a router lift into your workbench, you’ll be able to tackle complex routing tasks with ease, saving time and reducing potential problems.
The key steps involved in adding a router lift to your workbench include initial planning, installation of the lift mechanism, and final enhancements such as adding a jig or fence system. By following these steps, you’ll experience significant benefits, including improved precision, convenience, and expanded woodworking capabilities.
To ensure your router lift system continues to function smoothly, regular maintenance is crucial. This includes cleaning and lubricating moving parts, checking for any problems with the height adjustment, and verifying that the router bit is securely fastened.
With your new router lift setup, you’ll be able to explore new routing techniques and applications, potentially inspiring further workbench enhancements. This investment will save you time and improve results in your woodworking projects, making it a worthwhile upgrade for woodworkers of all skill levels.