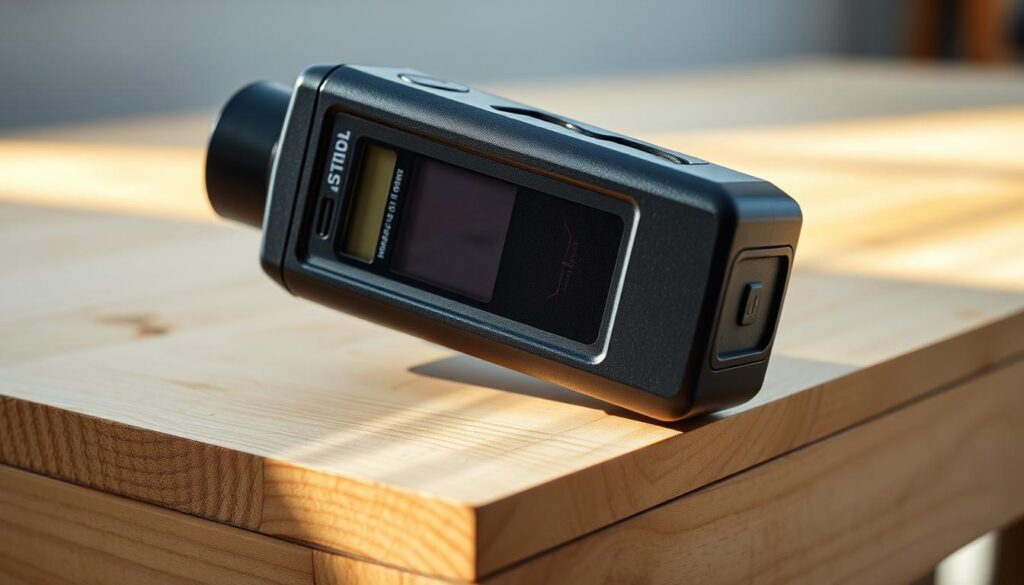
Are you tired of making unnecessary holes in your walls when trying to hang a heavy picture or mount a TV? Locating the wall stud is crucial for a secure and stable installation.
A stud finder is an essential tool for any DIY enthusiast, helping you avoid the frustration and mess of incorrect drilling. With various types available, from simple magnetic models to advanced electronic scanners, choosing the right one can be daunting.
This guide will walk you through the different types of stud finders, their key features, and expert tips on how to use them effectively, ensuring you find the perfect tool for your needs.
Key Takeaways
- Understand the different types of stud finders available for various DIY tasks.
- Learn the key features to consider when purchasing a stud finder.
- Discover expert techniques for using stud finders effectively.
- Find the top-rated stud finders across different categories.
- Troubleshoot common issues with stud finders.
Understanding the Importance of Stud Finders
For DIY enthusiasts, a stud finder is more than just a handy device; it’s an essential tool that prevents costly mistakes. When you’re hanging a picture, mounting a shelf, or performing more complex renovations, knowing what’s behind your wall is crucial.
Some stud finders feature other helpful tools like deep scanning and live wire detection. These features are designed to prevent you from hitting a pipe or wire when drilling into a wall, which can be an expensive mistake. While stud finders have advanced significantly, they don’t work like X-ray vision. There’s a lot going on in walls, and it’s challenging for any device to determine what’s a pipe and what’s a wire with 100 percent accuracy.
Why DIYers Need a Reliable Stud Finder
A reliable stud finder is crucial for DIY projects as it helps locate the structural supports behind your wall surfaces with precision. Without one, you risk hanging heavy items on drywall alone, which can lead to damage, fallen objects, and costly repairs.
- Stud finders help prevent accidental drilling into electrical wires, plumbing pipes, or other hidden utilities that could cause serious damage to your home.
- For DIYers working on renovation projects, a quality stud finder saves significant time that would otherwise be spent using unreliable methods like tapping on walls.
By investing in a good stud finder, you can ensure that your DIY projects are completed safely and efficiently, avoiding potential hazards and costly repairs.
Understanding the Importance of Stud Finders
For any home renovation or decoration project, astud finderplays a vital role in locating wall studs. This tool is crucial for ensuring that heavy items are securely attached to the wall, preventing damage and potential safety hazards.
Common Applications for Home Improvement Projects
Stud finders have numerous applications in home improvement projects. Some of the key uses include:
- Mounting televisions, shelving units, and heavy artwork securely to walls in your home.
- Installing kitchen cabinets or bathroom fixtures, where a reliable stud finder ensures these heavy items are properly anchored to structural studs.
- DIYers use stud finders when installing wainscoting, panelling, or other wall treatments that require secure attachment to studs.
- For home security installations like mounting cameras or alarm systems, stud finders help ensure these devices are securely attached.
- Stud finders are also valuable when planning renovations, helping you understand the underlying structure of walls before making significant changes.
In our comprehensive testing process, we evaluated sevenstud finderson various wall surfaces and home types. The Bosch GMS120Stud Finderemerged as the best overall option, demonstrating exceptional performance and reliability. By using astud finder, you can confidently undertake home improvement projects, knowing that your installations are secure and durable.
Types of Stud Finders Explained
The market offers a range of stud finders, but they can be broadly categorised into a few key types. Understanding these categories is essential for selecting the right tool for your DIY projects.
Magnetic Stud Finders: Simplicity and Reliability
Magnetic stud finders are a popular choice among DIYers due to their simplicity and reliability. These tools operate by detecting the metal fasteners (nails or screws) that secure drywall to wooden studs. As you wave a magnet along the wall, it catches on these fasteners, indicating the presence of a stud.
Magnetic stud finders are typically the most affordable and simplest stud finders on the market, requiring no batteries or calibration. They are highly reliable as they don’t produce false positives—if the magnet sticks, there’s definitely metal present. Models like the CH Hanson Magnetic Stud Finder use powerful rare-earth magnets that can detect fasteners through thicker wall materials.
- Magnetic stud finders detect metal fasteners securing drywall to wooden studs.
- They are affordable, simple, and require no batteries or calibration.
- These finders are reliable with no false positives.
- Powerful rare-earth magnets can detect fasteners through thicker materials.
- The main limitation is that they locate fasteners rather than the entire stud.
While magnetic stud finders may take longer to locate a stud due to the spacing of fasteners, they remain an effective and affordable option. The StudBuddy Magnetic Stud Finder and CH Hanson Magnetic Stud Finder are examples of effective and affordable magnetic options available.
Types of Stud Finders Explained
Unlike their magnetic counterparts, electronic stud finders utilise advanced sensors to detect studs behind walls. These devices send out a signal from a sensor and then read the signal that bounces back, allowing for precise detection.
Electronic Stud Finders: Advanced Features and Precision
Electronic stud finders employ density-sensing technology to identify changes in wall material, enabling the location of stud edges and centers. Advanced models can differentiate between wood studs, metal pipes, and live electrical wiring, enhancing safety for DIY projects.
Some key features of electronic stud finders include visual displays and audio alerts that facilitate precise stud location. They also offer adjustable scanning depth settings to accommodate various wall thicknesses and construction types.
| Feature | Benefit |
|---|---|
| Density-sensing technology | Accurate stud detection |
| Multi-material detection | Enhanced safety |
| Adjustable scanning depth | Versatility for different wall types |
While electronic stud finders are generally more expensive than their magnetic counterparts, they provide greater accuracy and additional features that justify the investment for serious DIYers.
Key Features to Consider When Buying a Stud Finder
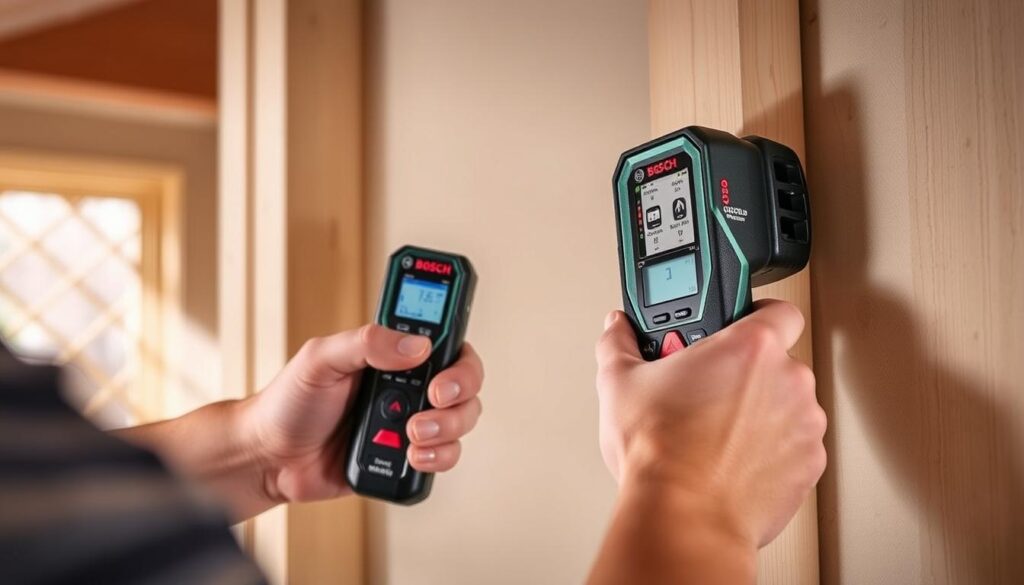
Understanding the detection capabilities of a stud finder is essential for ensuring it aligns with your project requirements. The Bosch GMS120 Digital Multi-Scanner is a prime example of a device that offers advanced detection features.
Detection Capabilities (Wood, Metal, and Live Wires)
Modern stud finders offer varying detection capabilities, with basic models identifying only wooden studs and advanced ones detecting multiple materials, including metal and live wires.
- The ability to detect live electrical wires is a crucial safety feature that prevents accidental drilling into potentially dangerous areas.
- Metal detection capabilities help identify both metal studs and hidden pipes, preventing costly damage during DIY projects.
- Some high-end models can differentiate between ferrous metals (like steel) and non-ferrous metals (like copper), providing more detailed information about what’s behind your wall.
- When selecting a stud finder, consider the types of materials in your home’s construction to ensure you choose a model with appropriate detection capabilities.
For most home uses, like hanging pictures or bathroom mirrors, a magnetic stud finder gets the job done effectively. However, if you’re hanging heavier items or anything that bears weight, like a shelf or a bike rack, electronic stud finders ensure you’re more precisely on target.
The detection capabilities of a stud finder are vital for the success of your DIY projects. By understanding what your stud finder can detect, you can avoid potential hazards and ensure a more scanning process.
When it comes to wood detection, most stud finders are capable of identifying wooden studs. However, the depth and accuracy can vary between models.
Key Features to Consider When Buying a Stud Finder

The effectiveness of a stud finder largely depends on its scanning depth and compatibility with various wall types. When you’re looking to buy a stud finder, especially a model like the Zircon MultiScanner A200, understanding these features is crucial.
Scanning Depth and Wall Compatibility
When it comes to scanning depth, it’s a critical consideration, especially for homes with thicker walls or multiple layers of wall material. Standard stud finders typically scan to a depth of 0.75-1.5 inches, which is sufficient for most modern drywall construction.
For older homes with plaster walls or properties with multiple layers of renovation, look for models with deep scanning capabilities of 2-3 inches. The Zircon MultiScanner A200, for instance, offers advanced scanning features that can handle various wall types.
- Scanning depth is a critical consideration, especially for homes with thicker walls or multiple layers of wall material.
- Standard stud finders typically scan to a depth of 0.75-1.5 inches, which is sufficient for most modern drywall construction.
- For older homes with plaster walls or properties with multiple layers of renovation, look for models with deep scanning capabilities of 2-3 inches.
- Wall compatibility varies between models—some stud finders work well on standard drywall but struggle with textured surfaces or plaster walls.
- Consider the various wall types in your home before purchasing a stud finder to ensure it will work effectively throughout your property.
While all stud finders are relatively small, some are more compact than others. The more compact, the easier they are to transport. Larger stud finders like the Franklin Sensors ProSensor MAX Stud Finder tend to provide more functionality, so if you plan to use your stud finder around your house—and storage and portability are less important—go with a larger model that fits all your needs.
Key Features to Consider When Buying a Stud Finder
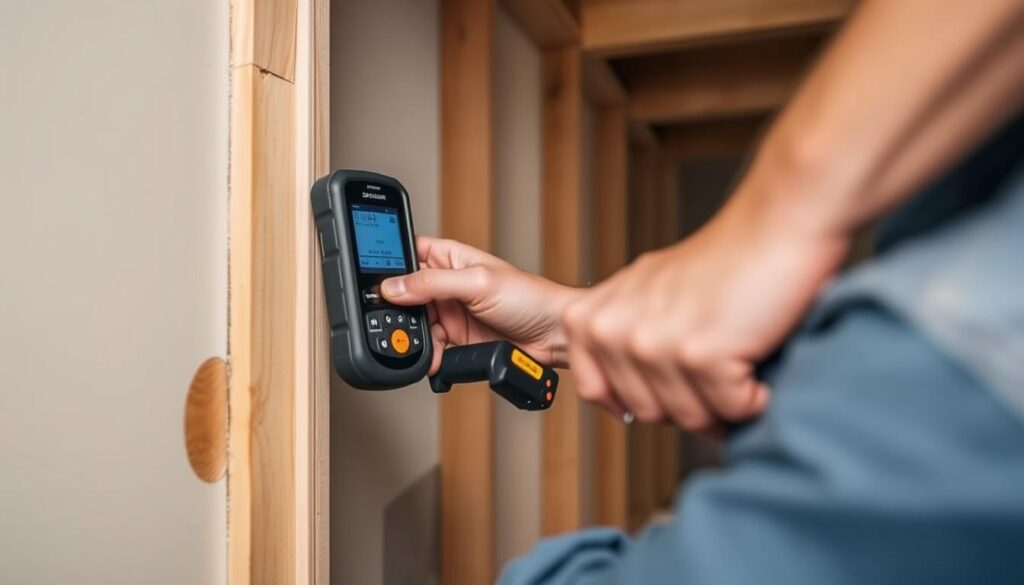
Ergonomics and Ease of Use
Ergonomics play a vital role in the effectiveness of a stud finder, especially when you’re working in difficult-to-reach areas or at heights. The design of your stud finder can significantly impact your ability to accurately locate studs.
When using a stud finder in awkward positions, such as above your head or high on a ladder, an ergonomic design is particularly important. You should look for models with comfortable grips, intuitive button placement, and balanced weight distribution for extended use.
- Clear visual displays with bright LEDs or LCD screens make it easier to read results in poorly lit areas or awkward positions.
- Some models feature marking systems that allow you to mark stud locations without removing the tool from the wall, improving accuracy.
- Consider whether the finder can be operated with one hand, which is particularly useful when working on ladders or in confined spaces, enhancing easy use.
By choosing a stud finder that is designed with ergonomics in mind, you can ensure more accurate and efficient use. This is particularly important for DIYers who frequently work on projects that require locating studs behind walls or ceilings.
Top-Rated Stud Finders for DIYers
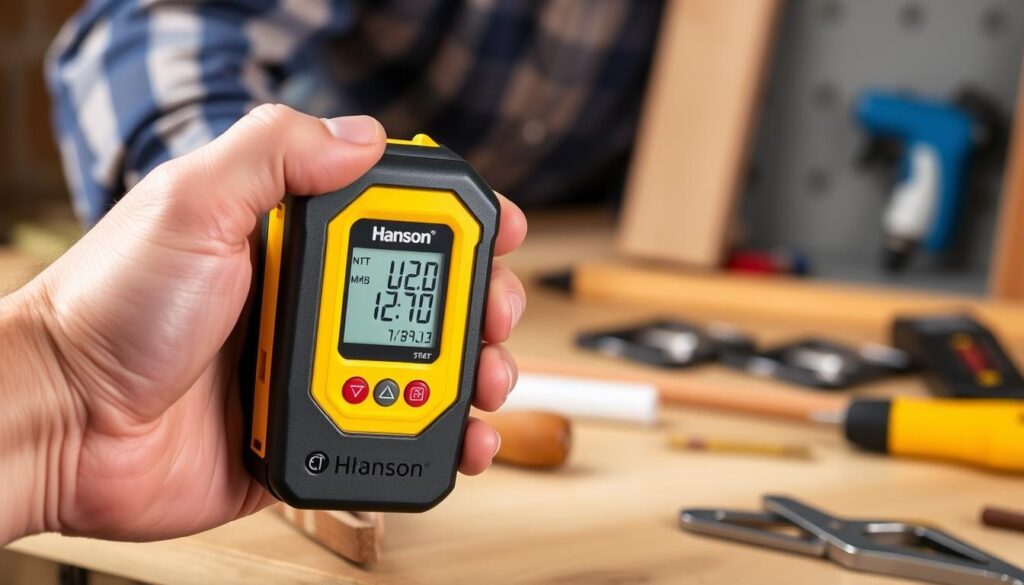
For DIY enthusiasts, a stud finder is an indispensable tool that ensures accuracy and safety in various projects. Our comprehensive review and testing have identified top-rated stud finders that cater to different needs and preferences.
How We Selected and Tested These Products
Our selection process involved comprehensive research of the most popular and highly-rated stud finders currently available on the market. We evaluated each stud finder across multiple wall types, including standard drywall, textured surfaces, and plaster walls to test versatility.
Testing included accuracy measurements, comparing the stud finder’s readings with the actual location of studs verified through alternative methods. We assessed ease of use by having both experienced DIYers and beginners test each model to determine intuitiveness and learning curve.
Additional testing focused on battery life, durability, and the effectiveness of special features like deep scanning and metal detection. The results were used to score each product across predetermined metrics covering different aspects of the tools, including Value, Accuracy, Ease of Use, and Features.
- Comprehensive research of highly-rated stud finders
- Evaluation across multiple wall types for versatility
- Accuracy measurements against actual stud locations
- Assessment of ease of use by diverse testers
- Testing of battery life, durability, and special features
By following this rigorous testing and evaluation process, we have identified the top-rated stud finders that are reliable, accurate, and easy to use. Whether you’re working with drywall, plaster, or other types of walls, our recommendations will help you find the right tool for your DIY projects.
Best Overall Stud Finder: Bosch GMS120 Digital Multi-Scanner

With its advanced features and precision, the Bosch GMS120 Digital Multi-Scanner is considered a gold standard in stud finders. This model is a powerhouse of a wall scanner, offering three distinct modes: wood, metal, and electrical power, with high accuracy across all three.
Overview
The Bosch GMS120 Digital Multi-Scanner stands out as the most comprehensive and accurate stud finder in our testing. It offers exceptional versatility with its ability to detect wooden studs, metal objects, and live electrical wires with impressive precision.
- The multi-mode functionality allows users to switch between different scanning types depending on the specific requirements of their project.
- Its sophisticated sensor technology provides reliable readings even through thicker wall materials, making it suitable for various home types.
- The Bosch GMS120 represents the gold standard for DIYers who require professional-grade accuracy and features in their stud finding tool.
This model is ideal for those seeking a reliable detection tool for their home improvement projects, ensuring that you can confidently locate studs behind walls.
Best Overall Stud Finder: Bosch GMS120 Digital Multi-Scanner
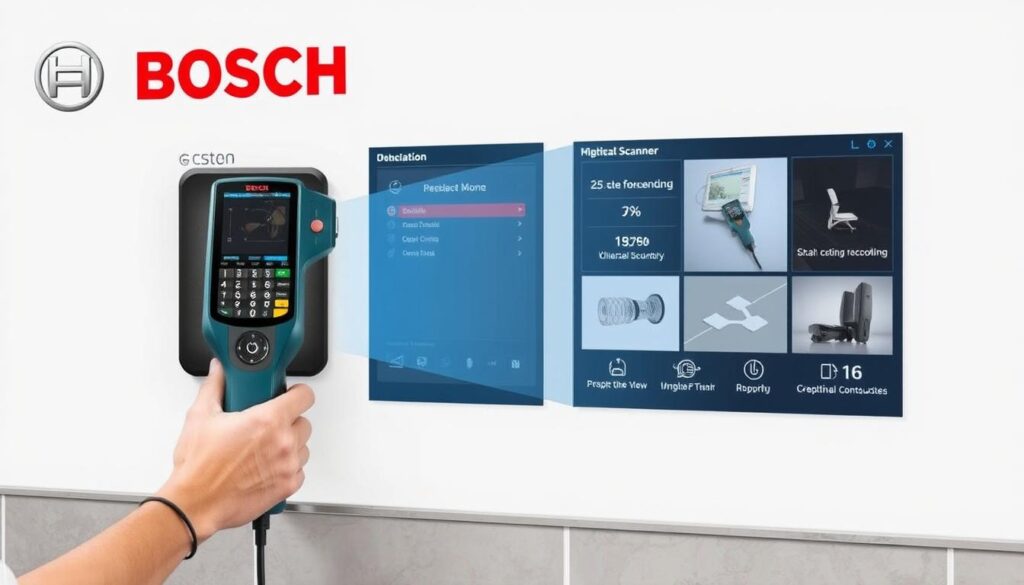
The Bosch GMS120 Digital Multi-Scanner is a top-rated stud finder that offers exceptional accuracy and reliability. It is designed to detect various materials behind walls, making it a versatile tool for DIYers and professionals.
Pros
The Bosch GMS120 Digital Multi-Scanner boasts several advantages, including its ability to detect studs with high accuracy. Its advanced detection capabilities allow it to identify not just wooden studs but also metal objects and live electrical wires.
- Exceptional accuracy with the ability to find stud edges within 1/16 of an inch, ensuring precise mounting locations.
- Comprehensive detection capabilities that clearly differentiate between wooden studs, metal objects, and live electrical wires.
- User-friendly illuminated display with color-coded indicators that make interpretation of results straightforward.
- Convenient marking system with a hollow ring that allows for precise marking of stud centers without moving the device.
- Durable construction with an IP54 rating that protects against dust and water splashes, making it suitable for construction environments.
While discussing the Bosch GMS120, it’s worth noting that other stud finders, like the Black + Decker BullsEye Auto Leveling Laser, offer unique features such as laser leveling, which can be beneficial for certain projects. The light-up ring on some models changes colour to indicate the presence of a stud, making it easier to use.
Best Overall Stud Finder: Bosch GMS120 Digital Multi-Scanner
Cons
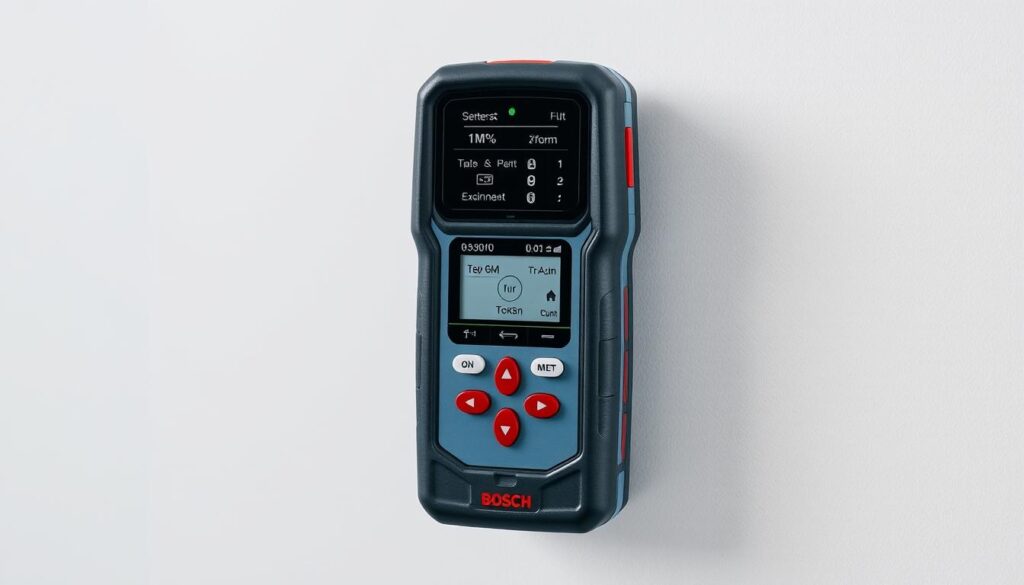
While the Bosch GMS120 Digital Multi-Scanner excels in many areas, it does have some drawbacks that may impact your user experience. On the downside, we wish the stud finder was a little smaller; as it is, it’s rather bulky and takes up most of the pocket on a tool belt.
The scanning process also requires three passes to detect an object’s location accurately, which can be time-consuming compared to single-pass models. Without the multiple passes, it can be off enough to miss the stud completely.
- The bulky design makes it less portable than some competing models and difficult to store in standard tool belts.
- Requires three passes for accurate scanning, which can be time-consuming compared to single-pass models.
- Higher price point may be prohibitive for casual DIYers who only need a stud finder occasionally.
- Steeper learning curve than simpler models, requiring users to familiarise themselves with the various modes and settings, including calibration procedures.
- Battery consumption is higher than simpler stud finders due to the advanced electronics and display features.
Best Overall Stud Finder: Bosch GMS120 Digital Multi-Scanner

The Bosch GMS120 Digital Multi-Scanner is a versatile tool that offers a range of features for DIYers. This device is designed to simplify the process of finding studs, making it an essential tool for various home improvement projects.
Key Features
The Bosch GMS120 Digital Multi-Scanner boasts several key features that make it stand out as a top-rated stud finder. Some of its notable features include:
- Three distinct scanning modes for wood, metal, and live electrical wires, providing comprehensive detection capabilities.
- Illuminated ring indicator that changes colour based on proximity to detected objects (green, yellow, red), enhancing visual feedback.
- Maximum scanning depth of 1.5 inches for wooden studs and 2.75 inches for metal objects, suitable for most residential wall types.
- Centre-finding technology that automatically identifies the middle of studs for more accurate mounting.
- Backlit digital display that remains visible in low-light conditions, making it ideal for working in poorly lit areas.
These features collectively make the Bosch GMS120 Digital Multi-Scanner a reliable and efficient finder that offers a range of benefits for DIYers. Its advanced features enable users to work with confidence, knowing that they can accurately locate wood and metal studs.
Best Budget Stud Finder: Zircon MultiScanner A200
In the realm of budget stud finders, the Zircon MultiScanner A200 emerges as a leading contender. This stud finder is designed to provide accuracy and reliability without straining your wallet.
An Affordable Solution for DIYers
The Zircon MultiScanner A200 is an excellent tool that is easy to use and accurate. It’s a versatile model that offers multiple scanning modes to detect wood, metal, and live wires behind your wall. Its deep scan mode is particularly useful for penetrating thick walls, making it a valuable asset for various DIY projects.
Our tests showed that the A200’s center marking was spot on, ensuring you can confidently locate the center of a stud. While edge sensing was slightly off, it erred on the inside, meaning you’ll still be able to hit your stud.
- The Zircon MultiScanner A200 offers exceptional value for DIYers seeking a reliable stud finder without breaking the bank.
- This model provides a balance of advanced features and affordability, making it accessible to casual home improvers.
- Despite its budget-friendly price point, the A200 delivers impressive accuracy in locating studs through standard drywall.
For DIYers who need occasional stud finding capabilities without investing in a premium model, the A200 represents an ideal compromise. Its ease of use, combined with its robust feature set, makes it a compelling choice for anyone looking for a reliable finder.
Best Budget Stud Finder: Zircon MultiScanner A200
The Zircon MultiScanner A200 offers a compelling blend of features at an affordable price, making it an attractive option for DIYers and homeowners alike. Its ability to detect studs behind various wall types is enhanced by several key features.
Pros
The Zircon MultiScanner A200 boasts several advantages that make it a standout in its category. Some of its key benefits include:
- Affordably priced while still offering multiple detection modes for wood, metal, and live electrical wires, making it a versatile tool for various tasks.
- Illuminated marking arrow and deep notch make it easy to use and mark stud locations accurately, even in poor lighting conditions.
- A user-friendly interface that requires minimal learning curve, making it accessible for DIY beginners.
- Deep scan mode allows for detection through thicker wall materials, extending its versatility beyond standard drywall.
- Ergonomic design fits comfortably in hand, allowing for smooth wall scanning with minimal effort.
Thanks to its large illuminated screen and marking notch, using the Zircon MultiScanner A200 in the field is easy even in dark or awkward positions. The device’s stud detection capabilities are reliable, and its overall design makes it a valuable tool for any DIY project.
Best Budget Stud Finder: Zircon MultiScanner A200
While the Zircon MultiScanner A200 is an excellent budget option, it’s not without its drawbacks. As with any device, there are certain limitations and potential issues to be aware of when using this stud finder.
Cons
The Zircon MultiScanner A200 has several cons that users should consider. For instance, its metal detection capabilities are less precise compared to premium models, sometimes registering false positives from several inches away. This can be mitigated by recalibrating the device over metal objects to decrease sensitivity and more accurately mark metal objects, which requires an extra step in the process.
Additionally, the ergonomic design of the Zircon MultiScanner A200 favours right-handed users, making it less comfortable for left-handed DIYers to hold and manoeuvre. You should also be aware that edge detection is slightly less accurate than centre detection, although it tends to err on the inside of studs. Furthermore, the battery life is shorter than some competing models, particularly when using the deep scan mode frequently, which may require more frequent calibration and battery replacements.
- Less precise metal detection compared to premium models, sometimes registering false positives from several inches away.
- Requires recalibration for accurate metal detection, adding an extra step to the process.
- Ergonomic design favours right-handed users, making it less comfortable for left-handed DIYers.
- Edge detection is slightly less accurate than centre detection, though it errs on the inside of studs.
- Battery life is shorter than some competing models, particularly when using the deep scan mode frequently.
Best Budget Stud Finder: Zircon MultiScanner A200
For DIY enthusiasts on a budget, the Zircon A200 stud finder is a reliable option that doesn’t compromise on features. Despite its flaws, the Zircon A200 is well-suited for most home projects while keeping costs (and learning curves) down.
Key Features
The Zircon MultiScanner A200 offers several key features that make it a valuable tool for home improvement projects. Some of its notable features include:
- Multiple scanning modes, including standard stud detection, deep scan, metal detection, and AC wire detection.
- An illuminated arrow that projects directly onto the wall surface for precise marking of stud locations.
- A deep scanning capability of up to 1.5 inches, suitable for most residential wall constructions.
- A large, easy-to-read LCD screen with clear indicators for different materials detected.
- An automatic calibration system that adjusts to different wall densities for more accurate readings.
These features combined make the Zircon A200 a versatile and reliable stud finder for various home projects.
Most Intuitive Stud Finder: Franklin Sensors ProSensor T13
In our tests, the Franklin Sensors ProSensor T13 proved to be exceptionally user-friendly, making it an ideal choice for DIY beginners and experienced users alike. This stud finder stands out for its innovative design and straightforward operation.
Overview of the ProSensor T13
The Franklin Sensors ProSensor T13 is designed with the user in mind, offering a hassle-free experience when locating studs behind walls. Unlike traditional stud finders that require multiple passes and can be confusing to use, the ProSensor T13 provides instant feedback with its unique display system.
This stud finder uses a bar of lights that shine when directly over a stud or object, making it easy to identify the stud’s edges and center. The lights always err on the inside of a stud, reducing the chance of near misses. This feature is particularly useful when dealing with non-standard sized studs behind sheetrock.
- The ProSensor T13 boasts an exceptionally intuitive design that requires virtually no learning curve, making it perfect for DIY beginners.
- Its unique display system shows the entire width of studs, rather than just edges or centers, providing a clear visual indication of the stud’s location.
- The device’s straightforward operation and instant feedback make it a reliable tool for any home improvement project.
| Feature | Description | Benefit |
|---|---|---|
| Unique Display System | Bar of lights indicating stud location | Easy to use, accurate results |
| Instant Feedback | No need for multiple passes | Saves time and effort |
| Stud Edge Detection | Lights err on the inside of studs | Reduces near misses, increases accuracy |
Most Intuitive Stud Finder: Franklin Sensors ProSensor T13
The Franklin Sensors ProSensor T13 stands out as a premier stud finder due to its intuitive design and advanced features. This device has become a favourite among DIYers and professionals alike for its ability to simplify the process of locating studs behind walls.
Pros
The ProSensor T13 boasts several key advantages that make it an excellent choice for anyone looking to locate studs accurately. Some of its notable benefits include:
- Unique Display: Shows the entire width of studs in a single pass, eliminating guesswork about stud boundaries.
- Intuitive Operation: Requires no calibration or special techniques to achieve accurate results, making it user-friendly.
- Multi-Functionality: Includes a built-in level, ruler, and straightedge, providing additional functionality that enhances the tool’s versatility.
- Instant Feedback: Multiple sensors working simultaneously provide instant feedback without requiring multiple passes over the wall.
- Reliable Accuracy: Consistently identifies studs through standard drywall with minimal false positives, ensuring reliable performance.
Overall, the Franklin Sensors ProSensor T13 is a highly effective stud finder that offers a range of benefits, making it an indispensable tool for various home improvement projects.
Most Intuitive Stud Finder: Franklin Sensors ProSensor T13
While the Franklin Sensors ProSensor T13 excels in many areas, it also has some notable drawbacks. You should be aware of these limitations to ensure it meets your needs.
Drawbacks of the ProSensor T13
The ProSensor T13’s design requires you to pinch the device while holding the power button, which can be uncomfortable during extended use. Additionally, its horizontal orientation can be awkward when scanning for ceiling joists or in tight spaces.
Some users may find the following cons significant:
- The need to continuously hold down the power button can cause hand fatigue during lengthy scanning sessions.
- The device lacks specific modes for metal or live wire detection, although it will still detect these materials.
- Its slightly larger footprint compared to some competing models makes it less pocket-friendly.
It’s essential to weigh these disadvantages against the product’s benefits to determine if it’s the right stud finder for your projects.
Most Intuitive Stud Finder: Franklin Sensors ProSensor T13
Ease of use and accuracy make the Franklin Sensors ProSensor T13 an excellent stud finder. This device is designed to simplify your DIY projects by providing precise location of studs behind walls.
Key Features
The Franklin Sensors ProSensor T13 boasts several key features that enhance its functionality and user experience. Some of the notable features include:
- An array of 13 sensors that simultaneously scan the wall to display the entire width of studs, providing a comprehensive view of the area.
- An LED light bar that illuminates directly over detected studs, giving a clear visual indication of stud location and width.
- A built-in bubble level to ensure accurate horizontal alignment during scanning and marking, making it easier to achieve professional results.
- An integrated ruler and straightedge for precise measurement and marking of stud locations, streamlining your workflow.
- A scanning depth of up to 1.7 inches, suitable for detecting studs through standard drywall and other common wall materials, making it versatile for various applications.
The combination of these features makes the Franklin Sensors ProSensor T13 a powerful tool for any DIY project. Whether you’re hanging a picture or installing shelves, this stud finder provides the accuracy and ease of use you need.
By utilizing the Franklin Sensors ProSensor T13, you can ensure that your projects are completed efficiently and effectively. Its advanced features and intuitive design make it an indispensable asset for any DIY enthusiast.
Best Magnetic Stud Finder: CH Hanson Magnetic Stud Finder
In an era of advanced technology, the CH Hanson Magnetic Stud Finder stands out with its straightforward magnetic design. Despite the various technological advancements in density scanning used by many wall scanners, there’s nothing more reliable than a magnet finding a screw holding the sheetrock to the stud.
The CH Hanson Magnetic Stud Finder represents a return to simplicity with its powerful magnetic design that locates metal fasteners in wall studs. This tool operates on a fundamental principle: powerful magnets attract to the metal screws or nails that secure drywall to studs.
Overview
Unlike electronic models, the CH Hanson requires no batteries or calibration, making it always ready for use without maintenance. The magnetic approach eliminates false positives that can occur with electronic stud finders, providing reliable results every time.
- The CH Hanson Magnetic Stud Finder is a simple, non-electronic solution for locating studs.
- It uses powerful magnets to detect metal fasteners behind drywall.
- No batteries or calibration are required, making it maintenance-free.
- The magnetic design reduces the risk of false positives.
For DIYers who value simplicity, reliability, and affordability, the CH Hanson offers an excellent alternative to more complex electronic models. As highlighted by a review, “Magnets don’t get false readings, nor do they have a hard time differentiating between different materials; either it is steel or it isn’t.”
| Feature | Benefit |
|---|---|
| Powerful Magnetic Design | Accurately locates metal fasteners in wall studs |
| No Batteries Required | Always ready for use without maintenance |
| Magnetic Approach | Eliminates false positives common with electronic stud finders |
Best Magnetic Stud Finder: CH Hanson Magnetic Stud Finder
The CH Hanson Magnetic Stud Finder stands out for its reliability and effectiveness in detecting studs behind various wall materials. You will appreciate its simplicity and the robust features that make it a valuable tool for any DIY project or professional task.
Advantages
The CH Hanson Magnetic Stud Finder offers several key benefits that make it an excellent choice for your stud-finding needs.
- Exceptional Sensitivity: Powerful rare-earth magnets provide exceptional sensitivity for detecting fasteners through various wall materials, including sheetrock and plaster and lath walls commonly found in older buildings.
- No Batteries Required: The absence of batteries eliminates concerns about power failure during your projects, ensuring uninterrupted work.
- Accurate Alignment: A built-in bubble level helps ensure accurate vertical alignment when marking stud locations, making your work more precise.
- Durable Construction: The device is built to last with no electronic components to fail or damage when dropped, providing you with a reliable tool.
- Hands-Free Operation: Strong magnets remain attached to the wall when positioned over a fastener, freeing up both hands for marking and other tasks.
To further illustrate the benefits, consider the following comparison table that highlights key features of the CH Hanson Magnetic Stud Finder against typical requirements for a magnetic stud finder.
| Feature | CH Hanson Magnetic Stud Finder | Typical Magnetic Stud Finder |
|---|---|---|
| Magnets Type | Rare-Earth Magnets | Varies |
| Battery Requirement | No | Often |
| Built-in Level | Yes | No |
| Durability | High | Varies |
Best Magnetic Stud Finder: CH Hanson Magnetic Stud Finder
While the CH Hanson Magnetic Stud Finder excels in reliability, it has some significant drawbacks that users should consider.
Cons
The primary limitation of the CH Hanson Magnetic Stud Finder is its inability to detect the actual studs, instead relying on finding the screws or nails holding the drywall to the studs. This can make it challenging to determine the centre of the stud.
- Only detects metal fasteners rather than the actual studs, requiring additional work to determine stud centres.
- Can be time-consuming to use as fasteners are typically spaced 12-16 inches apart along studs.
- Limited functionality compared to electronic models with no ability to detect live wires or non-ferrous metals.
- May struggle with walls where fasteners are deeply countersunk or covered with multiple layers of paint.
- Less effective on walls with metal mesh or backing that can confuse the magnetic readings.
| Limitation | Description |
|---|---|
| Detection Capability | Only detects metal fasteners, not actual studs |
| Time Consumption | Can be time-consuming due to fastener spacing |
| Functionality | Limited compared to electronic stud finders |
When using the CH Hanson Magnetic Stud Finder, you need to be aware of these limitations to effectively locate studs behind your wall.
Best Magnetic Stud Finder: CH Hanson Magnetic Stud Finder
The C.H. Hanson Magnetic Stud Finder stands out for its ease of use and accuracy. This tool is designed to simplify your DIY projects by providing a reliable way to locate studs behind walls.
Key Features
The C.H. Hanson Magnetic Stud Finder boasts several features that make it an indispensable tool for DIY enthusiasts. Some of its key features include:
- Powerful rare-earth magnets capable of detecting fasteners through up to 1 inch of wall material, ensuring that you can locate studs with ease.
- A rotating level vial that can be positioned for both horizontal and vertical levelling applications, providing flexibility and accuracy.
- A pointed arrow design that helps mark the exact location of detected fasteners, making it easier to hang items or perform repairs.
- A compact size that easily fits in a pocket or small tool pouch, allowing for convenient carrying on the job site.
- Durable construction that withstands job site conditions without damage to functionality, ensuring that your stud finder remains reliable over time.
These features combined make the C.H. Hanson Magnetic Stud Finder a valuable addition to any DIY toolkit. Its ease of use, coupled with its robust functionality, makes it an ideal choice for those looking to accurately locate studs without the hassle of complex electronics.
Best for Drywall: The StudBuddy Magnetic Stud Finder
Locating studs behind drywall just got easier with the StudBuddy, a magnetic stud finder designed for the task. This tool is specifically optimised for use with standard drywall construction, making it an ideal choice for homeowners and DIY enthusiasts.
Overview
The StudBuddy Magnetic Stud Finder excels at locating fasteners in drywall. Its simple yet effective design uses powerful neodymium magnets to detect the metal screws or nails that secure drywall to studs. By sliding the StudBuddy in an “S” pattern on the wall, you can effortlessly locate nails, screws, and metal studs.
- The StudBuddy is designed for standard drywall construction, making it perfect for locating fasteners.
- Its elongated design allows for efficient scanning in an “S” pattern to quickly locate fasteners along stud lines.
- This magnetic stud finder represents the most affordable option in our lineup while still providing reliable performance on drywall surfaces.
- For homeowners who primarily have drywall construction and need an occasional stud finder, the StudBuddy offers excellent value.
The StudBuddy’s effectiveness lies in its ability to snap to ferrous fasteners or studs when within about three-quarters of an inch of them, thanks to its two strong neodymium magnets. This makes it a reliable tool for anyone working with drywall.
Best for Drywall: The StudBuddy Magnetic Stud Finder
The StudBuddy Magnetic Stud Finder stands out for its exceptional performance on drywall. Its magnetic detection capabilities make it an ideal tool for DIYers working on projects that involve locating studs behind drywall.
Pros
The StudBuddy Magnetic Stud Finder offers several advantages that make it a top choice for drywall projects. Some of its key benefits include:
- An exceptionally lightweight design that makes it easy to manoeuvre across wall surfaces without fatigue, allowing you to work for extended periods.
- A narrow profile that enables precise location of studs when oriented vertically along the wall, providing a clearer picture of the stud location.
- Particular effectiveness on metal studs, where it provides immediate and definitive detection, requiring fewer confirmation “hits”.
- Simple operation that requires no learning curve, making it accessible to DIY beginners who are new to using magnetic stud finders.
- A compact size that fits easily in a pocket or small drawer for convenient storage between uses, making it a practical tool for your drywall projects.
Overall, the StudBuddy Magnetic Stud Finder is a reliable and efficient tool for finding studs in drywall, making it an excellent addition to your toolkit.
Best for Drywall: The StudBuddy Magnetic Stud Finder
While the StudBuddy Magnetic Stud Finder excels in many areas, it does have some drawbacks that users should be aware of.
Cons
The StudBuddy’s limitations become apparent when dealing with complex wall structures or when precision is paramount.
- Limited to detecting only ferrous metals, it cannot differentiate between fasteners and other metal objects in walls.
- Insufficient magnetic stud detection strength to work effectively on plaster walls or walls with multiple layers.
- No additional features like levels or marking guides that come with some other magnetic stud finder models.
- Requires multiple confirmations along a vertical line to verify stud location rather than showing the entire stud.
- Can be confused by other metal elements in walls such as ductwork or electrical boxes.
These limitations highlight the importance of understanding the tool’s capabilities and the wall’s composition before relying on the StudBuddy for critical tasks.
| Limitation | Description | Impact |
|---|---|---|
| Detection Limitation | Limited to ferrous metals | Cannot differentiate between fasteners and other metal objects |
| Magnetic Strength | Insufficient for plaster or multi-layer walls | Reduced effectiveness in complex wall structures |
| Additional Features | No levels or marking guides | Limited functionality compared to other models |
| Stud Detection | Requires multiple confirmations | Time-consuming and potentially inaccurate |
| Interference | Confused by other metal elements | Potential for false readings |
Best for Drywall: The StudBuddy Magnetic Stud Finder
Drywall projects just got easier with the StudBuddy Magnetic Stud Finder, a handy tool to have around. If you just want a basic, no-frills stud finder that you can carry around in your pocket or toss in a junk drawer until you need it again, you can’t go wrong with the StudBuddy.
Key Features
The StudBuddy Magnetic Stud Finder boasts several key features that make it an ideal choice for drywall projects.
- Dual neodymium magnets that provide strong attraction to metal fasteners through standard drywall.
- An elongated design that facilitates efficient scanning in vertical or horizontal patterns.
- A lightweight construction at just 1.16 ounces, making it the most portable option in our lineup.
- A simple one-piece design with no moving parts or electronics to malfunction.
- Durable construction that withstands being carried in toolboxes or pockets without damage.
The dual neodymium magnets are particularly noteworthy as they ensure a strong attraction to metal fasteners, making it easier to locate studs behind drywall. The elongated design of the StudBuddy allows for efficient scanning, whether you’re moving it vertically or horizontally across the wall.
Weighing in at just 1.16 ounces, the StudBuddy is incredibly lightweight, making it easy to carry around or store in a pocket or toolbox. Its simple design not only contributes to its durability but also eliminates the risk of mechanical failure, ensuring that it remains functional whenever you need it.
The StudBuddy Magnetic Stud Finder is designed with the user in mind, offering several key benefits:
- Dual Neodymium Magnets: Providing strong attraction to metal fasteners through standard drywall.
- Efficient Scanning: Elongated design facilitates scanning in vertical or horizontal patterns.
- Portability: Lightweight construction at just 1.16 ounces.
- Simple Design: No moving parts or electronics to malfunction.
- Durability: Withstands being carried in toolboxes or pockets without damage.
| Feature | StudBuddy | Competitor A | Competitor B |
|---|---|---|---|
| Weight | 1.16 oz | 2.5 oz | 3.0 oz |
| Magnet Type | Dual Neodymium | Single Ferrite | Single Neodymium |
| Design | Elongated | Compact | Standard |
Best with Laser Level: Black + Decker BullsEye Auto Leveling Laser
Combining the functionality of a stud finder and a laser level, the Black + Decker BullsEye is a valuable addition to any DIY toolkit. This versatile tool is designed to simplify various home improvement projects.
Overview
The Black+Decker Bullseye is a simple yet effective tool that boasts several great features. Its name is derived from the large circle on top, which has a hole just big enough for a pencil tip to mark the wall accurately. Additionally, it includes a live wire detection feature indicated by a small red light.
Here are some key benefits of using the Black + Decker BullsEye:
- The Black + Decker BullsEye combines stud finding capabilities with an integrated laser level for enhanced project versatility.
- This dual-function tool helps DIYers not only locate studs but also ensure that mounted items are perfectly level.
- The integrated laser level projects a bright line across the wall, making it ideal for hanging multiple items in alignment.
- Its bullseye marking system ensures precise marking of stud locations without having to move the tool away from the detected spot.
- For DIYers who frequently hang multiple items that need to be level with each other, this combination tool offers excellent value.
By integrating stud finding and laser leveling capabilities, the Black + Decker BullsEye provides a convenient solution for various DIY tasks, enhancing accuracy and efficiency.
Best with Laser Level: Black + Decker BullsEye Auto Leveling Laser
The Black + Decker BullsEye Auto Leveling Laser stands out for its innovative features that make it an indispensable tool for DIYers. This device is not just a stud finder; it’s a comprehensive solution that includes a laser level, making it perfect for hanging multiple items with precision.
Pros
The Black + Decker BullsEye Auto Leveling Laser offers several advantages that make it a top choice among DIYers. One of its standout features is the integrated laser level, which eliminates the need for a separate levelling tool when hanging multiple items. This feature is particularly useful when working on projects that require precision, such as hanging picture frames across a room.
The device also features a bullseye marking spot that ensures perfectly centred marks on detected studs without guesswork. Additionally, the laser beam is visible even on textured wall surfaces, a feature not commonly found in standalone laser levels.
- Integrated laser level eliminates the need for a separate levelling tool when hanging multiple items.
- Bullseye marking spot ensures perfectly centred marks on detected studs.
- Laser beam is visible even on textured wall surfaces.
- Live wire detection feature adds a safety element.
- Auto-levelling functionality ensures the laser line is perfectly horizontal.
These features make the Black + Decker BullsEye Auto Leveling Laser an excellent choice for anyone looking for a reliable and accurate stud finder with a built-in laser level.
Best with Laser Level: Black + Decker BullsEye Auto Leveling Laser
While the Black+Decker BullsEye Auto Leveling Laser offers a range of features, it does come with some drawbacks. One of the main concerns is its bulky design, which can make it more cumbersome to use in tight spaces compared to more compact models.
Drawbacks to Consider
The Black+Decker BullsEye Auto Leveling Laser has several cons that users should be aware of when using it as a stud finder. These include:
- Bulkier design makes it more cumbersome to use in tight spaces compared to more compact models.
- Less sensitive stud detection requires slower scanning movements across the wall for accurate readings.
- Higher power consumption due to the laser feature, requiring more frequent battery replacements.
- Stud detection depth is limited to approximately 0.8 inches, less than many dedicated stud finders.
- Laser level may be difficult to see in brightly lit rooms or outdoor conditions.
These limitations are crucial to consider when deciding if the Black+Decker BullsEye Auto Leveling Laser is the right tool for your needs.
Best with Laser Level: Black + Decker BullsEye Auto Leveling Laser
The Black + Decker BullsEye Auto Leveling Laser is a versatile tool that combines the functionality of a stud finder and a laser level, making it an indispensable asset for any DIY project.
Key Features
The Black + Decker BullsEye Auto Leveling Laser boasts several key features that enhance its usability and effectiveness. Some of these features include:
- An auto-levelling laser that projects a perfectly horizontal line across the wall for alignment purposes.
- A bullseye marking system with a precisely sized hole for pencil marking of stud centres.
- Live wire detection capability that alerts users to the presence of electrical wiring, ensuring safety during use.
- Dual functionality as both a stud finder and laser level in a single tool, providing convenience and value.
- An ergonomic grip design that facilitates comfortable handling during extended use.
These features make the Black + Decker BullsEye Auto Leveling Laser particularly useful for tasks such as hanging picture frames or installing shelves. Its ability to accurately detect studs behind the wall, combined with its laser leveling capability, makes it a highly versatile tool.
Best for Beginners: Craftsman StudSensor
The Craftsman StudSensor stands out as an excellent choice for beginners due to its ease of use and reliable performance. This tool is designed to simplify the process of finding studs, making it an ideal addition to any beginner’s toolkit.
An Overview of its Capabilities
The Craftsman StudSensor is tailored specifically for those new to DIY projects, offering a straightforward operation that eliminates confusion. Its entry-level design provides reliable stud detection capabilities at an affordable price point.
- The Craftsman StudSensor is designed with beginners in mind, featuring straightforward operation without complicated features.
- This model provides reliable stud detection capabilities, making it perfect for basic home improvement tasks.
- The simplified interface ensures clear indicators that are easy to interpret, even for first-time users.
- It represents an excellent starting point for homeowners just beginning to build their tool collection.
- Despite its beginner-friendly design, the StudSensor delivers sufficient accuracy for most DIY projects.
When choosing a stud finder, it’s essential to consider the ease of use, especially for beginners. The Craftsman StudSensor excels in this regard, making it a top recommendation for those looking to start their DIY journey.
| Feature | Description | Benefit |
|---|---|---|
| Easy Operation | Straightforward controls without complicated features | Simplifies the stud-finding process for beginners |
| Reliable Detection | Accurate stud detection capabilities | Ensures confidence in DIY projects |
| Affordable | Priced for entry-level users | Makes it accessible for those new to DIY |
Best for Beginners: Craftsman StudSensor
The Craftsman StudSensor has gained popularity among beginners due to its ease of use and affordability. As an entry-level electronic stud finder, it offers good value for money and is simple to use with minimal calibration required.
Pros
The Craftsman StudSensor boasts several features that make it an ideal choice for DIY beginners. Some of its key advantages include:
- Extremely intuitive operation that requires minimal instruction, making it perfect for those new to DIY projects.
- Clear visual indicators that leave no ambiguity about stud detection status, ensuring you can trust the results.
- An automatic calibration system simplifies the setup process, making it easy for inexperienced users to get started.
- A compact and lightweight design that’s comfortable to hold and easy to manoeuvre, allowing for smooth scanning.
- An affordable price point that makes it accessible for those just starting their DIY journey.
With its user-friendly design and robust features, the Craftsman StudSensor is an excellent stud finder for beginners. It’s designed to make your DIY projects easier, ensuring you can hang pictures, shelves, or anything else with confidence. By providing clear and accurate results, this model helps you avoid costly mistakes and ensures a professional finish.
Best for Beginners: Craftsman StudSensor
While the Craftsman StudSensor is a great tool for beginners, it does come with some limitations. Understanding these drawbacks is crucial to making the most out of this stud finder.
Cons
The Craftsman StudSensor has several cons that users should be aware of. These include:
- Limited features compared to more advanced models, with no metal or wire detection capabilities.
- Less effective on thicker walls or walls with multiple layers of material.
- Requires calibration when moving to different wall sections for accurate readings.
- May produce occasional false positives in walls with irregular construction or materials.
- Lacks the precision of higher-end models when determining exact stud edges.
It’s essential to consider these limitations when using the Craftsman StudSensor. While it is a good starting point for beginners, understanding its limitations can help you use it more effectively. For instance, being aware of the need for calibration can improve the accuracy of your readings.
Best for Beginners: Craftsman StudSensor
The Craftsman StudSensor is designed with beginners in mind, offering a straightforward and effective stud-finding solution. This tool is perfect for those who are new to DIY projects and need a reliable stud finder to get started.
Key Features
The Craftsman StudSensor boasts several key features that make it an ideal choice for beginners. Some of its notable features include:
- Simple one-button operation that eliminates confusion for first-time users.
- LED indicator system that clearly shows when a stud has been detected.
- Automatic calibration that adjusts to different wall densities without user intervention.
- Ergonomic design that fits comfortably in hand for extended scanning sessions.
- Battery-saving auto-shutoff feature that preserves power when the tool is not in use.
With its user-friendly interface and robust features, the Craftsman StudSensor is an excellent choice for anyone looking to invest in a reliable stud finder. Its ability to automatically calibrate and detect studs makes it a valuable addition to any DIY toolkit.
Best Premium Option: Franklin Sensors ProSensor 710+
If you’re in the market for a high-end stud finder that delivers unparalleled performance, look no further than the Franklin Sensors ProSensor710+. This premium tool is designed for professionals and serious DIYers who demand the best.
Overview
The Franklin Sensors ProSensor710+ is a heavy-duty stud finder that boasts advanced multi-sensor technology, providing an extremely accurate representation of objects behind your walls. With 13 internal sensors and 35 bright LEDs spanning its nine-inch length, this model offers exceptional accuracy and ease of use.
The ProSensor710+ represents the pinnacle of stud finder innovation, offering a wide scanning area that provides comprehensive coverage, showing multiple studs simultaneously and speeding up the detection process.
Key Benefits
- Advanced multi-sensor technology for exceptional accuracy
- Wide scanning area for comprehensive coverage
- Easy to use, even for complex wall structures
- Bright LEDs for clear visualization
- Durable design for long-term reliability
| Feature | Description | Benefit |
|---|---|---|
| Multi-Sensor Technology | 13 internal sensors for accurate detection | Enhanced accuracy and reliability |
| LED Display | 35 bright LEDs for clear visualization | Easy to understand and interpret results |
| Scanning Area | Wide scanning area for comprehensive coverage | Speeds up the detection process |
The Franklin Sensors ProSensor710+ is an investment in quality, offering unmatched performance and durability. While it may be more expensive than other models, its superior usability and comprehensive LED display make it well worth the extra cost.
Best Premium Option: Franklin Sensors ProSensor 710+
Featuring a wide scanning area and multiple sensors, the Franklin Sensors ProSensor710+ is engineered to simplify the process of finding studs behind walls. This advanced stud finder is designed to provide accurate and reliable detection, making it an ideal choice for both professionals and DIY enthusiasts.
Pros
The Franklin Sensors ProSensor710+ offers several key advantages that make it a top choice among stud finders. Some of the notable benefits include:
- A wide scanning area with 13 sensors that can detect multiple studs simultaneously, significantly speeding up the scanning process.
- A precise visual representation of stud width with 35 LEDs that illuminate directly over detected objects, providing a clear indication of the stud’s location.
- Two depth detection modes that allow for scanning through different wall thicknesses, making it versatile for various applications.
- An ergonomic design with a comfortable grip that reduces hand fatigue during extended use, ensuring that you can work for longer periods without discomfort.
- Instant readings without requiring calibration or multiple passes over the same area, saving you time and effort.
The individual LEDs light up red as objects are detected directly behind them to give you precise width, and a single green LED indicates the center of the object. This model is also really easy to use, with a large power button, ergonomic handle, and two depth settings.
| Feature | Benefit |
|---|---|
| Wide scanning area with 13 sensors | Detects multiple studs simultaneously |
| 35 LEDs for precise visual representation | Accurate indication of stud width and location |
| Two depth detection modes | Versatile for different wall thicknesses |
Best Premium Option: Franklin Sensors ProSensor 710+
While the Franklin Sensors ProSensor710+ offers advanced features, it also has some significant disadvantages. You should be aware of these cons before making a purchase.
Disadvantages
The Franklin Sensors ProSensor710+ has several drawbacks, including a higher price point that may be prohibitive for casual DIYers or those on a budget. Additionally, it is unable to differentiate between types of materials detected behind the wall, such as wood, metal, or wiring.
Other notable cons include its larger size, which makes it less portable and more difficult to store than compact stud finder models. The device is also heavier, which can cause fatigue during extended ceiling work or other overhead applications.
- A higher price point may deter budget-conscious buyers.
- Lack of material differentiation can lead to confusion.
- The larger and heavier design affects portability and ease of use.
- No specific mode for detecting live electrical wires, although it will detect them as objects.
It’s worth noting that the user manual provides helpful tips on how to interpret the detections, such as understanding that wires are detectable in small, sporadic areas, and pipes can be identified by their elbows or by branching off.
Best Premium Option: Franklin Sensors ProSensor 710+
As a scaled-down version of the ProSensor MAX, the Franklin Sensors ProSensor710+ retains key features while offering a more affordable option. This stud finder is designed to provide users with a reliable and efficient way to locate studs behind walls.
Key Features
The ProSensor710+ boasts an impressive array of features that make it an ideal choice for both professionals and DIY enthusiasts. Some of its standout features include:
- An array of 13 internal sensors that simultaneously scan a wide area of the wall, providing a comprehensive view of the stud layout.
- 35 bright LEDs that offer a visual representation of stud width and location, making it easier to accurately place screws or nails.
- Dual depth settings that allow for scanning through different wall thicknesses, ensuring versatility in various applications.
- A large, ergonomic handle designed for comfortable use in various positions, reducing fatigue during extended use.
- No calibration required, enabling immediate and accurate scanning upon power-up, which saves time and enhances productivity.
The combination of these features makes the Franklin Sensors ProSensor710+ a powerful tool for anyone needing to locate studs quickly and accurately. Whether you’re hanging a picture or performing more complex renovations, this stud finder is designed to meet your needs.
| Feature | Description | Benefit |
|---|---|---|
| 13 Internal Sensors | Simultaneously scan a wide area | Comprehensive stud layout view |
| 35 Bright LEDs | Visual representation of stud width and location | Accurate placement of screws or nails |
| Dual Depth Settings | Scanning through different wall thicknesses | Versatility in various applications |
In conclusion, the Franklin Sensors ProSensor710+ offers a compelling blend of advanced features and user-friendly design, making it an excellent choice for those seeking a premium stud finder.
Comparing Stud Finder Accuracy
When it comes to stud finders, accuracy is paramount, and understanding the differences between edge detection and center detection is crucial. Every inaccurate hole you drill into a wall is a hole that has to be covered up and repainted, making accurate sensing a vital feature in a decent stud finder.
Edge Detection vs. Center Detection
To evaluate the accuracy of stud finders, we looked at edge detection, center detection, and depth detection, especially for thicker walls. Edge detection and center detection represent two different approaches to locating studs, each with distinct advantages for different applications.
- Edge detection identifies the boundaries of studs, allowing you to determine the width and calculate the center manually.
- Center detection directly identifies the middle of studs, which is the optimal point for mounting heavy objects securely.
Electronic stud finders vary significantly in their accuracy, with premium models like the Bosch GMS120 detecting edges within 1/16 of an inch. The Franklin Sensors models use a unique approach that shows both edges simultaneously, providing a comprehensive view of stud location and width.
The choice between edge detection and center detection depends on your specific needs. If you’re looking to mount something heavy, center detection might be more convenient. However, if you need to understand the layout of the studs behind your wall, edge detection could be more beneficial.
As stated by a renowned expert, “The key to successful DIY projects lies in the accuracy of your tools, and a stud finder is no exception.” This emphasizes the importance of choosing the right stud finder for your needs.
“Accuracy is key when it comes to stud finders. You don’t want to be guessing where the studs are.”
Comparing Stud Finder Accuracy
When it comes to detecting what’s behind your walls, the type of stud finder you use can make all the difference. Different models offer varying levels of detection capabilities, and understanding these differences is crucial for DIYers.
Material Detection Capabilities
The ability of a stud finder to detect different materials behind walls is a critical feature. Advanced electronic models, such as the Bosch GMS120, can distinguish between wooden studs, metal pipes, and live electrical wires, providing a safer drilling or cutting experience.
In contrast, magnetic stud finders are limited to detecting ferrous metals but offer 100% accuracy within their detection range. The capability to differentiate between materials is not just a convenience; it’s a safety feature that helps you avoid electrical wires or plumbing.
Some stud finders provide visual or audible indicators that change based on the type of material detected, enhancing user awareness. Whether you’re working with wood, metal, or other materials, having the right stud finder can significantly impact the success and safety of your project.
- Different stud finders offer varying capabilities when it comes to detecting and differentiating between materials behind walls.
- Advanced electronic models can distinguish between wooden studs, metal pipes, and live electrical wires.
- Magnetic stud finders are limited to detecting ferrous metals but offer 100% accuracy within their detection range.
How to Use a Stud Finder Effectively
Calibration is a critical step in ensuring your stud finder provides accurate readings. To achieve this, it’s essential to understand the proper calibration techniques. This will help you to avoid false readings and ensure that you’re detecting studs accurately.
Calibration Techniques for Accurate Detection
Proper calibration is essential for accurate stud detection, particularly with electronic stud finders. You should always calibrate your stud finder on a section of the wall where you’re certain no studs, pipes, or wires are present.
- Hold the stud finder flat against the wall during calibration, avoiding any tilting that could affect readings.
- For models requiring manual calibration, follow the manufacturer’s specific instructions, which typically involve pressing and holding buttons in a particular sequence.
- Allow the calibration process to complete fully before beginning to scan for studs to ensure optimal accuracy.
It’s also important to note that you should not touch the wall with either hand while using a stud finder, as this can alter its readings. Some stud finders need to calibrate before scanning, so start away from switches, outlets, or light fixtures.
| Calibration Tips | Benefits |
|---|---|
| Calibrate on a clear section of wall | Accurate stud detection |
| Hold the stud finder flat | Avoids false readings |
| Follow manufacturer’s instructions | Ensures optimal accuracy |
By following these calibration techniques, you can ensure that your stud finder is working effectively and providing accurate readings. This will help you to complete your DIY projects with confidence.
How to Use a Stud Finder Effectively
When using a stud finder, it’s essential to adjust your scanning technique according to the type of wall you’re dealing with. Different walls present unique challenges, and understanding these differences is key to achieving accurate results.
Scanning Methods for Different Wall Types
To effectively use a stud finder, you need to adapt your scanning method to the specific wall type. For instance, standard drywall requires a slow and even horizontal motion at the desired height. This helps in detecting studs accurately without missing any.
For plaster walls, the approach differs due to their density and potential metal lath backing. Using slower scanning movements is advisable, and in some cases, opting for a magnetic stud finder can yield better results.
When dealing with textured walls, it’s crucial to apply firm, consistent pressure to maintain contact between the sensor and the wall surface. This ensures that the stud finder can detect studs behind the texture.
For walls with multiple layers or renovations, using a stud finder with adjustable depth settings is recommended. This feature allows the device to penetrate through all materials, providing accurate detection.
| Wall Type | Recommended Scanning Method | Additional Tips |
|---|---|---|
| Standard Drywall | Slow and even horizontal motion | Maintain consistent speed |
| Plaster Walls | Slower scanning movements | Consider using a magnetic stud finder |
| Textured Walls | Firm, consistent pressure | Ensure sensor contact with the wall |
| Walls with Multiple Layers | Use a stud finder with adjustable depth settings | Penetrate through all materials |
Additionally, applying some painter’s tape over the area you want to scan can be helpful. It provides a surface to mark your findings without damaging the wall. When you detect studs, objects, or live wires, mark them with a pencil or tape. It’s also worth noting that freshly painted walls may be difficult to scan for a few weeks due to the moisture in the paint.
How to Use a Stud Finder Effectively
Using a stud finder is a crucial skill for any DIY enthusiast or homeowner looking to hang pictures, shelves, or perform more complex renovations. To get the most out of your stud finder, it’s essential to understand not just how to operate it, but also how to interpret the results accurately.
Marking Techniques for Accurate Results
When you’ve located a stud, accurate marking is crucial to ensure that your fasteners hit the center of the stud. This is particularly important when mounting heavy objects or performing tasks that require a high level of precision.
To achieve accurate results, consider the following techniques:
- Use painter’s tape on the wall before scanning to provide a surface for marking without damaging your wall finish.
- When a stud is detected, mark both edges if possible, then measure to find the exact center for optimal mounting strength.
- For stud finders with built-in marking systems, ensure the tool remains perfectly still while making your mark.
- After marking potential stud locations, verify your findings by scanning the wall again from a different starting point.
It’s also worth noting that the layout of your home can give you clues about where studs and other features like pipes and wires might be located. For instance, paying attention to where the kitchen and bathrooms are can help, as water supply and waste pipes for the second floor are often found in walls on the first floor, below sinks, tubs, or showers.
Expert Tips for Finding Studs Without False Readings
To accurately locate studs, it’s crucial to understand the underlying structure of your walls. Most studs are spaced at 16-inch intervals, so finding one stud means the next should be approximately the same distance away in either direction.
Understanding Wall Construction
Changes in stud spacing often occur near the ends of walls or around doors and windows. If your stud finder seems to be detecting something between studs, it might be picking up metal or plastic plumbing components, electrical boxes or wiring, or metal ductwork.
To verify if the detection is a stud or not, scan above and below the point to see if it continues to the floor or ceiling. If it doesn’t, it could be something other than a stud.
- Understanding basic wall construction principles helps interpret stud finder readings more accurately.
- Standard stud spacing in modern construction is typically 16 inches on center, though older homes may use 24-inch spacing.
- Wall areas near doors, windows, and corners often have additional framing members that can confuse stud finder readings.
- Knowing that horizontal fire blocks and plumbing/electrical runs can exist between studs helps identify false positives.
- Recognising that metal corner beads on drywall corners can trigger stud finders will prevent confusion when scanning near wall edges.
By understanding these aspects of wall construction, you can use your stud finder more effectively and avoid false readings, saving you time and effort in your DIY projects.
Expert Tips for Finding Studs Without False Readings
Stud finders can sometimes provide misleading information, but there are ways to overcome this. When using a stud finder, it’s essential to understand the potential pitfalls and how to troubleshoot them.
Troubleshooting Common Issues
False readings are common with stud finders but can be minimised with proper technique and understanding. If your stud finder gives inconsistent readings, try scanning the wall at different heights to confirm stud location.
- If you’re having trouble getting consistent readings, make multiple passes with the stud finder to verify results, especially when working with challenging wall materials like plaster.
- When a stud finder indicates an unusually wide stud, you may be detecting a double stud, which is common around doors and windows.
- For persistent difficulties, try alternative methods like tapping the wall and listening for differences in sound or looking for visible clues like nail pops.
Understanding the layout of electrical wires can also help. Typically, electrical wires run vertically on the side of a stud and sometimes horizontally between outlets. If there are light fixtures, switches, and outlets on a wall, you can make an educated guess as to where the wires might be.
| Issue | Troubleshooting Tip |
|---|---|
| Inconsistent readings | Scan the wall at different heights |
| Unusually wide stud indication | Check for double studs around doors and windows |
| Persistent difficulties | Try alternative methods like tapping the wall or looking for nail pops |
By following these tips and understanding how to troubleshoot common issues, you can improve the accuracy of your stud finder and save time in the long run.
Stud Finder Maintenance and Care
To ensure your electronic stud finder remains reliable, proper battery management is crucial. Most stud finders are made of plastic with magnets or electronic components inside, making them vulnerable to moisture and impact damage.
Battery Management for Electronic Models
Effective battery management not only extends the life of your stud finder but also ensures its reliability over time. For electronic models, it’s essential to remove batteries when storing your stud finder for extended periods to prevent corrosion damage from leaking batteries.
- Keep spare batteries on hand, especially for projects requiring extensive stud finding, as low battery power can cause inaccurate readings.
- Clean battery contacts periodically with a dry cloth to ensure good electrical connection.
- Pay attention to low battery indicators and replace batteries promptly to maintain optimal performance.
For more information on choosing the right stud finder, you can visit this resource for comprehensive reviews and guides.
By following these simple battery management tips, you can ensure your electronic stud finder continues to serve you well across various projects, maintaining its accuracy and prolonging its operational life.
Stud Finder Maintenance and Care
The longevity and accuracy of your stud finder depend significantly on how you store it. Proper storage is crucial for maintaining the tool’s effectiveness over time.
Storage and Protection Tips
To ensure your stud finder remains in good condition, follow these storage and protection tips:
- Store electronic stud finders in a dry environment away from extreme temperatures that could damage sensitive components.
- Use the original packaging or a protective case when storing your tool to prevent physical damage.
- Keep the sensing surface clean and free from scratches that could interfere with accurate readings.
- For magnetic stud finders, store them away from other magnetic tools or materials that could weaken their magnetic strength over time.
- If you plan on using an electric model in wet conditions, look for one with a robust IP-rating, such as the IP54-rated Bosch GMS120-27 Wall Scanner and Stud Finder, which withstands both dust and water splashes from any direction.
By following these tips, you can extend the lifespan of your stud finder and maintain its accuracy. Proper care and storage are essential for getting the most out of your tool over time.
Conclusion
As we’ve explored the world of stud finders, it’s clear that the right tool can make all the difference in your home improvement projects. Investing in a quality stud finder is essential for any DIYer who regularly works on projects that require precise wall scanning.
The best stud finder for your needs depends on your specific requirements, wall types, and frequency of use. For most homeowners, the Bosch GMS120 Digital Multi-Scanner offers the best combination of accuracy, features, and reliability. Its ability to detect multiple materials and provide a clear display makes it a top choice despite its bulk and learning curve.
For those looking for a quicker process, the Franklin Sensors ProSensor T13 is incredibly easy and intuitive to use, making it a great alternative. Budget-conscious DIYers will find excellent value in the Zircon MultiScanner A200, which provides solid performance at a more accessible price point.
Remember that proper technique and understanding of your tool’s capabilities are just as important as the quality of the stud finder itself. By choosing the right model and using it effectively, you can save time and avoid costly mistakes in your projects.
In summary, whether you’re a seasoned DIYer or a beginner, there’s a stud finder out there that’s right for you. Take the time to consider your needs, and you’ll be well on your way to successful home improvement projects.
