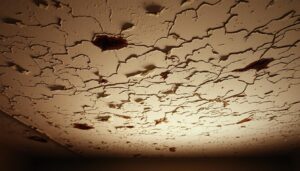
For many homeowners, the bumpy, textured ceiling is a relic of a bygone era. Once a fashionable feature in mid-20th-century homes, these ceilings have largely fallen out of favour in modern interior design.
If you’re wondering how to update your home’s aesthetic, you might be considering tackling the popcorn ceiling removal project. But before you start, it’s essential to understand the process and the potential challenges involved.
Removing the texture from your ceiling can be a DIY task, but it requires careful planning, the right tools, and safety precautions. In this guide, we’ll walk you through the steps to transform your dated ceiling into a smooth, contemporary surface.
Key Takeaways
- Understand the process of removing popcorn ceiling texture.
- Learn how to prepare for the removal project.
- Discover the importance of testing for asbestos.
- Explore various methods for removing the texture.
- Find out how to achieve a smooth, contemporary finish.
Understanding Popcorn Ceiling Texture
If you’re dealing with a popcorn ceiling, understanding its history and composition is crucial for deciding what to do with it. Popcorn ceilings are a textured ceiling treatment characterised by their bumpy appearance.
What Is a Popcorn Ceiling?
A popcorn ceiling, also known as a textured or acoustic ceiling, is a ceiling with a textured surface. This texture is usually achieved by spraying a mixture of water, starch, and aggregate onto the ceiling surface.
Why Were Popcorn Ceilings Popular?
Builders favoured popcorn ceilings for their practical benefits, including sound dampening and the ability to hide imperfections in the ceiling drywall. This made them a cost-effective solution during the mid-20th century.
Why Homeowners Remove Popcorn Ceilings Today
Today, homeowners often view popcorn ceilings as outdated. Removing the texture can update the home’s aesthetic, increase property value, and improve indoor air quality by eliminating dust collectors.
- Popcorn ceilings were popular in the mid-20th century for their acoustic properties and ability to hide ceiling imperfections.
- They are now often seen as outdated and can make rooms appear smaller.
- Removing popcorn ceilings can improve a home’s appearance and indoor air quality.

Understanding the reasons behind the installation of popcorn ceilings and their current status can help you decide the best course of action for your home.
Safety Considerations Before Removal
To avoid potential health risks, it’s essential to take necessary safety measures before removing popcorn ceiling texture. This process can release harmful particles into the air, posing serious health risks if not handled properly.
Testing for Asbestos
Before attempting to remove any ceiling texture, it’s crucial to test for the presence of asbestos, particularly in homes built before the early 1980s. You can purchase an asbestos test kit from a hardware store or hire a professional to collect and analyse samples from your ceiling texture.

Health Risks and Precautions
Asbestos was commonly used in ceiling texture for its fire-retardant properties and could pose serious health risks if disturbed during removal. If asbestos is detected, do not attempt DIY removal as disturbing these fibres can lead to serious respiratory conditions and even cancer when inhaled.
For asbestos-containing ceilings, consult with a licensed asbestos abatement professional who can safely remove the material or recommend encapsulation methods.
Essential Safety Equipment
Even without asbestos, ceiling texture removal creates significant dust that can irritate lungs and eyes, making proper safety equipment essential. Essential safety equipment includes an N95 respirator mask, protective goggles, gloves, and clothing that covers your skin.

Ensure proper ventilation in the work area while maintaining containment of dust and debris using plastic sheeting and proper air filtration. Turn off your HVAC system and cover vents to prevent dust from circulating throughout your home during the removal process.
Tools and Materials Needed to Remove Popcorn Ceiling Texture

Gathering the appropriate tools and materials is the first step in removing popcorn ceiling texture from your ceiling. This DIY project doesn’t require many special tools, and you may find that you already have everything you need on hand.
Essential Tools for Scraping Method
For the wet scraping method, you’ll need a few essential tools. These include a garden sprayer or spray bottle, a wide putty knife or drywall taping knife (15-20 cm width works best), and a drywall mud pan to catch falling debris.
Additional Materials for Preparation
To prepare your space, you’ll need materials such as heavy-duty plastic sheeting to protect floors and furniture, painter’s tape to secure the plastic, and drop cloths for additional coverage. Safety equipment is also crucial: an N95 respirator mask, protective goggles, work gloves, and clothes you don’t mind getting messy are all essential.
Optional Equipment for Different Methods
For the sanding method, you’ll require a drywall sander with an extension pole (preferably one with a vacuum attachment), various grits of sandpaper (60-120 grit), and a shop vacuum with a HEPA filter. Post-removal finishing will require joint compound, drywall primer, ceiling paint, and appropriate application tools.
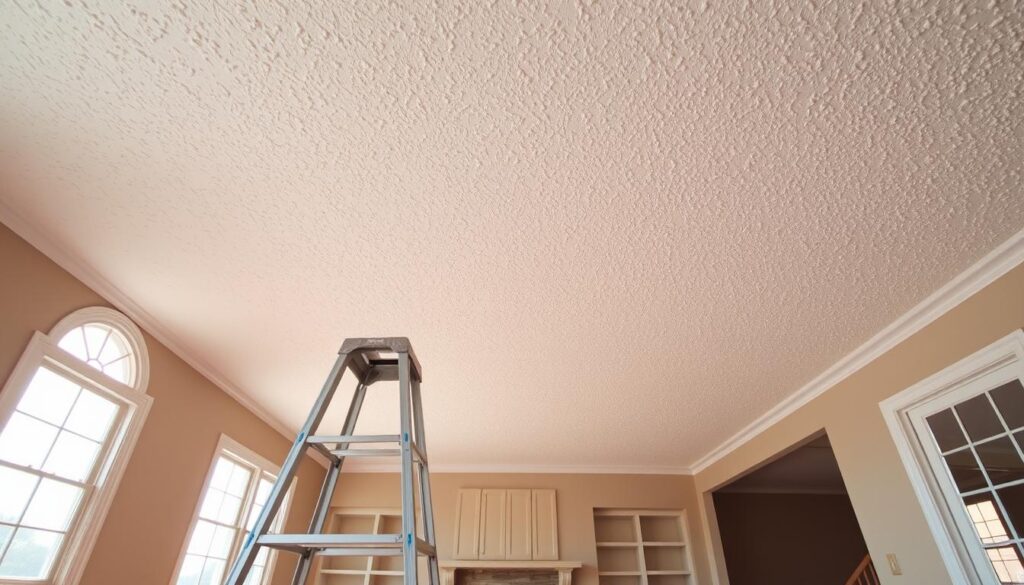
Having the right tools and materials will make the process more efficient and effective. A sturdy ladder or scaffolding system is necessary for reaching the ceiling safely, especially in rooms with standard or high ceilings.
Preparing Your Space for Popcorn Ceiling Removal
Before you start removing the popcorn ceiling texture, it’s essential to prepare your space properly. This step is crucial for both efficiency and protecting your home from the mess associated with the removal process.
Clearing and Protecting the Room
To keep everything clean, remove all furniture from the room or group items in the centre and cover them completely with plastic sheeting. Cover the entire floor with plastic sheeting or waterproof tarps, taping them to the baseboards to create a complete seal. This will contain falling debris and water, making cleanup easier.
Protect your walls by hanging plastic sheeting from the top of the walls to the floor, secured with painter’s tape that won’t damage paint when removed. This precaution will help prevent dust from spreading to other parts of your home.
Removing Light Fixtures and Ceiling Fans
Turn off electricity to the room and carefully remove all ceiling fixtures, fans, smoke detectors, and vent covers, labelling wires if necessary for easy reinstallation. Cover electrical boxes with painter’s tape to protect wires from water damage.
Setting Up Proper Ventilation
Create proper ventilation by opening windows if weather permits. Use plastic barriers at doorways to prevent dust from spreading to the rest of your home. This will help maintain good air quality and reduce the risk of dust circulation.
Creating a Workable Environment
Set up adequate lighting with floor lamps or work lights to ensure you can clearly see the ceiling surface while working. Establish a designated “clean area” outside the work room where you can rest and keep clean tools, water, and other necessities without contaminating them.

By following these steps, you’ll be able to work efficiently and safely, making the popcorn ceiling removal process less daunting.
Methods to Remove Popcorn Ceiling Texture
To remove popcorn ceiling texture, you’ll need to select a suitable method that aligns with your DIY skills, budget, and the condition of your ceiling. There are several effective approaches, each with its advantages and challenges.
The Wet Scrape Technique
The wet scrape technique is the most common and economical method for removing popcorn ceiling texture. It involves spraying small sections of the ceiling with water to soften the texture before scraping it away.
Step-by-Step Process
To apply the wet scrape method, work in small sections (approximately 1-2 square metres at a time). Use a garden sprayer to apply water, wait 15 minutes for absorption, and then gently scrape with a wide drywall knife held at a 30-degree angle.
Pros and Cons
The wet scrape method is inexpensive and requires minimal tools. However, it can be time-consuming and may result in ceiling damage if not done carefully or if too much water is applied.
Using a Drywall Sander
Using a drywall sander with a vacuum attachment offers a faster, less messy alternative for removing popcorn ceiling texture, especially for larger areas or painted popcorn ceilings.
Step-by-Step Process
The sanding process involves using a drywall sander with 60-80 grit sandpaper for initial removal, followed by finer grits for smoothing, working methodically across the ceiling surface.

Pros and Cons
Sanding is faster and creates fewer gouges than scraping but requires more expensive equipment and still generates significant dust despite vacuum attachments.
Alternative Approaches
For particularly difficult situations or ceilings containing asbestos, alternative methods may be more suitable.
Covering with New Drywall
Covering the existing ceiling with a new layer of thin drywall (6mm) can be an effective alternative that avoids disturbing the popcorn texture.
Complete Ceiling Replacement
Complete ceiling replacement involves removing the existing drywall entirely and installing new ceiling drywall, which is the most invasive but provides an opportunity for adding insulation or fixing structural issues.
Each method requires different preparation, tools, and finishing steps, so choosing the right approach based on your ceiling’s condition, your budget, and your DIY comfort level is essential.
Post-Removal Steps: Finishing Your Ceiling
Removing the popcorn ceiling is just the beginning; you now need to prepare your ceiling for painting. After the removal process, inspect the entire ceiling surface carefully for any gouges, nicks, or exposed drywall tape that may need attention.
Repairing Gouges and Imperfections
Use a good quality joint compound to fill in any imperfections. Apply it with a putty knife or drywall taping knife in thin layers. For deeper gouges, you may need to apply multiple coats, allowing each layer to dry completely before adding the next.
Sanding for a Smooth Finish
Once repairs are dry, use a fine-grit sandpaper (120-150 grit) attached to a sanding block or pole sander to smooth out the patched areas. Be careful not to damage the surrounding drywall.
Priming and Painting Your New Ceiling
After sanding, wipe down the entire ceiling with a damp cloth to remove dust. Then, apply a high-quality drywall primer, such as Kilz Drywall interior primer, to seal the drywall and provide a uniform surface for paint adhesion. Finally, apply two coats of your chosen ceiling paint using a roller with an extension pole.
By following these steps, you’ll achieve a smooth, newly finished ceiling that’s ready to be enjoyed.
Conclusion: Is DIY Popcorn Ceiling Removal Worth It?
Ultimately, the success of your popcorn ceiling removal project depends on your preparation and patience. While hiring a professional can cost between $924 and $2,970, a DIY approach can save you significant money, with the caveat that it’s time-consuming and physically demanding.
For an experienced DIYer, removing popcorn ceiling texture from a 500 square feet area can take around 20 hours. It’s essential to consider the entire project timeline, including preparation, removal, repairs, priming, painting, and cleanup, which can span several days to a week.
Weigh the benefits of DIY against professional services, especially if you have multiple rooms or asbestos concerns. For many homeowners, the transformation to smooth ceilings modernises their home and potentially increases its value, making the effort worthwhile.