Are you looking to give your kitchen a fresh new look without breaking the bank or undertaking a major renovation? Updating your kitchen with a new backsplash can make a significant difference. One of the easiest and most cost-effective ways to achieve this is by using peel-and-stick tile.
This DIY project is perfect for homeowners and renters alike who want to update their kitchen without the commitment, mess, and expense of traditional tile work. By choosing the right peel-and-stick backsplash, you can dramatically transform your kitchen’s appearance.
Key Takeaways
- Select the right materials for your DIY backsplash project.
- Prepare your kitchen surface for a successful installation.
- Follow step-by-step instructions for a professional finish.
- Update your kitchen without the mess and expense of traditional tiling.
- Achieve a fresh new look with a budget-friendly DIY solution.
What is Peel-and-Stick Backsplash?
The peel-and-stick backsplash offers a modern and efficient way to achieve a fresh look in your kitchen. This innovative solution allows homeowners to update their kitchen decor without the complexity and cost associated with traditional tiling methods.
Peel-and-stick backsplash is available in a variety of designs and patterns, making it easy to find a style that complements your kitchen’s aesthetic. From sleek and modern to traditional and ornate, the diverse range of stick tile options ensures there’s something for every homeowner.
Types and Styles Available
You can choose from a wide array of styles, including designs that mimic natural stone, ceramic, and other materials. The versatility of peel-and-stick tiles means you can achieve the desired look without the associated costs and hassle of real stone or ceramic tiles.
Advantages Over Traditional Tile
One of the primary benefits of peel-and-stick backsplash is its ease of installation. Unlike traditional tiles that require specialised tools, messy mortar, and grout, peel-and-stick stick tile can be installed with basic household tools and minimal preparation. Additionally, the installation process is significantly cleaner, generating less dust and debris compared to cutting and setting traditional tiles.
Other advantages include being much lighter than ceramic or porcelain, making them ideal for most kitchen walls without needing special support. They are also easier to cut around outlets and irregular spaces, and some options can be removed or replaced more easily, making them suitable for renters or those who like to update their décor frequently.
Benefits of Using Peel-and-Stick Backsplash
The benefits of using peel-and-stick backsplash are numerous, ranging from cost-effectiveness to ease of installation. You can achieve a stylish kitchen makeover without the hassle associated with traditional tiling methods.

Cost-Effectiveness
Peel-and-stick backsplash is a cost-effective solution for kitchen renovations. It eliminates the need for professional installation, reducing labour costs. Additionally, the material costs are often lower compared to traditional tiles.
Easy Installation for DIYers
The ease of installation makes peel-and-stick backsplash an ideal choice for DIY enthusiasts. You can easily apply the tiles yourself, without requiring specialized tools or skills. This simplicity makes it accessible to anyone looking to refresh their kitchen.
Time-Saving Alternative
Peel-and-stick backsplash is a time-saving alternative to traditional tiling. The installation process is quick, typically taking just a few hours. This rapid application means you can enjoy your new kitchen backsplash without the lengthy wait associated with traditional methods.
- Traditional tile installation can take multiple days, involving preparation, setting, drying, grouting, and sealing, whereas peel-and-stick backsplash can be installed in just a few hours, providing an instant makeover solution.
- The quick installation process minimises disruption to your daily routine, keeping your kitchen functional throughout the project.
- Peel-and-stick backsplash eliminates the need for mixing mortar and grout, as well as the subsequent clean-up, making it a convenient time-saving solution.
For those seeking a rapid kitchen refresh before a special occasion or holiday gathering, peel-and-stick backsplash offers the perfect solution, saving you time and effort.
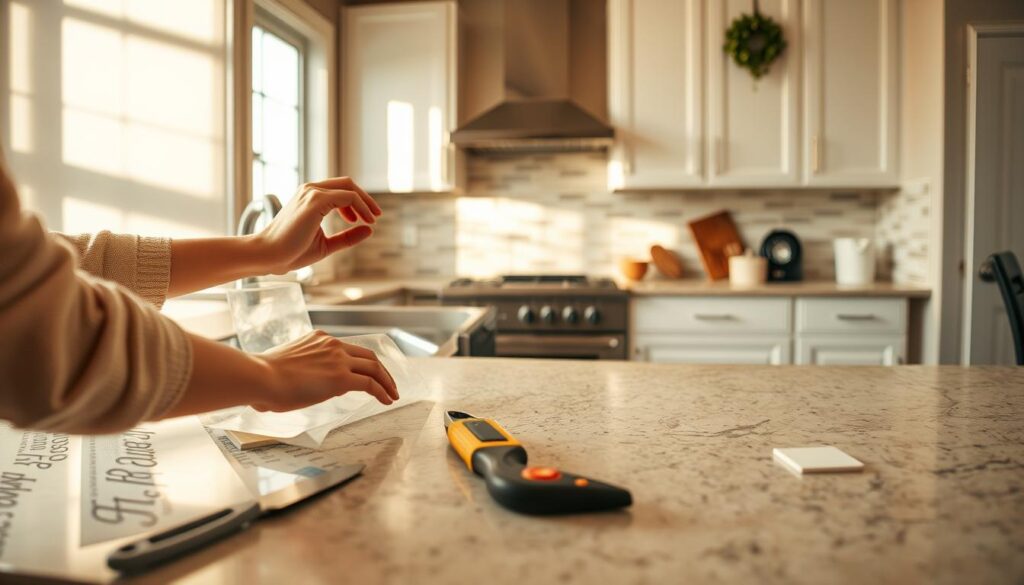
Materials and Tools You’ll Need

Before starting your peel-and-stick backsplash installation, it’s essential to gather the necessary tools and materials. Having everything ready will make the process smoother and more efficient.
Essential Materials Checklist
To begin, you’ll need a few essential materials. These include:
- Peel-and-stick tiles (choose your desired design and quantity)
- Sharp scissors or a utility cutter for cutting the tiles
- A J-roller or credit card for smoothing tiles and removing air bubbles
- A level or laser level to ensure straight alignment
Recommended Tools
In addition to the essential materials, having the right tools can make a significant difference. These include:
- Measuring tape and straightedge for accurate measurements and cuts
- A pencil for marking cut lines
- Clean cloth or paper towels for surface preparation
- Tin snips or heavy-duty scissors for cutting around outlets or pipes
- A caulk gun for applying caulk to edges and corners
- A heat gun (optional, for helping to shape tiles around corners or obstacles)
Preparing Your Kitchen Wall for Application
To ensure a smooth and durable peel-and-stick backsplash, wall preparation is essential. A well-prepared wall not only enhances the appearance of your backsplash but also ensures its longevity.
Cleaning and Degreasing the Surface
Before you start, make sure your wall is clean and free of grease. Any dirt or grime can interfere with the adhesive, causing the tiles to peel off over time. Use a gentle cleanser and a soft cloth to wipe down the wall surface, ensuring it’s free from any debris or grease.
Measuring and Planning Your Layout
Proper planning is crucial for a successful installation. Start by measuring the wall area to determine how many tiles you’ll need, adding 10-15% extra for cuts and future replacements. Consider the layout and decide on the starting point, typically the centre point behind the sink or hob. Use a level to draw a horizontal reference line on the wall, ensuring your tiles are straight. For kitchens with multiple walls, you can either continue the pattern around corners or treat each wall separately.
- Measure the wall area and calculate the number of tiles needed.
- Determine the focal point of your backsplash and start your installation from there.
- Use a level to ensure your tiles are perfectly aligned.
- Plan around outlets and switches to achieve a seamless look.
Step-by-Step Guide to Apply Peel-and-Stick Backsplash
Applying a peel-and-stick backsplash is a straightforward DIY project that can significantly enhance the look of your kitchen. You can achieve a professional-looking result with careful planning and execution.
Starting Your First Row
Begin by preparing your wall surface, ensuring it is clean and dry. To establish a straight line for your first row, use a level and a pencil to mark the area where you will apply the tiles. Starting from the left is recommended to avoid gaps, but adjustments can be made later with caulk or trim.
Aligning and Applying Subsequent Tiles
Once the first tile is in place, subsequent tiles should be aligned carefully to maintain a consistent pattern. Press each tile firmly to ensure adhesion. If necessary, use a rubber mallet to tap the tiles into place, ensuring there are no air bubbles or gaps.
Cutting Tiles for Edges and Outlets
For edges and around outlets, tiles will need to be cut to size. Use a utility knife or a tile cutter for this purpose. Measure carefully to ensure a precise fit, and apply the cut tiles, pressing them firmly onto the wall.
Finishing Touches
After all tiles are applied, inspect the backsplash for any areas that require additional pressure or touch-ups. Apply caulk around the edges to create a waterproof seal. Consider adding trim for a polished look, and reinstall outlet covers. Finally, clean the backsplash gently to remove any residue or fingerprints.
- Inspect the entire surface for proper adhesion and apply additional pressure if needed.
- Use matching caulk to seal edges where the backsplash meets countertops or cabinets.
- Add trim pieces or edge profiles for a more polished appearance.
- Reinstall outlet and switch covers, ensuring they are flush against the new backsplash.
- Apply a recommended sealer for added protection, following the manufacturer’s instructions.
- Clean the finished backsplash with a gentle, non-abrasive cleaner.
- Document your work by taking photos from different angles to showcase your new kitchen backsplash.
Tips for a Professional-Looking Finish
To ensure your kitchen backsplash looks its best, follow these expert tips for a flawless finish. A professional-looking peel-and-stick backsplash can make a significant difference in the overall appearance of your kitchen.
Ensuring Proper Alignment
Proper alignment is crucial for a visually appealing backsplash. Start by ensuring your first tile is straight and level, as this will set the tone for the rest of the installation. Use a spirit level and a pencil to mark a guideline on the wall.
Dealing with Corners and Edges
Corners and edges can be challenging, but with the right approach, you can achieve a seamless finish. When cutting tiles to fit around corners, use a sharp utility knife or a tile cutter to ensure clean cuts. Apply the tile slowly and smoothly to avoid air bubbles.
Working Around Outlets and Switches
Working around electrical outlets and switches requires careful planning. Turn off the power to these areas before starting work. Consider using outlet extenders if your new backsplash will be thicker than the original surface. When cutting tiles to fit around outlets, make the opening slightly larger than the outlet box to allow for adjustments.
| Tip | Description |
|---|---|
| Turn off power | Switch off electricity to outlets and switches before removing cover plates. |
| Use outlet extenders | Purchase extenders if needed to bring outlets flush with the new surface. |
| Cut tiles carefully | Make openings slightly larger than outlet boxes for a smooth fit. |
By following these tips, you can achieve a professional-looking peel-and-stick backsplash that enhances the beauty of your kitchen. The key thing to remember is to take your time and be meticulous in your installation. Unlike traditional tile installations, peel-and-stick backsplashes don’t require grout, making the process simpler. With patience and attention to detail, you’ll find that installing a peel-and-stick backsplash is a straightforward way to give your kitchen a fresh new look. Ensure the tiles stick properly by cleaning the surface thoroughly before application.
Troubleshooting Common Installation Challenges
While peel-and-stick backsplash is designed for easy installation, there are some common pitfalls to watch out for. Being aware of these potential issues can help you achieve a professional-looking finish.
Addressing Air Bubbles and Lifting Corners
Air bubbles and lifting corners can be a nuisance. To fix these issues, use a needle or a pin to carefully prick the bubble, then smooth out the area with a credit card or a similar tool. For lifting corners, apply a small amount of adhesive, such as Liquid Nails, to secure the tile firmly in place.

Fixing Misalignment Issues
Misaligned tiles can be adjusted by carefully lifting the tile and repositioning it. To avoid misalignment in the first place, ensure that your first tile is straight and use a level to guide subsequent tiles. For more information on avoiding common mistakes during installation, you can visit this helpful resource.
Solutions for Difficult Surfaces
Difficult surfaces, such as textured walls, can be challenging for peel-and-stick tiles. Consider applying a thin layer of joint compound to create a smoother surface before installation. For highly textured surfaces, supplementary adhesive like Liquid Nails can help tiles adhere to the high points of the texture. When working in tight space or awkward areas, cut paper templates first to ensure precise fits before cutting your actual tiles. If outlet covers don’t sit flush after installation, purchase outlet extenders to bring the outlet forward.
Conclusion: Enjoying Your New Kitchen Backsplash
As you step back to admire your handiwork, the beauty of your new peel stick tile backsplash becomes truly apparent. You now have a refreshed kitchen ambiance that not only enhances the appearance of your kitchen but can also increase the value of your home with minimal investment. If you’ve chosen a high-quality stick tile backsplash, it will stand the test of time, providing a beautiful, clean, and bright space for years to come.
Proper maintenance of your new backsplash is simple yet crucial for its longevity. Understanding the expected lifespan of your particular product will help you plan for future updates or replacements. The versatility of peel-and-stick backsplash materials means you can easily update your kitchen’s look again in the future if design trends or your personal preferences change.
Having completed this project, you’ll have developed valuable skills such as measuring, cutting, planning, and problem-solving, which are transferable to many other home improvement endeavours. For more ideas and inspiration on peel-and-stick backsplash designs, you can explore further resources. With your new peel stick tile, you’ve not only enhanced your kitchen but also gained the confidence to tackle other DIY projects.