Are you tired of being stuck with a single brightness level in your home’s recessed lighting? Do you wish you could adjust the lighting to suit different moods and activities? You’re not alone. Many homeowners in the UK are discovering the benefits of adding a dimmer to their recessed lighting.
With a dimmer, you can enhance the ambiance of your home, save energy, and gain greater control over your lighting environment. But how do you get started? Can you simply install a dimmer switch, or are there other factors to consider?
Key Takeaways
- Understand the benefits of adding a dimmer to your recessed lighting, including enhanced ambiance and energy savings.
- Learn how to choose a compatible dimmer switch for your LED recessed lights.
- Discover the importance of compatibility between your dimmer switch and recessed lights.
- Gain an overview of the installation process and necessary safety precautions.
- Recognise the enhanced functionality and versatility that a dimmer can bring to your home’s lighting.
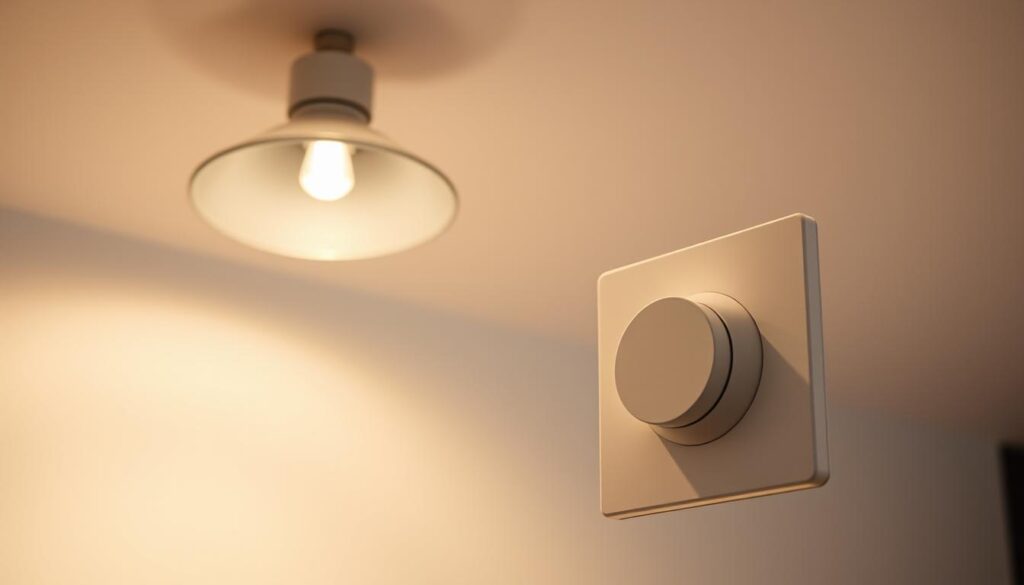
Understanding Dimmer Switches for Recessed Lighting
To effectively control your recessed lighting, it’s crucial to understand the different types of dimmer switches available. Dimmer switches for recessed lighting come in various forms, and selecting the right one is vital for achieving the desired lighting effect.
Types of Dimmer Switches
There are primarily two types of dimmer switches used for recessed lighting: TRIAC dimming technology and 0-10V dimming systems. Understanding their differences is key to making an informed decision.
TRIAC Dimming Technology
TRIAC dimming is a standard method for regulating the brightness of incandescent, halogen, and certain types of dimmable recessed lighting. TRIAC dimmers adjust the power sent to the lights by chopping the AC waveform, effectively managing their brightness.
0-10V Dimming Systems
0-10V dimming is an analog dimming technique primarily used for LED drivers, fluorescent ballasts, and other compatible lighting fixtures. The dimmer sends a direct current (DC) voltage signal to the lighting fixture, where 0V represents 0% brightness and 10V indicates 100% brightness.
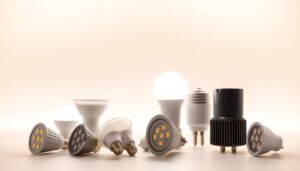
Compatibility with LED Recessed Lights
Not all LEDs are dimmable, so it’s essential to check the product specifications to determine if your chosen LED light is designed for dimming. LED lights require specific dimmer switches for LED lighting due to their unique electrical characteristics.
Are All LEDs Dimmable?
No, not all LEDs are dimmable. It’s crucial to verify the dimmability of your LED lights before purchasing a dimmer switch.
Choosing the Right Dimmer for Your Setup
To choose the right dimmer, consider the type of recessed lights installed, the number of fixtures, and your desired dimming functionality. Ensuring compatibility between your LED lights and the dimmer switch is vital for a smooth dimming experience.
Preparation Before Adding a Dimmer to Recessed Lighting
Before you start installing a dimmer switch for your recessed lighting, it’s essential to prepare properly. This involves several key steps to ensure a safe and successful installation.
Safety Precautions
Your safety is paramount when working with electrical systems. Turning off the power at the circuit breaker is the first critical step to prevent electrical accidents.
Turning Off Power at the Circuit Breaker
Ensure you switch off the power to the circuit you’re working on. Verify this by checking your circuit breaker or fuse box.
Testing for Live Wires
Always double-check that the power is off by using a voltage tester on the wires you’ll be working with. This step is crucial for your safety.
Tools and Materials Needed
Gathering the right tools and materials before starting the installation is vital for efficiency and safety.
Essential Tools for Installation
You’ll need a voltage tester, a screwdriver set, wire strippers, a drywall saw or hole cutter, electrical tape, and wire connectors.
Selecting the Appropriate Dimmer Switch
Choose a dimmer switch that is compatible with your LED recessed lights and suitable for your lighting needs. Consider factors like load capacity and dimming functionality.

Planning Your Lighting Layout
Careful planning of your lighting layout is necessary to achieve the desired illumination and ambiance.
Determining Placement and Number of Lights
Decide on the number of lights needed and their optimal placement based on the room’s dimensions and purpose.
Considering Room Dimensions and Lighting Needs
Take into account the specific lighting requirements of different rooms, such as task lighting in kitchens or ambient lighting in living areas.
Step-by-Step Process to Add Dimmer to Recessed Lighting
You can easily add a dimmer to your recessed lighting by following these steps. This process involves removing the existing switch, installing a new dimmer switch, and testing the installation to ensure it works correctly.
Removing the Existing Switch
Before you start, ensure your safety by confirming that the power is off. Use a voltage tester to check the wires. Once you verify the power is off, proceed to remove the old switch.
Safely Disconnecting Wires
Use a screwdriver to unscrew the faceplate and the switch from the wall. Carefully disconnect the wires, keeping track of the wire connections, as this will help when installing the new dimmer switch.
Identifying Wire Connections
It’s crucial to identify and label wire connections in your existing switch to ensure the correct installation of the new dimmer switch. Note the differences between one-way and two-way switching configurations.
Installing the Dimmer Switch
When installing the dimmer switch, ensure it is compatible with LED technology. Not all dimmers work well with LED lights. Choose a dimmer specifically designed for LED recessed can lights dimmable.
Connecting Wires to the Dimmer
Match the wires from the lighting kit to the corresponding wires in your ceiling. Use wire connectors to secure the connections. Follow the manufacturer’s instructions for connecting wires to the dimmer, paying special attention to identifying line/load wires and proper connection techniques.
Securing the Dimmer in the Wall Box
Secure the dimmer switch properly in the wall box, ensuring all connections are tight and the switch is firmly mounted to prevent future issues.
| Step | Description | Notes |
|---|---|---|
| 1 | Remove existing switch | Ensure power is off |
| 2 | Disconnect wires | Label wire connections |
| 3 | Install dimmer switch | Choose LED compatible dimmer |
| 4 | Connect wires to dimmer | Follow manufacturer’s instructions |
Testing the Installation
After installing the dimmer switch, it’s essential to test the installation.
Restoring Power and Initial Testing
Safely restore power at the circuit breaker and conduct initial functionality tests. Check that the lights are working correctly and that the dimmer is functioning as expected.
Adjusting Dimmer Settings
Adjust the dimmer settings to your preference, setting minimum brightness levels and testing the full range of dimming capabilities with your recessed lights.

Most dimmers work as one-way or two-way light switches, and typically only one switch in a circuit can be converted to a dimmer. Understanding these limitations is crucial for a successful installation.
Troubleshooting Common Dimmer and Recessed Lighting Issues
Troubleshooting dimmer and recessed lighting problems is crucial for a smooth and efficient lighting system. When you encounter issues, it’s essential to identify the cause and apply the appropriate solution.
Addressing Flickering Lights
Flickering lights can be caused by incompatible dimmers or poor-quality recessed LED lighting kits. To keep your dimmable recessed LED lighting flicker-free, ensure you’re using an LED compatible dimmer switch.
Causes of LED Flickering with Dimmers
The main causes of LED flickering include minimum load requirements, incompatible dimming technology, and electrical interference issues. For more information on compatible dimmers, you can visit Zano Controls.
Solutions for Smooth Dimming
To achieve smooth dimming without flickering, use LED-specific dimmer switches, set appropriate minimum brightness levels, and ensure proper wiring connections.
Dealing with Buzzing Sounds
Buzzing sounds often occur when the dimmer is not fully compatible with the LED lights. Try replacing the dimmer with a trailing-edge model, which is better suited for LEDs.
Why Dimmers Sometimes Buzz
Buzzing noises typically result from electromagnetic interference in the dimmer switch or incompatibility with LED drivers.
How to Eliminate Buzzing Noises
To eliminate buzzing noises, consider replacing standard dimmers with trailing-edge dimmers specifically designed for LED compatibility.
Resolving Limited Dimming Range
Some LED fixtures may not dim smoothly throughout the entire brightness range. Adjusting the minimum brightness level can help resolve this issue.
Setting Minimum Brightness Levels
Setting the correct minimum brightness level prevents flickering at low settings while ensuring full range dimming control.
Ensuring Full Range Dimming Control
| Issue | Cause | Solution |
|---|---|---|
| Flickering Lights | Incompatible dimmers or poor-quality LED kits | Use LED-compatible dimmer switches |
| Buzzing Sounds | Electromagnetic interference or incompatibility | Replace with trailing-edge dimmers |
| Limited Dimming Range | Incompatible LED fixtures | Adjust minimum brightness levels |

Conclusion: Enjoying Your Newly Dimmable Recessed Lighting
Your newly dimmable recessed lighting offers a range of benefits, from energy savings to improved control over your home’s lighting environment. With a dimmable LED system, you can enjoy enhanced ambiance and flexibility for different activities and occasions.
By installing a dimmer switch, you’ve gained the ability to adjust the brightness and lighting level to suit various tasks, from cooking to reading, and even create subtle ambient lighting for entertaining or relaxing. To make the most of your new system, experiment with different brightness levels and settings to find the perfect balance for your needs.
For ongoing maintenance and potential upgrades, consider the benefits of dimmable LED spotlights and the possibility of integrating smart dimmers with your home automation system. Properly installed LED dimmers with compatible LED recessed lights should provide years of reliable service, adding value to your home while enhancing comfort and functionality.