Are you tired of a lacklustre shower experience due to a faulty diverter valve? Are you wondering if upgrading it can make a significant difference? A shower diverter valve controls the flow of water to the shower head, tub spout, and body sprays, making it a crucial component of your bathroom’s plumbing system.
Upgrading your shower valve can significantly enhance your daily routine by providing better water pressure and temperature control. With various types of valves available in the UK market, choosing the right one can be daunting. This comprehensive guide will walk you through the process of upgrading your diverter valve, ensuring a successful installation.
Key Takeaways
- Understand the function of a shower diverter valve and its importance in your bathroom’s plumbing system.
- Learn about the different types of shower valves available in the UK market.
- Discover the benefits of upgrading your shower diverter valve, including improved water pressure and temperature control.
- Find out how to choose the right shower valve for your specific bathroom setup.
- Gain knowledge on the materials used in quality shower valves, such as brass construction with chrome finishes.
Understanding Shower Diverter Valves
To appreciate the importance of upgrading your shower diverter valve, you first need to understand what it does and how it works. The shower diverter valve is a crucial component of your shower system, controlling the flow of water between the shower head and other outlets, such as a bathtub faucet or additional shower heads.
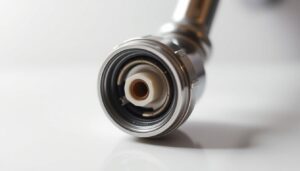
What Is a Shower Diverter Valve?
A shower diverter valve is a mechanism that directs water flow either to the shower head or to another outlet. It is typically located near the shower handle and is an essential part of your shower’s plumbing system. Modern shower diverter valves are designed to provide a seamless transition between different water outlets, ensuring a smooth and comfortable shower experience.
Signs You Need to Upgrade Your Shower Diverter Valve
If you’re experiencing issues such as leaks, difficulty in switching between shower outlets, or inconsistent water temperature, it may be time to consider upgrading your shower diverter valve. Other signs include visible corrosion or mineral buildup on the valve, indicating wear and tear over time.
Benefits of Upgrading Your Shower Diverter Valve
Upgrading your shower diverter valve can bring numerous benefits, including improved temperature stability, enhanced water efficiency, and better control over water flow. Modern valves are designed with high-quality materials and advanced features such as anti-scald protection, making your shower experience safer and more enjoyable.
| Benefits | Description |
|---|---|
| Improved Temperature Stability | Eliminates hot and cold fluctuations when other water fixtures are used |
| Enhanced Water Efficiency | Reduces water consumption and lowers utility bills |
| Better Control Over Water Flow | Allows adjustment of pressure to your preference |
Types of Shower Diverter Valves
Understanding the different types of shower diverter valves is crucial for a successful upgrade. You have several options to choose from, depending on your shower configuration and personal preferences.
Pressure Balancing Shower Valves
Pressure balancing shower valves are designed to maintain a consistent water temperature, even when other water sources are in use. This is achieved by balancing the pressure between hot and cold water supplies, ensuring a comfortable showering experience.
Thermostatic Shower Valves
Thermostatic shower valves offer precise temperature control, allowing you to set your preferred temperature. These valves are particularly useful for households with varying water pressure, as they maintain a consistent temperature.
3-Way Diverter Valves
3-way diverter valves are specialised components that allow water to be directed to multiple outlets, offering versatility in your shower experience. You can divert water to a primary showerhead, a secondary outlet such as a handheld shower or body jets, or operate multiple outlets simultaneously for a spa-like experience.
- 3-way diverter valves are available in both integrated designs and as separate components that can be added to existing shower systems.
- When shopping for 3-way diverter valves, it’s essential to distinguish them from 2-way valves, which only allow switching between two outlets.
- Most quality 3-way diverters feature brass construction with chrome or other decorative finishes, providing durability and reliable performance.
Essential Tools and Materials for the Upgrade
A successful shower diverter valve upgrade depends on having the correct tools and high-quality materials. To ensure a smooth installation process, it’s essential to be well-prepared.

Required Tools List
To upgrade your shower diverter valve, you’ll need a set of basic tools, including an adjustable wrench, pipe wrench, and screwdrivers. You’ll also require a level and a tape measure to ensure accurate placement and alignment.
Materials You’ll Need
The materials needed include a high-quality diverter valve, preferably made from durable materials like copper and zinc alloy, which offer excellent resistance to corrosion and wear. You’ll also need pipe fittings, Teflon tape, and potentially new trim and handles to match your existing bathroom fixtures.
Safety Equipment
Safety is paramount when upgrading your shower diverter valve. Essential safety equipment includes safety goggles, work gloves, a dust mask, and knee pads. It’s also recommended to have a first aid kit nearby and a fire extinguisher if you’ll be soldering copper pipes.
How to Upgrade Shower Diverter Valve: Removal Process
To upgrade your shower diverter valve, you need to start by removing the old valve, a process that involves several key steps. The removal process is crucial for a successful upgrade, as it ensures that the new valve is installed correctly.
Shutting Off the Water Supply
Before you begin the removal process, it’s essential to shut off the water supply to your shower. Locate the shut-off valves and turn them clockwise to shut off the water supply. You may need to use a wrench to turn the valves, depending on their type. Once the water supply is off, open the shower faucet to drain the water from the pipes.
Removing the Old Shower Handle and Trim
With the water supply shut off, you can proceed to remove the old shower handle and trim. Use a screwdriver to remove the screws that hold the handle in place, then gently pull the handle off. Next, remove the trim by unscrewing the escutcheon plate. Be careful not to damage the surrounding area.

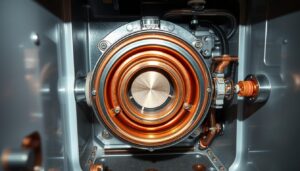
Extracting the Existing Valve
Once the trim and handle are removed, you’ll need to access the shower valve body, which is mounted inside the wall and connected to your home’s water supply pipes. Identify the type of pipe connections your existing valve uses, as this will determine the tools and techniques needed for removal. For soldered copper connections, use a propane torch to heat the joints and melt the solder. With threaded connections, use two adjustable wrenches to loosen the connecting pipes. If your shower uses PEX or push-fit connections, use the appropriate disconnect tools.
When removing the valve, pay close attention to how it’s mounted to the framing inside the wall, as you’ll need to install the new valve in a similar manner. Be prepared for potential hidden issues, such as water damage or corroded pipes, and take measurements and photos to document the valve’s position and orientation.
Installing Your New Shower Diverter Valve
With the old valve removed, the next step is to install your new shower diverter valve. This process involves several key steps to ensure a successful and leak-free installation.
Preparing the Shower Wall
Before installing the new valve, you need to prepare the shower wall. Ensure the area around the valve is clean and free of debris. If you’re replacing an old valve, inspect the wall for any signs of water damage or mineral buildup and address these issues before proceeding. For tiled showers, check that the tiles are securely fixed and that the grout is in good condition.
Connecting the New Valve
Connecting the new shower diverter valve requires careful attention to detail. Start by applying a layer of pipe dope or PTFE tape to the threads of the valve to create a watertight seal. Gently push the valve into place, ensuring it’s properly seated within the shower wall. Secure the valve according to the manufacturer’s instructions, typically involving screwing it into place or using a retaining clip. Make sure all connections are tight and that the valve operates smoothly.

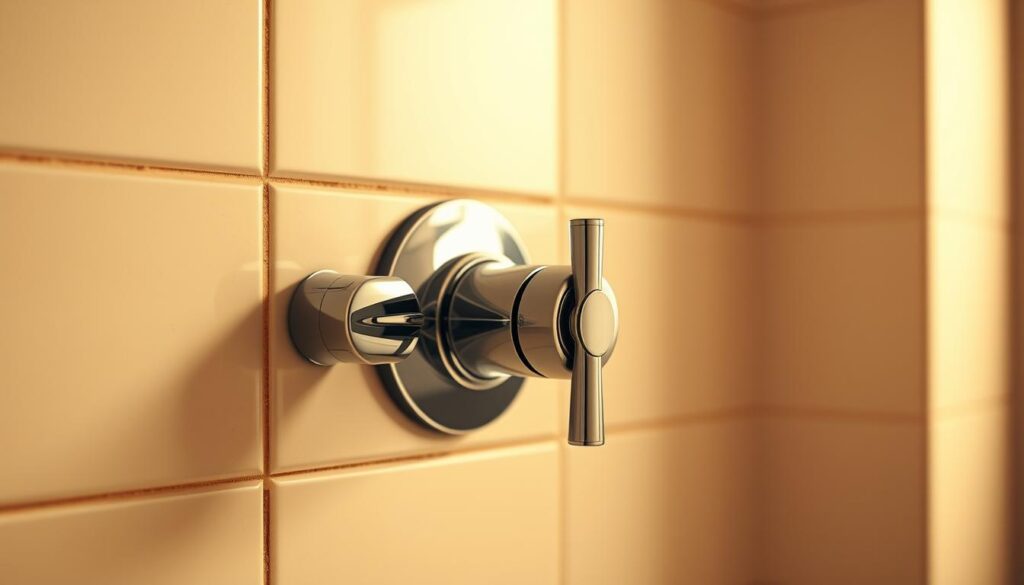
Attaching the Trim and Handle
Once the new valve is connected, you can attach the trim and handle. Start by installing the escutcheon plate, ensuring it’s centered and securely fastened to the wall. Then, attach the handle or knob, making sure it’s properly aligned and functions correctly. For a chrome or brass finish, use a soft cloth to remove any fingerprints or smudges.
Sealing and Finishing Touches
To complete the installation, apply a continuous bead of high-quality silicone caulk around the perimeter of the escutcheon plate where it meets the wall surface. Use your finger or a caulk finishing tool dipped in water to smooth the caulk bead, creating a neat, professional-looking seal. For tiled showers, ensure the caulk color matches either the grout or the trim finish. Finally, install any additional components such as the shower arm and shower head, using PTFE tape on the threads to ensure a watertight seal.
After completing the installation, clean all newly installed components with a soft cloth and mild cleaner appropriate for the finish to remove any fingerprints, adhesive residue, or installation debris. Apply a thin layer of valve lubricant to any exposed moving parts according to the manufacturer’s recommendations.
Testing and Troubleshooting Your New Diverter Valve
Once you’ve installed your new shower diverter valve, it’s crucial to test it thoroughly to ensure it’s working as expected. This step is vital to identify any potential issues early on.
Initial Water Test
Begin by turning on the water supply and checking for leaks around the valve and shower head. Ensure the water temperature is consistent and the diverter function is working correctly. If you notice any leaks or irregularities, address them promptly.
Common Installation Problems and Solutions
Despite careful installation, issues may arise. Here are some common problems and their solutions:
- If water leaks from around the shower handle, check the sealing and tighten the trim components.
- For inconsistent water temperature, verify that the hot and cold supply lines are correctly connected.
- If water drips from the shower head when turned off, inspect the valve cartridge for proper seating or damage.
| Issue | Solution |
|---|---|
| Low water pressure | Check for partially closed service stop valves or debris in the valve aerator. |
| Diverter function failure | Inspect for mineral buildup or worn O-rings in the diverter mechanism. |
| Stiff shower valve handle | Lubricate or replace the cartridge as necessary. |
By following these steps, you can ensure your new shower diverter valve operates smoothly and efficiently, providing a safe and enjoyable showering experience.
Conclusion
A modern shower diverter valve can greatly improve the functionality and safety of your shower. By following this guide, you’ve learned how to replace your old valve with a high-quality brass one featuring a chrome finish, enhancing your daily routine. Proper preparation and choosing the right type of shower valve are crucial for a successful upgrade. Regular maintenance will extend its lifespan. Consider complementing your new valve with matching bathroom taps for a cohesive look. This upgrade not only improves your shower experience but also adds value to your home. With your new diverter valve installed, you can enjoy a more comfortable and customisable shower.