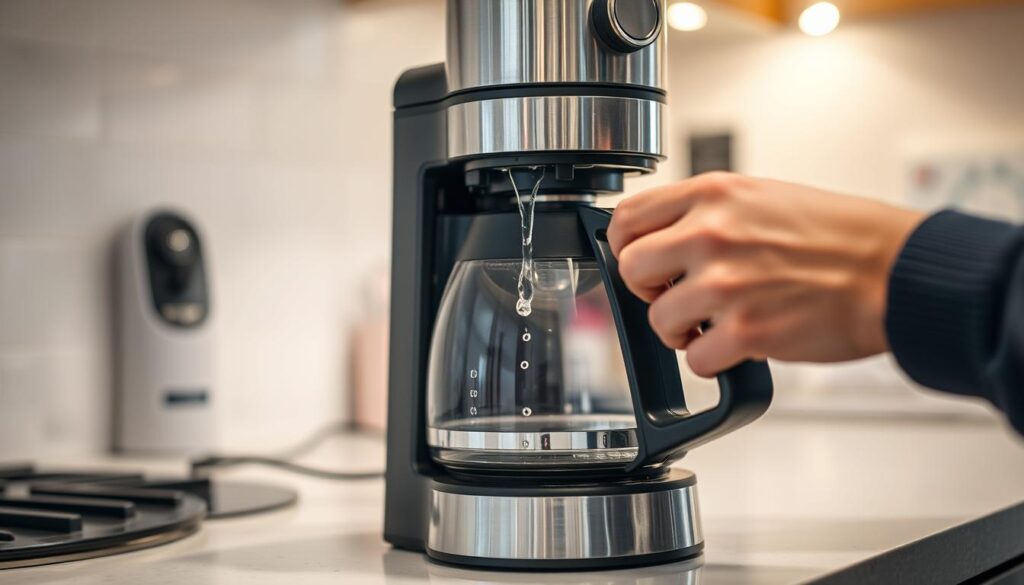
Are you tired of waking up to a kitchen counter flooded with water due to your malfunctioning coffee maker? A leaking coffee maker can be more than just an inconvenience; it poses a risk to your electrical safety and can damage your kitchen surfaces.
Understanding the source of the leak is crucial to resolving the problem. Whether you’re a casual coffee drinker or a connoisseur, a functioning coffee maker is essential. This guide will walk you through the steps to diagnose and fix the issue, ensuring your morning coffee ritual is uninterrupted.
Key Takeaways
- Identify the common causes of a leaking coffee maker.
- Learn a step-by-step approach to diagnosing the problem.
- Discover simple fixes to common issues with your coffee maker.
- Understand how to prevent future leaks and ensure your maker operates smoothly.
- Find out when it’s necessary to consider replacing your coffee maker.
Understanding Why Coffee Makers Leak
The issue of a coffee maker leaking water is common, but the root cause can vary significantly from one model to another. Understanding why your coffee maker is leaking is crucial for effective repair.
Common Causes of Leakage in Coffee Makers
Leakage in coffee makers can be attributed to several factors, including clogged water channels, damaged seals, or misaligned parts. Regular use can lead to wear and tear, causing leaks.
Types of Coffee Makers and Their Vulnerable Points
Different types of coffee makers have unique vulnerable points. For instance, drip coffee makers are prone to leaks around the water reservoir, while percolator models may leak due to issues with their pumping mechanism.
There are two main types of coffee makers: those that drip hot water once through the coffee grounds and those that percolate, or recycle, the water through the grounds many times. Each type has its specific issues:
- Drip coffee makers versus percolator models have different vulnerable points, such as seals and tubing.
- Single-serve coffee makers have unique potential failure points in their water delivery systems.
- Espresso machines experience pressure-related leak issues, distinct from standard coffee makers.

Tools and Materials Needed for Repair

Before you start repairing your coffee maker, it’s essential to gather the necessary tools and materials. Make sure you have everything you need to avoid any delays or complications during the repair process.
Basic Tools for Disassembly
To disassemble your coffee maker, you will need basic tools such as a screwdriver. Special head screwdrivers, available at larger hardware stores, may be required for certain models. Ensure you have the correct type to avoid damaging the screws.
Safety Precautions Before Starting Repairs
Before starting the repair, ensure your coffee maker is unplugged to prevent electrical shock. Drain all water from the system to prevent spills and electrical hazards. Work on a dry, non-conductive surface when handling electrical components, and be cautious when handling heating elements that may still be hot.
Key safety points to consider include:
– Understand the critical importance of unplugging your coffee maker before beginning any repair work to prevent electrical shock.
– Learn how to properly drain all water from the system before disassembly to prevent spills and electrical hazards.
– Discover the importance of working on a dry, non-conductive surface when handling electrical components.
– Recognise how to safely handle heating elements that may still be hot even after the unit has been unplugged.
– Understand when a repair might be beyond DIY capabilities and could pose safety risks if attempted without professional help.
Diagnosing Your Coffee Maker’s Leaking Problem
To effectively repair your coffee maker, it’s crucial to first identify the source of the leak. If the leak isn’t from overflow water, you’ll need to inspect the machine more closely.
Identifying the Source of the Leak
Start by turning the coffee maker over (while it’s empty) and removing the screws from the bottom of the machine. This will allow you to locate the source of the leak. Be thorough in your inspection to ensure you don’t miss the origin of the issue.
Common Leak Locations and What They Indicate
Different leak locations can indicate various problems. For instance, leaks from the water reservoir often suggest cracks or damaged seals at the reservoir connection points. Leaks around the filter basket may indicate issues with the spray head or basket seating. Water pooling at the base of the machine can point to internal tubing or heating element seal failures. Understanding these signs will help you diagnose the issue accurately.

By identifying the leak’s source, you can take the necessary steps to repair your coffee maker and prevent future leaks.
Coffee Maker Leaking Water Repair: Step-by-Step Guide
A leaking coffee maker can be frustrating, but with a systematic approach, you can repair it efficiently. To start, ensure your coffee maker is unplugged before attempting any repairs to avoid any electrical shocks.
Fixing Leaks from the Water Reservoir
Leaks from the water reservoir are often due to cracks or worn-out seals. Inspect the reservoir for any visible damage and replace it if necessary. Ensure all connections are secure and seals are intact to prevent future leaks.
Repairing Leaks in the Brewing System
The brewing system, including the brew basket and tubes, can be a common source of leaks. Check for any blockages or damage in the tubes and clean or replace them as needed. Ensure the brew basket is properly aligned and seated.
Addressing Leaks from the Base and Warming Element
Leaks from the base or warming element can be due to worn-out seals or damaged heating elements. Inspect these components for any signs of wear or damage. Replacing the seals or the heating element may be necessary.
| Component | Common Issues | Fix |
|---|---|---|
| Water Reservoir | Cracks, worn-out seals | Inspect and replace reservoir or seals |
| Brewing System | Blockages, damaged tubes | Clean or replace tubes, align brew basket |
| Base and Warming Element | Worn-out seals, damaged heating element | Replace seals or heating element |
By following these steps, you can identify and fix leaks in your coffee maker, ensuring it operates efficiently and safely.
Preventative Maintenance to Avoid Future Leaks
Maintaining your coffee maker is essential to avoid future leaks and ensure it continues to function properly. By adopting a few simple habits, you can significantly reduce the risk of leakage and prolong the lifespan of your device.
Regular Cleaning and Descaling
Regular cleaning and descaling are vital to prevent scale buildup and bacterial growth. Descaling should be done every 3-6 months, depending on usage. Use a mixture of water and vinegar or a descaling solution to remove mineral deposits. Clean the brew basket and carafe regularly to prevent coffee oil buildup.
Signs Your Coffee Maker Needs Attention
Be aware of the early warning signs that indicate your coffee maker needs maintenance. These include:
- Slower brewing times, which may indicate blockages in the water lines.
- Unusual sounds during the brewing cycle, potentially signaling issues with the pump or heating element.
- Changes in coffee taste, which could be due to scale buildup affecting water flow and temperature.
- Minor moisture signs around the coffee maker, which could develop into significant leaks if not addressed.
Recognising these signs early can help you take corrective action before a minor issue becomes a major problem.
Conclusion
You’ve now gained the knowledge needed to repair your coffee maker and prevent future leaks. By addressing the leak promptly, you’ve avoided potential damage to your appliance and kitchen surfaces. Regular maintenance, including cleaning and descaling, will extend the life of your coffee maker. Consider the environmental and financial benefits of repairing your existing unit. Understanding the inner workings of your coffee maker will also inform your future purchasing decisions. Apply these skills to other small kitchen appliances for a more self-sufficient kitchen.