Have you ever wondered how to restore your beloved rattan furniture to its former glory? Over time, the woven cane on headboards can become loose, leaving your once beautiful piece of furniture looking worn and tired.
This comprehensive guide will walk you through the simple process of reattaching loose cane, helping you to repair rattan furniture effectively. Understanding the structure of cane weaving is crucial before attempting any repairs to prevent further damage.
Key Takeaways
- Learn how to restore your rattan furniture to its original state.
- Understand the importance of cane weaving structure.
- Discover simple household tools and materials needed for repair.
- Follow a step-by-step guide suitable for beginners.
- Extend the life of your cane headboard while maintaining its aesthetic appeal.
Understanding Cane Headboards and Common Issues
Understanding the causes of loose cane headboards is crucial for effective repair. Cane headboards are a popular choice for bedroom furniture due to their aesthetic appeal and durability. However, over time, they can become loose and damaged, requiring attention and repair.
What Causes Cane Headboards to Loosen Over Time
Cane headboards can loosen due to various factors, including regular use, changes in humidity, and wear and tear. As the cane weave is subjected to stress and strain, it can start to sag or bulge, leading to a loose or detached appearance. Broken rattan strands are a common issue, and if not addressed, can lead to further damage.
Signs Your Cane Headboard Needs Repair
To determine if your cane headboard needs repair, look out for signs such as visible sagging or bulging in the cane weave, loose or detached cane strands around the edges, and broken or frayed cane pieces within the weave pattern. Other indicators include a rattling sound when the headboard is moved, discoloration, or brittleness in certain areas. You may notice:
- Loose or completely detached cane strands around the edges.
- Broken or frayed cane pieces within the weave.
- A rattling sound when touching or moving the headboard.
- Discoloration or brittleness in certain areas.
Addressing these issues promptly can help prevent further damage and extend the lifespan of your cane headboard.
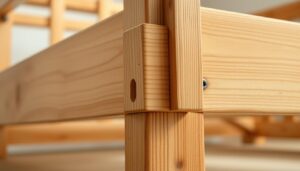
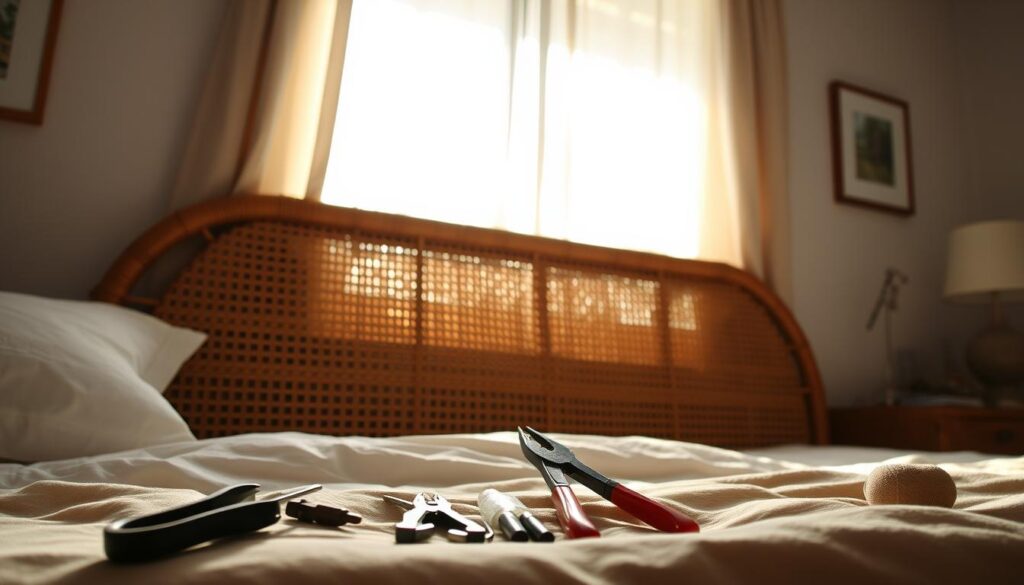
Essential Tools and Materials for Reattaching Loose Cane
Before you start repairing your cane headboard, it’s crucial to gather the necessary tools and materials.
Basic Tools You’ll Need
To begin the repair, you’ll need some basic tools. These typically include a sharp utility knife or scissors for cutting cane, a measuring tape for measuring and marking the headboard, and a clamp to hold the cane in place while the adhesive dries.
Having the right tools will make the process smoother and ensure a professional-looking finish.
Types of Adhesives and Replacement Materials
Selecting the right adhesive is crucial for securing loose rattan pieces. Super Glue (cyanoacrylate) works well for quick fixes and small areas, while wood glue or carpenter’s glue is ideal for reattaching cane to wooden frames due to its flexibility after drying.
For larger repair areas, consider using epoxy-based adhesives, which provide excellent strength but require mixing and have a specific working time.
When it comes to replacement materials, you’ll need to match the original weave’s thickness and color as closely as possible. Options include pre-woven cane webbing sheets, natural rattan binding cane, and synthetic cane materials.

Preparing Your Cane Headboard for Repair
Preparing your cane headboard for repair is a crucial step that ensures a successful outcome. To start, you need to make sure your headboard is clean and free from dirt and debris, which can interfere with the repair process.
Cleaning the Headboard Properly
Cleaning your cane headboard is an essential step before you begin the repair. Use a soft-bristled brush or a vacuum cleaner with a gentle suction setting to remove any loose dirt or dust from the rattan surface. For more thorough cleaning, you can dampen a cloth with water, but be cautious not to soak the furniture as this can cause damage to the material.

Identifying and Assessing Damaged Areas
The next step is to identify the damaged areas that need attention. Look out for any loose or broken strands of rattan, as well as any cracks or holes in the weave. To do this effectively:
- Carefully examine the entire cane surface in good lighting.
- Run your fingers gently across the cane to feel for areas that give too much or move when pressed.
- Mark damaged areas with small pieces of masking tape to help you remember all spots needing repair.
- Assess whether each damaged area requires simple reattachment or replacement of broken strands.
By following these steps, you can ensure that your cane headboard is properly prepared for repair, and you can achieve a professional-looking result.
| Assessment Criteria | Description | Action Required |
|---|---|---|
| Loose Strands | Areas where the cane is loose but not broken | Reattachment |
| Broken Strands | Areas where the cane is broken | Replacement |
| Cracks or Holes | Areas with cracks or holes in the weave | Repair or Replacement |
Step-by-Step Guide to Reattach Loose Cane Headboard
Reattaching a loose cane headboard can seem daunting, but with the right steps, you can restore it to its original beauty. This process involves several key stages that, when followed carefully, can lead to a successful repair.
Removing Broken or Damaged Strands
The first step in repairing your cane headboard is to remove any broken or damaged strands. This will give you a clean slate to work with and ensure that your repair is effective. Use a pair of pliers to gently pull out the damaged strands, taking care not to damage the surrounding area.
Soaking New Cane Material
Once you’ve removed the damaged strands, you’ll need to soak your new cane material to make it pliable and ready for weaving. Soak the cane in warm water for about 30 minutes to an hour, or until it becomes flexible. This step is crucial in repairing rattan furniture, as it allows the material to be manipulated without breaking.
Applying Adhesive to Loose Strands
Before weaving the new cane material into place, apply a small amount of adhesive to the loose strands to secure them. Use a suitable adhesive for rattan strands, and apply it sparingly to avoid creating a mess. This will help hold the new strands in place as you weave them through the existing pattern.
Weaving and Securing New Cane Pieces
Now it’s time to weave the soaked cane pieces into the existing pattern. Use a pair of pliers to manipulate the new strands into place, gently weaving them through the existing weave. Refer to your reference photos to ensure you’re replicating the original weave pattern correctly. Begin weaving from the edge of the headboard, working your way inward to maintain tension and alignment.
- Use needle-nose pliers to guide the flexible cane through tight spaces without damaging surrounding strands.
- For complex patterns, consider using a blunt needle or crochet hook to lift existing strands while threading new ones underneath.
- Maintain consistent tension as you weave to avoid breaking the cane or causing the repair to sag.
| Step | Description | Tools Needed |
|---|---|---|
| 1 | Remove damaged strands | Pliers |
| 2 | Soak new cane material | Warm water |
| 3 | Apply adhesive | Adhesive, brush |
| 4 | Weave new cane pieces | Pliers, needle-nose pliers |
By following these step-by-step instructions, you can successfully reattach a loose cane headboard and restore it to its original condition.
Finishing Touches for a Professional-Looking Repair
Once you’ve reattached the loose cane, the finishing touches will make all the difference in the quality of your repair. To ensure a professional-looking result, you’ll need to attend to a few final details.
Trimming Away Excess Material
After reattaching the cane, use a sharp utility knife or scissors to trim away any excess material. This will help create a neat and tidy finish. Be careful not to cut too close to the weave, as this can cause damage.
Tucking Ends Beneath Existing Weave
To secure the new cane in place, tuck the ends beneath the existing weave. This will help prevent the cane from coming loose over time. Use a gentle touch to avoid damaging the surrounding area.
Allowing Proper Drying Time
It’s crucial to allow the glue to dry completely before using the furniture. Check the manufacturer’s instructions for the recommended drying time, but generally, you should wait at least 24 hours. Factors such as humidity and temperature can affect drying time, so be patient and let the glue dry for the recommended amount of minutes. In some cases, this may take several minutes or even hours, depending on the type of glue and environmental conditions. Ensure the area is well-ventilated to prevent the buildup of moisture, which can be affected by the presence of water.
| Drying Conditions | Recommended Waiting Time |
|---|---|
| Normal Room Temperature | 24 hours |
| Humid Environment | 48 hours or more |
| Well-Ventilated Area | 24 hours |
To ensure a strong bond, avoid touching or testing the repair during the drying period. Once the glue is dry, gently test the repair by applying light pressure with your fingertips. This will help you verify that the cane feels secure before returning the headboard to normal use.

Addressing Other Common Cane Furniture Problems
Beyond the cane headboard, other rattan furniture items can also experience common issues that are relatively easy to fix. Cane and rattan furniture, while durable, can succumb to wear and tear over time, leading to problems such as sagging seats or wobbly structures.
Fixing Sagging Seats and Surfaces
Sagging seats and surfaces are common issues with cane furniture, often resulting from prolonged use or exposure to varying environmental conditions. To address this, you first need to identify the cause of the sag. If it’s due to loose or broken strands, you’ll need to repair or replace them. Soaking new rattan material in water for at least 30 minutes can make it more pliable for weaving into the existing structure.
To repair sagging areas, start by removing any broken strands. Then, weave in new material, securing it with a suitable adhesive. Ensure the new strands are tightly woven to provide adequate support.
| Issue | Solution |
|---|---|
| Sagging seats | Replace or repair broken strands, secure with adhesive |
| Loose weave | Tighten weave, apply adhesive to secure |
Repairing Wobbles and Structural Issues
Wobbliness in cane furniture is often due to uneven ground or structural damage. To fix this, first ensure the floor is level. If the issue persists, inspect the furniture legs for cracks or damage. Repairing cracks with wood glue and clamping until dry can stabilize the structure.
Key steps to repair wobbles:
- Check and level the ground
- Inspect and repair damaged legs
- Tighten loose joints and screws
For more severe structural issues, consider consulting a professional furniture restorer, especially for antique or complex pieces.
Maintenance Tips to Prevent Future Damage
To keep your cane headboard in excellent condition, regular maintenance is crucial. A little time invested in caring for your rattan furniture can significantly extend its lifespan and prevent the need for frequent repairs.
Regular Cleaning Practices
Regular cleaning is essential to maintain the appearance and durability of your cane headboard. Clean your furniture regularly with a soft-bristled brush or a damp cloth to remove dirt and grime. Avoid using harsh chemicals or abrasive cleaning tools, as these can damage the rattan material. For more thorough cleaning, you can use a mild soap solution, but ensure you dry the area thoroughly afterward.
Proper Care and Storage of Cane Furniture
Proper care and storage are vital to prevent damage to your cane headboard. Position your headboard away from direct sunlight, radiators, and air conditioning vents to avoid extreme temperature fluctuations and UV exposure. Maintain optimal humidity levels in your bedroom, around 40-60%, to prevent the cane from becoming too dry or too damp. When not in use, consider covering your headboard or storing it in a dry, cool place.
Additional tips include applying a light coat of furniture wax or lemon oil to the wooden frame every 6-12 months and lifting the headboard when moving it to prevent stress on the cane panels and wooden frame joints.
Conclusion
Restoring your cane headboard can be a rewarding experience, preserving its aesthetic appeal and value. By following this comprehensive guide, you’ve learned how to reattach loose cane and extend the life of your furniture. To attach cane webbing to wood or repair other rattan pieces, apply the techniques outlined here. Remember to soak new rattan material properly and glue loose strands securely. Regular maintenance will reduce the need for future repairs. With patience and the right tools, you can successfully repair rattan furniture and enjoy a beautifully restored headboard.
By doing so, you’re not only preserving craftsmanship but also making an environmentally friendly choice. If needed, don’t hesitate to consult a professional for complex repairs.