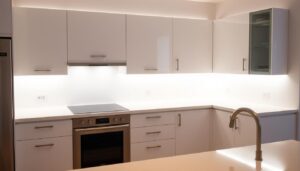
Automating your outdoor lights with a photocell sensor can significantly enhance your home’s energy efficiency and security. A photocell is a device that detects natural light levels, turning your lights on at dusk and off at dawn. This feature is particularly useful for LED lights and other types of outdoor lighting, ensuring they operate only when necessary.
By installing a photocell sensor, you can enjoy the convenience of automated lighting, reducing unnecessary energy consumption. This guide will walk you through the process, providing a step-by-step installation guide and troubleshooting tips.
Key Takeaways
- Understand the function and benefits of photocell sensors in automating outdoor lighting.
- Learn how to install a photocell sensor to your existing outside light fixture.
- Discover the energy efficiency and security enhancements provided by automated lighting.
- Follow a step-by-step guide tailored for DIY beginners.
- Troubleshoot common issues that may arise during installation.
Understanding Photocell Sensors for Outdoor Lighting
Understanding photocell sensors is key to optimising your outdoor lighting. A photocell sensor is a device that detects the ambient light level and automatically controls your outdoor lighting fixtures. This technology ensures that your lights are turned on and off according to the availability of natural light, thus providing an efficient and convenient way to manage your outdoor lighting.
What is a Photocell Sensor?
A photocell sensor is essentially a light-sensitive device that contains a photoresistor, also known as a light-dependent resistor. The resistance of this component changes in response to the amount of light it is exposed to, allowing the sensor to differentiate between day and night. During the day, the photocell’s resistance is low, keeping the circuit open and the lights off. As darkness falls, the resistance increases, closing the circuit and activating the LED lights.
How Photocell Sensors Function
Modern photocell sensors are designed to ignore brief changes in light, such as those caused by car headlights or lightning, to prevent unnecessary cycling of the lights. This functionality helps to prolong the lifespan of the lighting system. The technology behind photocells has evolved significantly, offering improved sensitivity, weather resistance, and compatibility with various types of LED and traditional lighting systems.
| Functionality | Description | Benefits |
|---|---|---|
| Light Detection | Detects ambient light levels | Automatic control of outdoor lighting |
| Resistance Change | Changes resistance based on light exposure | Differentiates between day and night |
| Circuit Control | Controls the circuit to turn lights on/off | Efficient management of lighting system |
By understanding how photocell sensors function, you can select the right type for your specific outdoor lighting needs and ensure proper installation for optimal performance over time.
Benefits of Adding a Photocell Sensor to Outside Light
You can improve your outdoor lighting’s efficiency by incorporating a photocell sensor. This upgrade can bring numerous benefits, including energy efficiency, convenience, and environmental advantages.
Energy Efficiency and Cost Savings
Installing a photocell sensor can reduce electricity consumption by up to 30%, as lights will only operate when natural light is insufficient. This results in significant cost savings over time. The initial investment in a photocell sensor typically pays for itself within 6-12 months through energy savings.
| Benefits | Description |
|---|---|
| Energy Savings | Reduces electricity consumption by up to 30% |
| Cost-Effective | Pays for itself within 6-12 months |
| Extended Lifespan | Prevents unnecessary operation during daylight hours |
Convenience and Security Benefits
The automatic operation of outdoor lights equipped with photocell sensors eliminates the need to remember to turn lights on and off, providing convenience while ensuring your property remains well-lit during nighttime hours for enhanced security.

Environmental Impact
Photocell-equipped led lights contribute to reduced light pollution by operating only when necessary, supporting environmental conservation efforts. This makes led lighting an eco-friendly alternative, ideal for outdoor lights used for security lighting purposes.
By installing a photocell sensor, you can enjoy these benefits while contributing to a more sustainable environment.
Tools and Materials Needed to Add Photocell Sensor

To successfully integrate a photocell sensor into your outdoor lighting, you’ll need the right tools and materials. This ensures a smooth installation process and optimal performance of your outdoor lights.
Essential Tools for Installation
Gathering the necessary tools is the first step in installing a photocell device. You’ll need:
- A voltage tester to ensure safety
- Wire strippers and wire nuts for connecting wires
- Electrical tape for insulation
- Screwdrivers (both flathead and Phillips) for various tasks
- Pliers for gripping and bending
- A ladder for safe access to your outdoor light fixture
Types of Photocell Sensors Available
Selecting the appropriate photocell sensor is crucial. You have several options, including:
- In-line photocells that wire directly into the circuit
- Screw-in photocells that fit between the light socket and bulb
- Swivel-mount photocells for flexible positioning
By choosing the right photocell sensor and having the necessary tools, you can efficiently add a photocell device to your outdoor lights, enhancing their functionality and energy efficiency.
Step-by-Step Guide to Add Photocell Sensor to Outside Light
The process of adding a photocell sensor to your outside light involves several key steps that must be followed carefully. To ensure a successful installation, you will need to prepare your workspace, remove the existing light fixture, identify and prepare the wires, install the photocell device, connect the wires properly, and secure the installation.
Preparation and Safety Measures
Before starting the installation, it is crucial to take necessary safety precautions. Always begin by turning off the power at the circuit breaker, not just the light switch, and verify that the power is off using a voltage tester. This step is essential to ensure your safety during the installation process.
Removing the Existing Light Fixture
Carefully remove the existing light fixture by unscrewing the mounting hardware and gently pulling it away from the wall or ceiling. Take note of how the current wiring is connected for reference during reinstallation. This will make it easier to connect the new photocell sensor.

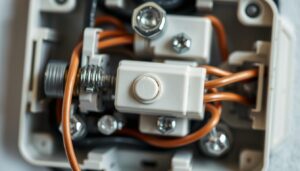
Identifying and Preparing Wires
Identify the three main wire types in your electrical box: the black (hot) wire, white (neutral) wire, and bare copper or green (ground) wire. Proper identification is crucial for safe and effective photocell installation. Cut the cable’s insulation with a plier, separate the cables, and strip them to prepare for connection.
Installing the Photocell Device
Hang a conduit or junction box on the wall and install the photocell device on it. Intertwine the other end of the photocell with the cables, ensuring a secure connection. This step is vital for the proper functioning of the photocell sensor.
Connecting the Wires Properly
When installing an in-line photocell sensor, connect the black wire from your power source to the black wire on the photocell, then connect the red wire from the photocell to the black wire of your light fixture. The white neutral wires from the power source and light fixture should be connected together, while the ground wires should be connected to each other and to the metal parts of the fixture for safety.
Securing the Installation
After making all connections with wire nuts, carefully tuck the wires back into the junction box, mount the fixture securely, and apply weatherproof sealant around the edges to prevent water infiltration. Finally, test your installation by covering the photocell sensor to simulate darkness and then exposing it to light to ensure it functions correctly.
By following these steps, you can successfully add a photocell sensor to your outside light, enhancing the energy efficiency and convenience of your outdoor lighting system.
Optimal Positioning and Troubleshooting
To get the most out of your photocell sensor, it’s essential to position it correctly. The placement of your photocell sensor plays a significant role in its effectiveness and longevity. A well-positioned photocell sensor ensures that your external lights operate efficiently, providing the desired lighting without unnecessary energy consumption.
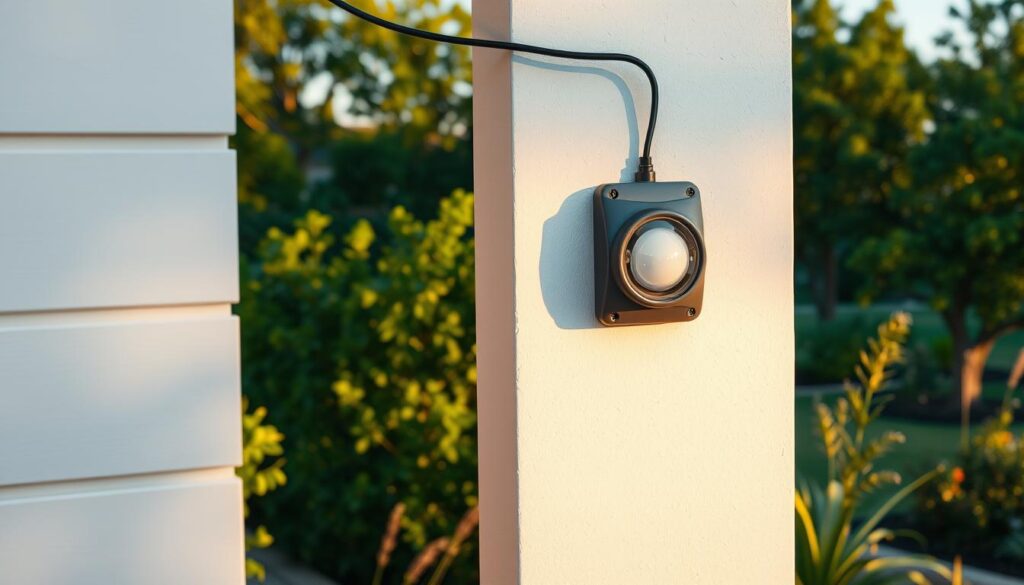
Best Placement for Your Photocell Sensor
The ideal location for your photocell sensor is on the north side of your property, where it won’t receive direct sunlight. Excessive exposure to sunlight can cause premature failure or erratic operation of the sensor over time. If a north-facing placement isn’t possible, consider positioning the sensor under an eave or in a shaded area. This protects it from direct sunlight while allowing it to accurately detect ambient light levels throughout the day. For instance, placing it under an eave can shield it from harsh sunlight and heavy rain, thus prolonging its lifespan.
Common Issues and Solutions
Despite their reliability, photocell sensors can sometimes experience issues. Common problems include cycling, where the lights turn on and off repeatedly. This is often caused by the sensor being affected by the light it’s controlling or by nearby artificial light sources. If your lights stay on during daylight hours, the photocell may be obstructed by debris, positioned in deep shade, or failing due to age. Try cleaning the sensor window or repositioning it before considering replacement.
Maintenance Tips for Longevity
To extend the lifespan of your photocell sensor, regular maintenance is crucial. Clean the sensor window every 3-6 months to remove dust, pollen, and other debris that might block light detection. Additionally, check wire connections annually for signs of corrosion or loosening. Protecting your photocell sensor from heavy rain and snow is also vital, as moisture can infiltrate the unit and cause short circuits or corrosion of internal components. By following these maintenance tips, you can ensure your photocell sensor operates effectively for its expected lifespan of 5-7 years.
Conclusion
Adding a photocell sensor to your external light is a simple yet effective way to boost your home’s security and energy efficiency. This DIY project offers numerous benefits, including convenience, cost savings, and enhanced safety around your property. To ensure optimal performance, remember to position the photocell sensor correctly, avoiding direct sunlight and artificial light sources. Regular maintenance will also extend the lifespan of your photocell-equipped fixture. For more detailed installation guidance, please visit https://chi-swear.com/how-to-install/. By doing so, you’ll create a more efficient and convenient home lighting system.