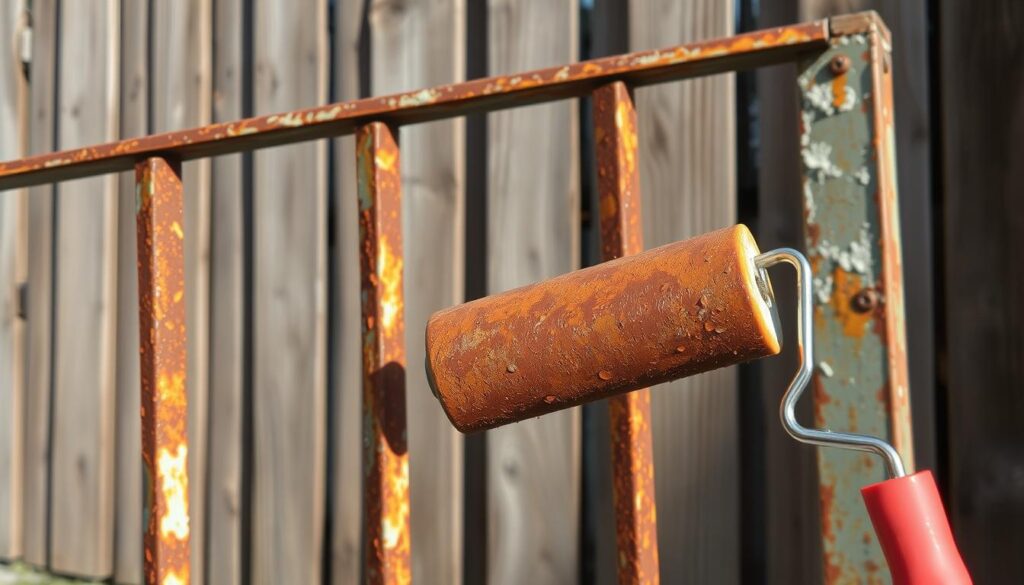
Are you tired of looking at rusty metal railings that detract from your home’s appearance? Reviving them is a feasible task that can significantly enhance your property’s curb appeal. Rusty railings not only look unsightly, but they can also pose safety risks as their structural integrity becomes compromised over time.
With the right tools and techniques, you can give your railings a new lease on life. This comprehensive guide will walk you through the process, from preparation to the final protective coat, ensuring a professional-looking finish that will last for years.
Key Takeaways
- Transforming rusty railings is a straightforward home improvement project.
- Proper preparation is crucial for a long-lasting finish.
- Using quality materials ensures professional-looking results.
- The project requires patience, particularly during the preparation phase.
- Understanding the complete process helps in planning and execution.
Essential Tools and Materials You’ll Need

Gathering the correct equipment is the first step towards successfully repainting your metal railings. To achieve a professional finish, you’ll need to assemble the right tools and materials.
Safety Equipment
Ensure you have safety goggles and gloves to protect yourself from paint splatters and chemical exposure. Safety should always be your top priority when working with potentially hazardous materials.
Preparation Tools
For preparation, you’ll need wire brushes or a wire wheel for removing rust, and sandpaper for smoothing out the metal surfaces. Proper preparation is key to a durable finish.
Painting Supplies
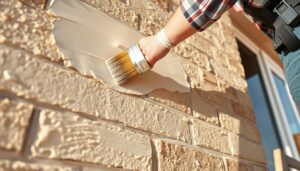
Choose a high-gloss DTM paint for the best results on metal surfaces. Use an oil-based primer specifically designed for metal to enhance adhesion and durability. Apply the paint using high-quality brushes or a roller suitable for exterior use.
Safety First: Testing for Lead Paint
Lead paint can be a significant hazard, so it’s essential to test for it before starting your repainting project. If your metal railings were painted before the late 1990s, there’s a good chance they contain lead.
How to Test for Lead Paint
You can purchase a lead paint testing kit or hire a certified professional to conduct the test. These kits usually involve swabbing the painted surface and waiting for the results.
What to Do If You Find Lead Paint
If lead paint is detected, you must take precautions. Consider hiring a professional contractor certified in lead paint removal services to handle the job safely.
| Safety Measures | Description |
|---|---|
| Seal off the area | Use plastic sheeting to contain the work area |
| Wear protection | Use a HEPA filter respirator for adequate protection |
| Minimise dust | Employ wet methods to reduce lead dust |
After completing the work, thoroughly clean the area using HEPA vacuums and wet cleaning methods to remove any remaining lead dust.

Preparing Your Rusty Metal Railings
Preparing your rusty metal railings is a vital step in the repainting process. This step ensures a smooth, durable finish that will last for years to come.
Setting Up Your Work Area
Before you begin, set up your work area to prevent damage and ensure safety. Cover the surrounding surfaces with drop cloths or plastic sheets to protect them from dust and paint splatters.
Removing Rust and Flaking Paint
Start by removing any loose rust and flaking paint from your railings. Use a wire brush or a scraper to gently remove the rust, taking care not to damage the metal surface. After removing the rust, use a vacuum or a tack cloth to remove any remaining dust.
Sanding Techniques for Metal Surfaces
For metal surfaces, sanding is crucial. Begin with a coarser grit sandpaper (80-100 grit) on heavily rusted areas, then progress to a medium grit (150 grit) for general surface preparation. Use sanding sponges for intricate areas or an angle grinder with a flap disc for larger flat areas.
| Sanding Method | Grit | Application |
|---|---|---|
| Coarse Sandpaper | 80-100 grit | Heavily rusted areas |
| Medium Sandpaper | 150 grit | General surface preparation |
| Sanding Sponges | Varies | Intricate or curved surfaces |

Cleaning and Priming the Surface
To achieve a durable paint finish, you must first clean and prime your rusty metal railings. This crucial step ensures a strong bond between the metal and the paint, leading to a longer-lasting result.
Thoroughly Cleaning the Railings
Begin by thoroughly cleaning your metal railings to remove dirt, grime, and any loose rust. This process helps create a clean surface for priming and painting. Use a wire brush or a scrubber to remove flaking rust and dirt, and then wipe the surface clean with a damp cloth.
Choosing the Right Metal Primer
Selecting the right primer is vital for a successful painting project. For rusty metal railings, choose a primer specifically designed to combat rust and corrosion. You can find more information on the best primers for rusty metal railings on our website.
Applying Primer Correctly
To apply primer correctly, start by stirring it thoroughly and pouring it into a paint tray. Use a 4-inch fabric roller to cover larger areas evenly, and switch to a paintbrush for intricate details and hard-to-reach areas. Apply the primer in thin, even coats, allowing it to dry according to the manufacturer’s instructions. Make sure to cover all surfaces completely, paying extra attention to edges and undersides where rust tends to accumulate.
- Applying primer correctly creates the foundation for a successful paint job, so take your time to ensure even coverage and proper adhesion.
- Use a combination of a roller for flat surfaces and a brush for detailed areas to achieve comprehensive coverage.
- Allow the primer to dry completely according to the manufacturer’s recommended time before applying paint.
Painting Techniques for Metal Railings
To achieve a professional-looking finish on your metal railings, it’s essential to master the right painting techniques. This involves selecting the appropriate paint, applying it using the correct method, and ensuring multiple coats for durability.
Selecting the Right Paint for Exterior Metal
When choosing paint for exterior metal railings, consider using a high-quality, exterior-grade paint specifically designed for metal surfaces. Zinsser AllCoat is a popular choice due to its ease of application and excellent finish. You can find suitable paints at most hardware stores or home improvement centres.

Application Methods: Brushes vs. Rollers
The choice between using a brush or a roller depends on the design of your metal railings. For intricate details, a brush is preferable, while a roller can be used for larger, smoother areas. Using the right tool ensures a smooth, even application.
Applying Multiple Coats for Durability
Apply two coats of paint, allowing the first coat to dry completely before applying the second. This ensures a durable finish that can withstand various weather conditions. Use smooth, even strokes to maintain a professional-looking finish throughout the process of painting.
For railings exposed to harsh conditions, consider a third coat for added protection, especially on horizontal surfaces.
Maintaining Your Newly Painted Railings
Ensuring your railings remain in good condition involves a few simple steps that you can follow. Regularly inspecting your railings for signs of wear or damage is vital. You should touch up scratches or chips promptly to prevent rusting, and clean the railing regularly with a mild detergent and water solution.
For optimal results, inspect your railings at least twice yearly, ideally in spring and autumn. Look for any chips, scratches, or early signs of rust that should be addressed promptly. Cleaning your railings every 3-6 months using a mild detergent and water solution is also recommended. For more information on repainting rusty metal handrails, you can visit This Old House.
Applying a fresh coat of paint every few years or as needed will also help maintain their appearance. Consider applying a clear sealant over the topcoat for additional protection against weather and daily wear. This extra layer will make maintenance easier and the paint more durable. By following these steps, you can extend the life of your painting work and keep your railings looking their best.