Are you tired of looking at dull, stained tiles in your bathroom or kitchen? If you live in an area with hard water, you’re likely no stranger to the unsightly effects of limescale build-up on your tile surfaces. Limescale can quickly diminish the appearance of your tiles, making them look dirty and unclean, even after a thorough cleaning.
Regular maintenance is crucial to prevent stubborn limescale build-up that becomes increasingly difficult to remove. In this guide, we’ll provide you with comprehensive solutions for different tile types and severity of limescale deposits, helping you restore your tiles to their original shine without breaking the bank.
Key Takeaways
- Effective methods for preventing limescale build-up on your tiles
- Natural and commercial cleaning solutions for removing limescale stains from tiles
- Tips for maintaining your tile surface to prevent future staining
- Guidance on choosing the right cleaning products for your tiles
- Simple techniques for restoring the shine to your tiles
Understanding Limescale and Why It Forms on Tiles
If you’re struggling with limescale stains on your tiles, understanding what causes them is crucial. Limescale is a hard, chalky deposit that forms when hard water evaporates, leaving behind minerals such as calcium carbonate.
What is Limescale?
Limescale is primarily composed of calcium and magnesium minerals, which are present in hard water. When this water evaporates, especially in warm environments like bathrooms, these minerals precipitate out of solution and form a hard deposit on surfaces, including tiles.
Why Hard Water Areas Are More Susceptible
Regions with hard water are more prone to limescale build-up due to the higher concentration of dissolved minerals in the water. The geological characteristics of an area and its local water supply can contribute to the hardness of the water, making some regions more susceptible to limescale issues. As a result, limescale can damage tile surfaces and grout over time if left untreated, particularly on porous tile materials.
How to Identify Limescale Stains on Different Tile Types
The appearance of limescale stains varies across different tile types, making identification key. Limescale can manifest differently depending on the tile material and surface characteristics.
Appearance on Ceramic Tiles
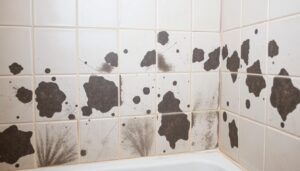
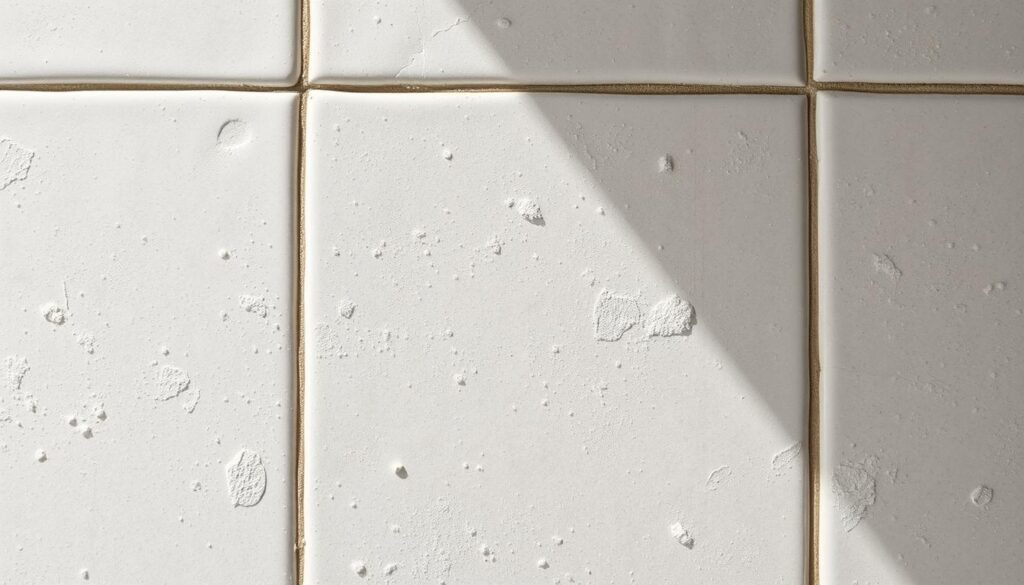
On ceramic tiles, limescale stains often appear as a white, chalky residue or cloudy patches. These stains can be particularly noticeable on glossy finishes.
Appearance on Natural Stone Tiles
Natural stone tiles, such as marble and limestone, are more porous and tend to show limescale stains as deeper discolorations. The stains can penetrate the stone, making them more challenging to remove.
Differentiating Limescale from Other Stains
To distinguish limescale from other stains like soap scum or dirt, look for its characteristic appearance and location. Limescale tends to accumulate around taps and shower enclosures. A simple acid test using vinegar can confirm the presence of limescale; it will fizz upon application.
| Tile Type | Appearance of Limescale | Common Locations |
|---|---|---|
| Ceramic Tiles | White, chalky residue or cloudy patches | Around taps, shower enclosures |
| Natural Stone Tiles | Deeper discolorations, penetrating the stone | Edges, grout lines, and areas around fixtures |

Effective Ways to Remove Limescale Stains from Tiles
The unsightly appearance of limescale stains on tiles can be easily tackled with the right cleaning methods. Limescale, a common problem in areas with hard water, can leave unsightly marks on your tiles, but there are several effective ways to remove these stains.

Vinegar and Baking Soda Method
One of the most effective and eco-friendly ways to remove limescale stains is by using a mixture of vinegar and baking soda. The acid in the vinegar helps break down the mineral deposits in limescale, while the baking soda acts as a gentle abrasive to remove the stains.
To apply this method, mix white wine vinegar with baking soda to form a paste. Apply the paste to the limescale stains using a scouring pad for ceramic tiles or a softer microfibre cloth for patterned tiles. Gently press the paste onto the stains without scrubbing. Let it sit for a while before rinsing off with fresh water and drying with a towel.
Lemon Juice Technique
Lemon juice is another natural alternative for removing limescale stains, particularly effective for light to moderate build-up. The acidity in lemon juice helps dissolve the mineral deposits, making it easier to remove the stains.
Apply lemon juice directly to the limescale stains and let it sit for a few minutes. Then, rinse off with water and dry the area thoroughly.
Commercial Limescale Removers
For more stubborn limescale stains, commercial limescale removers can be highly effective. These products contain specific ingredients designed to break down and remove limescale deposits. When choosing a commercial remover, consider the type of tiles you have and the severity of the limescale build-up.
Always follow the manufacturer’s instructions and take necessary safety precautions, such as wearing gloves and ensuring good ventilation.
Specialist Cleaning Methods for Different Tile Materials
To tackle limescale stains on your tiles, it’s crucial to first identify the tile material and choose the appropriate cleaning method. Different tile materials demand distinct cleaning approaches to effectively remove limescale without causing damage.
Ceramic and Porcelain Tiles
Ceramic and porcelain tiles are durable and resistant to most cleaning agents. For these tiles, a mixture of vinegar and baking soda can be effective. Alternatively, a commercial limescale remover can be used. It’s essential to rinse the tiles thoroughly after cleaning to prevent any residue from forming.
Natural Stone Tiles
Natural stone tiles, such as marble, travertine, and limestone, require more caution. Acidic cleaners, including vinegar, should be avoided on marble as they can cause etching. Instead, use a cleaner specifically designed for natural stone. The Mattstone Natural Stone Sealer is a recommended product that protects the stone while allowing it to breathe.
Glass and Mosaic Tiles
For glass and mosaic tiles, a gentle cleaning approach is necessary to maintain their shine and prevent damage to the grout lines. A mixture of water and a mild detergent is often sufficient. For more stubborn limescale stains, a product specifically designed for glass and mosaic tiles should be used.
After cleaning, applying a specialist sealant or protector can help reduce future limescale adhesion. Products like the LTP Porcelain Tile Sealer are ideal for polished tiles, as they do not affect the polished finish. Always test any cleaning solution on an inconspicuous area first, particularly for natural stone and decorative tiles.
Tackling Limescale in Grout and Hard-to-Reach Areas
The porous nature of grout makes it susceptible to limescale deposits, complicating cleaning efforts. To effectively tackle this issue, you need to understand the right techniques and tools for the job.
Tools for Effective Grout Cleaning
For cleaning grout lines, a stiff-bristled grout brush or an old toothbrush can be particularly effective. These tools allow you to scrub away limescale deposits without damaging the surrounding tile. For more thorough cleaning, consider using specialized grout cleaning tools available in UK stores.

Removing Limescale from Corners and Edges
To reach difficult corners and edges, use cotton buds soaked in cleaning solution. This technique enables you to target limescale accumulation in tight spaces without spreading it further. For more severe cases, a small, soft-bristled brush can also be useful.
Dealing with Severe Build-up
For severe limescale build-up, apply a cleaning solution and let it sit before scrubbing. In cases where limescale damage is extensive, consider consulting a professional or potentially replacing the grout. Learn more about removing hard water.
| Cleaning Method | Effectiveness | Ease of Use |
|---|---|---|
| Grout Brush | High | Easy |
| Cotton Buds | Medium | Moderate |
| Specialized Grout Cleaner | High | Easy |
Preventing Future Limescale Build-up on Tiles
The key to maintaining spotless tiles lies in understanding how to prevent limescale formation. By adopting a few simple habits and using the right products, you can significantly reduce the occurrence of limescale on your tiles.
Daily Habits to Reduce Limescale Formation
Daily habits such as wiping down wet surfaces after use and utilizing a squeegee on shower tiles can greatly minimize limescale formation. Rinsing your shower cubicle and bathtub with cold water after use also helps, as cold water forms fewer lime deposits than warm water.
Water Softening Solutions
Various water softening solutions are available for homes in the UK, including whole-house systems and shower head filters that reduce mineral content in the water. These solutions can be highly effective in reducing limescale.
Protective Sealants and Treatments
Applying protective sealants to your tiles creates a barrier against limescale adhesion. The frequency of reapplying these sealants depends on the water hardness and usage frequency. For more information on removing hard water stains, visit Tile Giant’s guide.
| Preventative Measure | Effectiveness | Maintenance Frequency |
|---|---|---|
| Daily Wiping | High | Daily |
| Water Softening | Very High | Quarterly |
| Protective Sealants | High | Every 6-12 months |
Conclusion: Maintaining Spotless Tiles in Hard Water Areas
Keeping your tiles free from limescale requires a tailored cleaning schedule and the right techniques for your specific tile type. To maintain a spotless floor, it’s crucial to both remove existing limescale stains and prevent future build-up.
Consistent maintenance is more effective and less labour-intensive than occasional deep cleaning. By identifying your tile material and selecting the appropriate cleaning methods, you can avoid damage and ensure your tiles continue to shine. Even in areas with hard water, it’s possible to maintain a sparkling floor with the right combination of techniques and preventative measures.
Consider creating a personalized cleaning schedule based on your specific water hardness and tile types. Natural cleaning methods can be just as effective as commercial products for regular maintenance. Properly maintained tiles not only look better but will also last longer, providing better value in the long term. For homes in particularly hard water areas, consider investing in water softening solutions for a long-term effect.