Are unsightly cracks in your ceiling plaster a cause for concern, or merely a cosmetic issue? Hairline cracks can be a common problem in many homes, particularly in older properties.
Understanding the difference between normal settling cracks and those that require professional attention is crucial. In this guide, we’ll walk you through the process of identifying and repairing hairline cracks in your ceiling plaster, helping you achieve a smooth, crack-free finish.
By following our step-by-step instructions, you’ll be able to restore your ceiling to its original condition, saving you money on professional decorators and achieving professional-quality results.
Key Takeaways
- Identify the causes of hairline cracks in ceiling plaster
- Determine whether your cracks are cosmetic or structural
- Learn the steps to repair hairline cracks effectively
- Understand the importance of addressing cracks promptly
- Achieve a professional finish with our guide
Understanding Ceiling Cracks: Normal or Concerning?
Ceiling cracks are a common occurrence in many homes, but distinguishing between normal settling cracks and those that indicate structural issues is crucial. When you notice a crack in your ceiling, it’s essential to assess its severity to determine the appropriate course of action.
Types of Ceiling Cracks and Their Severity
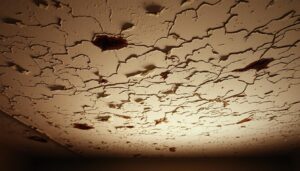
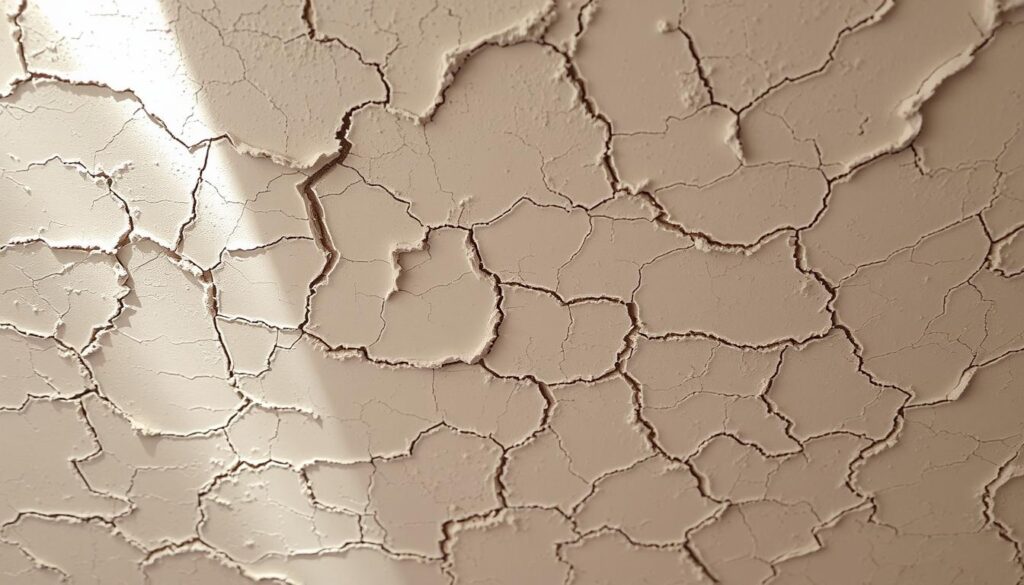
Ceiling cracks come in various forms, with hairline cracks being the most common and least concerning type that homeowners encounter. These hairline cracks typically appear as thin, fine lines in the ceiling plaster and are generally cosmetic issues rather than indicators of structural problems.
Hairline Cracks: The Least Concerning
Hairline cracks are usually caused by minor settlement or shrinkage of the plaster. They are often superficial and can be easily repaired with a fresh coat of paint. It’s worth noting that these cracks are more about aesthetics than structural integrity.
When Cracks Indicate Serious Problems
On the other hand, deep cracks, especially those wider than 3mm or accompanied by sagging ceilings, can indicate major structural damage. If you observe such cracks running along walls and ceilings, it’s a sign that you need professional intervention to prevent potential collapse.
Common Causes of Ceiling Cracks
Understanding the root cause of your ceiling crack is essential for determining the appropriate repair approach. Several factors contribute to the formation of ceiling cracks, including temperature and humidity fluctuations, structural issues, poor workmanship, water damage, and the age of the property.
Temperature and Humidity Fluctuations
Changes in temperature and humidity cause plaster to expand and contract, leading to hairline cracks. This is a common issue in many homes, particularly in areas with significant seasonal changes.
Structural Issues and Poor Workmanship
Poor workmanship during initial plastering or previous repairs can lead to premature cracking, particularly along joints or where drywall tape was improperly applied. Structural issues, such as foundation problems, can also manifest as ceiling cracks.
Water Damage and Age
Water damage from leaking pipes or roof issues often results in discoloured cracks with yellowish or brownish stains. Older properties are more susceptible to ceiling cracks due to the natural settling of the structure and aging of original plaster materials.

Tools and Materials Needed to Repair Hairline Crack in Ceiling Plaster
Gathering the necessary tools and materials is essential before starting your ceiling repair project. This will ensure a smooth, efficient process with professional-quality results.
Essential Tools for the Job
You’ll need a utility knife or crack widening tool to prepare the crack for repair. Putty knives in various sizes (2-inch and 6-inch recommended) are necessary for applying filler. A sanding block with fine-grit sandpaper will help you achieve a smooth finish.
Recommended Plaster and Fillers
For ceiling plaster repairs, you’ll need to choose between ready-mixed filler and powder filler that requires mixing. Plaster-specific filler is ideal for traditional plaster ceilings, while all-purpose drywall compounds work well for modern plasterboard ceilings.
Safety Equipment You Shouldn’t Skip
Safety equipment is non-negotiable: dust masks protect your lungs from plaster dust, safety goggles shield your eyes, and gloves prevent skin irritation from plaster compounds. A plastic drop cloth or old sheets are necessary to protect your furniture and flooring from inevitable plaster drips and dust.
Preparing Your Ceiling for Repair
Before you start repairing that hairline crack in your ceiling plaster, it’s essential to prepare the area properly. This involves a series of steps that ensure a successful and long-lasting repair.
Assessing the Damage Properly
Begin by examining the crack closely to determine its severity. Check if the crack is accompanied by sagging, water stains, or if it extends down the walls, which could indicate more serious structural issues. Gently press the area around the crack to test for any movement or softness in the plaster.
Cleaning and Prepping the Cracked Area
Clear the room of furniture or cover items with dust sheets to protect them from dust and debris. Use a soft brush to remove dust, cobwebs, and loose plaster particles from the cracked area. For hairline cracks with loose edges, use a utility knife to widen the crack slightly, creating a V-shaped channel.

Protecting Your Room and Furniture
Protect your flooring with drop cloths and wear safety gear, including eye protection and a dust mask, as ceiling plaster can contain irritants. Proper lighting is also crucial; set up portable work lights to illuminate the cracked area clearly.
| Preparation Step | Purpose |
|---|---|
| Assess the damage | Determine the severity of the crack |
| Clean the cracked area | Remove dust and debris for better adhesion |
| Protect the room | Prevent damage from dust and debris |
Step-by-Step Guide to Repair Hairline Crack in Ceiling Plaster
To fix a hairline crack in ceiling plaster, follow these methodical steps for a lasting repair. Repairing a crack in your ceiling not only improves its appearance but also prevents further damage.
Widening the Crack for Better Repair
Begin by carefully widening the hairline crack using a utility knife or a crack-widening tool. Create a V-shaped channel about 3mm wide to allow the filler to penetrate deeply and bond properly with the surrounding plaster. Be cautious not to apply too much pressure, which could damage the surrounding area.
Applying the First Layer of Filler
Prepare your chosen filler according to the manufacturer’s instructions. For a powder type, mix it to achieve a smooth, paste-like consistency. Apply the first layer of filler using a small putty knife, pressing firmly to fill the widened crack completely. Leave a slight depression for subsequent layers.
Reinforcing with Drywall Tape
Reinforce the repair with drywall tape to prevent the crack from reappearing. Center the tape directly over the filled crack and press it gently into the still-damp first layer of filler. Smooth out any wrinkles or air bubbles with your putty knife.
“Using drywall tape is crucial for a durable repair. It adds an extra layer of strength to the filled area, ensuring that the crack does not recur.”
Adding the Final Layers of Plaster
Apply a second layer of filler over the tape, extending about 10-15cm on either side of the crack to feather the edges. This creates a gradual transition to the existing ceiling, making the repair less noticeable. Allow sufficient drying time between layers as per the filler manufacturer’s instructions.
| Layer | Material | Drying Time |
|---|---|---|
| First Layer | Filler | As per manufacturer’s instructions |
| Second Layer | Filler over drywall tape | As per manufacturer’s instructions |
Sanding and Finishing the Surface
The final step involves careful sanding with fine-grit sandpaper once the filler is completely dry. Work in gentle circular motions to achieve a perfectly smooth surface that blends seamlessly with the surrounding ceiling plaster. This step is crucial for a professional finish.
By following these steps, you can effectively repair hairline crack in ceiling plaster, ensuring a durable and visually appealing result.
Painting and Finishing Touches
After successfully repairing the hairline crack, it’s time to focus on painting and finishing techniques that will leave your ceiling looking as good as new. The painting and finishing stage is critical for ensuring that the repaired area blends in seamlessly with the rest of the ceiling.
Choosing the Right Paint for Ceiling Repairs
Selecting the appropriate paint is vital for a successful finish. Choose a high-quality ceiling paint that is specifically formulated for plaster surfaces. A matt finish is preferable as it helps to disguise minor imperfections and reduces the visibility of the repaired crack. Before painting, apply a coat of primer over the repaired area to seal the new plaster or filler and provide a uniform base for the topcoat.
Techniques for Seamless Blending
To achieve a seamless blend, use a roller with a medium nap (approximately 12mm) for the main ceiling areas, and switch to a smaller brush for cutting in around edges. Apply paint in thin, even coats rather than one thick layer. The “feathering” technique is essential; gradually lighten the pressure as you move away from the repaired crack to create an imperceptible transition. For textured ceilings, consider using a stippling technique with a brush to recreate the original pattern.
When to Call Professional Decorators
If your ceiling has ornate details or complex textures, or if the repaired area remains visible despite your best efforts, it may be time to consult professional decorators. They can provide the expertise needed to achieve a flawless finish, especially in challenging situations.
Conclusion: Preventing Future Ceiling Cracks
Maintaining your ceiling’s integrity requires more than just repairing cracks; it involves implementing preventative measures to avoid future issues. Controlling indoor humidity levels can help prevent plaster cracks by reducing the stress caused by expansion and contraction. Regular inspections of your roof and plumbing systems can identify potential water leaks before they cause damage. For more detailed guidance on fixing ceiling cracks, you can visit this resource. By taking these steps, you can maintain your ceiling’s integrity.