Are you tired of dealing with a leaky mixer tap in your kitchen?
A dripping tap can be more than just a nuisance; it can waste a significant amount of water and increase your utility bills.
The good news is that fixing the issue is often as simple as replacing the cartridge. This comprehensive guide will walk you through the process, helping you to solve common problems like dripping or temperature control issues.
By following this guide, you’ll not only fix your current tap issues but also gain valuable knowledge about your kitchen plumbing system.
Key Takeaways
- Understand the function of a mixer tap cartridge and its role in your kitchen tap.
- Learn how to identify when your cartridge needs replacement.
- Follow a step-by-step guide to replace your mixer tap cartridge effectively.
- Discover how this DIY project can save you time and money.
- Gain insights into maintaining your kitchen plumbing system to prevent future issues.
Understanding Kitchen Mixer Tap Cartridges
Kitchen mixer taps rely on a crucial component known as the cartridge to control water flow and temperature. The cartridge is a vital mechanism that ensures the smooth operation of your kitchen tap.
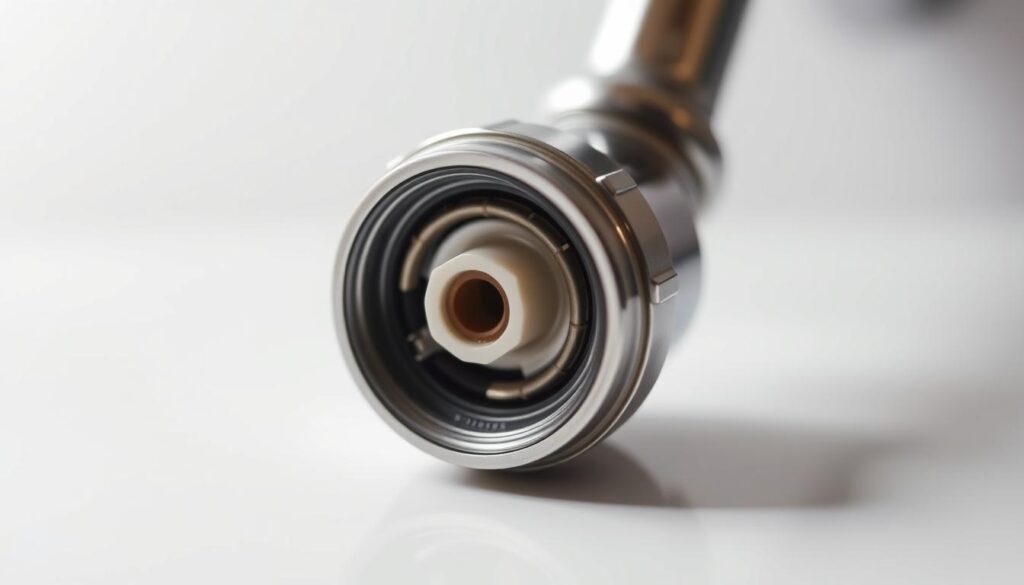
What is a Mixer Tap Cartridge?
A mixer tap cartridge is a complex device that regulates the mixing of hot and cold water. It is designed to provide a seamless transition between different water temperatures and flow rates. As “The cartridge is the heart of the mixer tap, controlling the flow and temperature of water.”
The cartridge contains intricate parts that work together to achieve this functionality. Its construction varies among different tap models, but its primary function remains the same.
How Mixer Cartridges Work
Mixer cartridges work by adjusting the flow of hot and cold water through the tap. When you turn the handle, it moves the cartridge, which in turn controls the water flow. The cartridge is designed to respond to the user’s input, providing a precise control over the water temperature and flow rate.

“A well-designed cartridge can significantly enhance the overall performance of the mixer tap.”
Lifespan of Mixer Tap Cartridges
The lifespan of a mixer tap cartridge can vary significantly based on several factors, including water quality and frequency of use. Generally, a quality mixer tap cartridge can last anywhere from five to ten years.
Factors such as mineral build-up in hard water areas can reduce the cartridge’s lifespan. Regular maintenance and checks can help extend its life. Some key points to consider include:
- The average lifespan of a quality cartridge ranges from 5 to 10 years.
- Water quality plays a crucial role in cartridge longevity.
- Frequency of use directly impacts the cartridge’s lifespan.
By understanding these factors, you can take steps to maximize the lifespan of your mixer tap cartridge.
Signs Your Mixer Tap Cartridge Needs Replacing
Recognising the indicators that your mixer tap cartridge is failing can save you from more significant problems down the line. Your kitchen mixer tap is a crucial fixture, and its cartridge plays a vital role in controlling water flow and temperature.
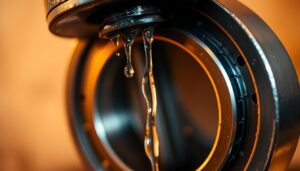
Persistent Dripping or Leaking
If your mixer tap is dripping or leaking persistently, it is likely that the cartridge is worn out or damaged. This issue can lead to wasted water and increased utility bills. Inspecting the cartridge and replacing it if necessary can resolve the problem.
Difficulty Controlling Water Temperature
When you find it challenging to control the water temperature, it may be a sign that the cartridge is failing. A faulty cartridge can cause the tap to stick or not respond correctly to temperature adjustments, making it difficult to achieve the desired water temperature.

Stiff or Loose Handle Movement
A stiff or loose handle movement is another indicator that your mixer tap cartridge needs attention. If the handle becomes difficult to turn or feels loose, it could signify internal wear or damage to the cartridge, affecting its operation.
Unusual Noises When Operating the Tap
Hearing strange noises, such as whistling, squeaking, or rattling sounds, when operating your kitchen mixer tap can indicate internal cartridge damage. These noises typically occur when water is forced through worn or damaged components within the cartridge. A healthy mixer tap should operate quietly, with only the sound of flowing water being audible.
By being aware of these signs, you can identify when your mixer tap cartridge needs replacing, ensuring your tap continues to function efficiently and effectively.
Preparation Before You Replace Kitchen Mixer Tap Cartridge
Replacing a kitchen mixer tap cartridge requires some preparation to ensure the process goes smoothly. Before you start, it’s essential to understand the steps involved and the tools you’ll need.
Essential Tools for the Job

To replace your kitchen mixer tap cartridge, you’ll need a few essential tools. These typically include an Allen key to remove the tap handle, an adjustable wrench to loosen any corroded parts, and possibly a cartridge removal tool specific to your tap model. Ensure you have these tools ready before starting the job.
Identifying and Measuring Your Cartridge Type

It’s crucial to identify and measure your existing cartridge type to purchase a correct replacement. Check your tap’s manufacturer details or measure the cartridge dimensions carefully. This step ensures you buy a compatible replacement, saving time and effort.
Safety Precautions to Take
Before beginning any work, ensure the water supply to your kitchen tap is completely shut off using the isolation valves under the sink or at the main water supply. Additional safety measures include placing a towel in the sink basin to catch any small parts or residual water, wearing protective gloves, and considering safety glasses to protect your eyes.
- Turn off the water supply to your mixer tap by turning the isolation valves counter-clockwise.
- Place a towel in the sink basin to prevent small parts from falling down the drain.
- Protect your hands with appropriate gloves, especially when dealing with older taps.
- Consider wearing safety glasses to protect your eyes from unexpected water sprays.
- Take photos of the tap assembly before and during disassembly for reference.
Step-by-Step Guide to Replace Kitchen Mixer Tap Cartridge
Replacing your kitchen mixer tap cartridge is a straightforward process that can be completed with a few simple tools. Before you start, make sure you have everything you need to avoid unnecessary trips to the hardware store.
Turning Off the Water Supply
The first step in replacing your mixer tap cartridge is to turn off the water supply. Locate the stopcock or isolation valve that controls the water supply to your kitchen tap and turn it clockwise to shut off the water supply. Open the tap to drain the water from the pipes.
Removing the Tap Handle and Indicator Cap
Next, you’ll need to remove the tap handle and indicator cap. Use a screwdriver or Allen key to remove the grub screw that holds the handle in place. Gently pull the handle off the tap, taking care not to damage any of the surrounding components. You may need to use a bit of force, but be careful not to apply too much pressure, which could damage the tap.
Accessing and Removing the Grub Screw and Dress Ring
With the handle removed, you’ll see the grub screw and dress ring. Use an Allen key to loosen the grub screw, then remove the dress ring by unscrewing it clockwise. This will give you access to the cartridge.
Removing the Old Cartridge
Now it’s time to remove the old cartridge. Use a cartridge removal tool or pliers to grip the cartridge and pull it out. Be careful not to damage any of the surrounding components or pipes.
Installing the New Cartridge
Take the new cartridge and insert it into the tap, making sure it’s properly seated. Use the cartridge removal tool or pliers to secure it in place.
Reassembling the Tap Components
Once the new cartridge is in place, reassemble the tap components in the reverse order that they were removed. Begin by replacing the cartridge retaining nut, tightening it firmly but not excessively. Reattach the decorative dress ring by screwing it clockwise until hand-tight. Replace the tap handle, ensuring it aligns correctly with the cartridge stem, and secure it with the grub screw. Finally, snap the decorative cap back into place.
| Step | Action | Tools Required |
|---|---|---|
| 1 | Turn off water supply | None |
| 2 | Remove tap handle and indicator cap | Screwdriver or Allen key |
| 3 | Access and remove grub screw and dress ring | Allen key |
| 4 | Remove old cartridge | Cartridge removal tool or pliers |
| 5 | Install new cartridge | Cartridge removal tool or pliers |
| 6 | Reassemble tap components | None |
After reassembling the tap, turn on the water supply and check for leaks. If you’ve followed these steps correctly, your mixer tap should be functioning properly again.
“A well-maintained tap is essential for any kitchen. By following these simple steps, you can replace your mixer tap cartridge and enjoy a leak-free experience.”
Troubleshooting Common Issues After Replacement
Troubleshooting common issues after cartridge replacement can save you time and frustration. Even with a successful replacement, some tap issues can persist. Here, we’ll explore common problems and their potential solutions.
Tap Still Leaking After Cartridge Replacement
If your tap continues to leak after replacing the cartridge, check that all components are properly reassembled and tightened. Ensure the new cartridge is correctly seated and aligned with the tap’s water inlets. If the leak persists, inspect the tap’s O-rings or gaskets for damage.
Water Pressure or Flow Problems
Issues with water pressure or flow can occur if the new cartridge isn’t properly aligned or if debris is obstructing the water flow. Check that both hot and cold water supplies are functioning correctly. You may need to clean or replace aerators or filters to restore normal water flow.
Temperature Control Issues
If you’re experiencing temperature control issues, verify that the cartridge is properly aligned with the hot and cold water inlets. Check that both supplies are functioning correctly and that the water pressure is balanced between hot and cold. Some cartridges have adjustable temperature limiters; consult the manufacturer’s instructions for guidance.
| Issue | Potential Cause | Solution |
|---|---|---|
| Leaking Tap | Improper reassembly or damaged O-rings | Check and tighten components; inspect O-rings |
| Water Pressure Issues | Debris obstruction or misaligned cartridge | Clean or replace aerators; check cartridge alignment |
| Temperature Control Issues | Cartridge misalignment or unbalanced water pressure | Check cartridge alignment; balance hot and cold water pressure |
Conclusion
The process of replacing a mixer tap cartridge is relatively straightforward and can be done by most homeowners. By following the step-by-step guide provided, you can save significant money compared to calling a professional plumber or replacing the entire tap unit. Regular maintenance of your kitchen mixer taps, including timely cartridge replacement, can extend the lifespan of your fixtures for many years.
When purchasing a replacement cartridge, remember that quality matters. Investing in a higher-quality cartridge from reputable plumbing stores may cost more initially but will typically last longer and provide better performance. If you encounter persistent issues after following this guide, you may need to consult a professional plumber.
To ensure you get the correct replacement, keep your old cartridge as a reference when shopping. Consider keeping a spare cartridge on hand if you have multiple identical mixer taps in your home. This can save time and hassle when future replacements are needed.