Are you tired of the limitations imposed by a static miter saw in your workshop?
Imagine being able to move your saw to where it’s needed, saving space, and enhancing your workshop’s flexibility. A mobile miter saw stand can be the solution, offering the versatility you need.
This comprehensive guide will walk you through the process of building a practical and space-saving mobile stand. You’ll learn how to add folding extension wings and storage solutions, making your workshop more efficient.
By following this step-by-step guide, you’ll be able to create a versatile workshop asset that improves your work efficiency and saves space.
Key Takeaways
- Learn to build a mobile stand that combines functionality and stability.
- Discover how to add mobility features for easy movement around your workshop.
- Understand the importance of foldable extension wings for supporting longer materials.
- Explore practical storage solutions to keep your workshop organised.
- Complete this project over a weekend with basic tools and intermediate woodworking skills.
Why You Need a Mobile Miter Saw Stand
In the realm of woodworking, mobility and space are crucial, and a mobile miter saw stand addresses both needs effectively. By having a versatile and movable workstation, you can significantly enhance your workshop’s functionality.
Benefits of Mobility in Your Workshop
A mobile miter saw stand offers the flexibility to move your workstation around the workshop or to different job sites. This mobility is particularly beneficial for large projects that require you to work in various locations. With a mobile stand, you can easily relocate your miter saw to accommodate different tasks or to make way for other equipment.
The ability to move your miter saw stand also facilitates better organisation and workflow. You can position your stand in the most convenient location for the task at hand, reducing the need to constantly move your workpieces or other equipment around.
Space-Saving Features for Small Workshops
A folding miter saw stand with collapsible wings takes up minimal space when not in use, making it ideal for small workshops where every square foot matters. Some key features that contribute to its space-saving design include:
- Foldable extension wings that provide support for long workpieces when extended but fold away when not needed.
- A compact footprint design that ensures the stand occupies minimal floor space while still providing a stable platform for your miter saw.
- Vertical storage capability that allows you to stand the unit against a wall when not in use, further maximising available workshop space.
- Integrated storage solutions that eliminate the need for separate organisation systems, consolidating your miter saw accessories in one efficient unit.
By incorporating these space-saving features, a mobile miter saw stand can significantly enhance the functionality of your workshop, even in the most constrained environments.
Essential Materials and Tools for Your Mobile Miter Saw Stand
The success of your mobile miter saw stand project hinges on having the right materials and tools at your disposal. Building a DIY saw stand requires careful planning and the correct equipment to ensure it is sturdy, functional, and safe to use.

Required Materials List
To start, you’ll need to gather the necessary materials. These include plywood sheets for the stand’s surface and shelves, 2×4 lumber for the frame, and screws to assemble the pieces together. The type and quantity of materials may vary depending on your specific design plan.
For a standard mobile miter saw stand, you will need:
- Plywood or MDF for the top and shelves
- 2×4 lumber for the frame
- Screws and wood glue for assembly
- Cast iron or steel for added stability (optional)
Necessary Tools for Construction
Having the right tools is just as important as having the right materials. For this project, you will need:
- A table saw or circular saw with a straight-edge guide for making precise cuts
- A miter saw for angled cuts (ironically, the tool this stand is designed for)
- A drill/driver with appropriate bits for pre-drilling and driving screws
- A pocket hole jig like the Kreg Jig for creating strong, hidden joinery
- Clamps in various sizes to hold pieces securely during assembly
- Measuring and marking tools including a tape measure, speed square, and level
By ensuring you have all the necessary materials and tools, you’ll be well-prepared to complete your saw stand DIY project efficiently and effectively.
Planning Your Mobile Miter Saw Stand
To build a mobile miter saw stand that meets your needs, start with a solid plan. A well-designed stand will enhance your workshop’s efficiency and make your woodworking projects more enjoyable.
Taking Critical Measurements
Begin by taking precise measurements of your miter saw and the space where you plan to use the stand. Consider the size of your saw, the height you need for comfortable operation, and the space available for the stand’s footprint. Accurate measurements will ensure that your stand is proportionate and functional.
Record the dimensions of your miter saw, including its length, width, and height. Also, measure the space where you intend to place the stand, taking note of any obstructions or limitations.
Creating a Design Plan
With your measurements in hand, create a detailed design plan for your mobile miter saw stand. Sketch your design, incorporating the measurements you’ve taken, and consider the features you need, such as extension wings and storage areas. Your design should also include a detailed cut list to maximise material efficiency.
- Plan the sequence of assembly steps logically, identifying which components need to be built first.
- Consider potential modifications for your specific workshop needs.
- Ensure your design includes features like dust collection integration and tool storage.
By carefully planning your mobile miter saw stand, you’ll be able to build a stand diy project that is both functional and tailored to your workshop’s requirements.
Building the Base Structure
To ensure stability and mobility, the base structure of your miter saw stand must be carefully constructed. The base provides the foundation for your DIY miter saw setup, and its construction involves several critical steps.
Cutting the Plywood Pieces
The first step in building the base structure is cutting the plywood pieces according to your design plan. Ensure that you cut the pieces accurately to avoid any discrepancies during assembly.
Use a table saw or a circular saw to cut the plywood sheets into the required sizes. It’s essential to double-check your measurements before making the cuts to prevent errors.
Assembling the Frame
Assembling the frame involves using pocket hole joinery to attach the shelves to the side panels. Begin by attaching the top shelf to one side panel, ensuring that it is precisely positioned to achieve the correct height for your miter saw.
Use screws to attach the shelves, and make sure the corners are square by using corner clamps or measuring diagonals. The following table outlines the assembly sequence:
| Step | Assembly Task | Components Involved |
|---|---|---|
| 1 | Attach top shelf | Top shelf, one side panel |
| 2 | Attach remaining shelves | Remaining shelves, one side panel |
| 3 | Attach second side panel | Second side panel, shelves |
| 4 | Attach back panel (if included) | Back panel, frame |
Once the basic frame is assembled, double-check that the structure is square and level before proceeding. If your design includes a back panel, attach it now to add rigidity to the structure.
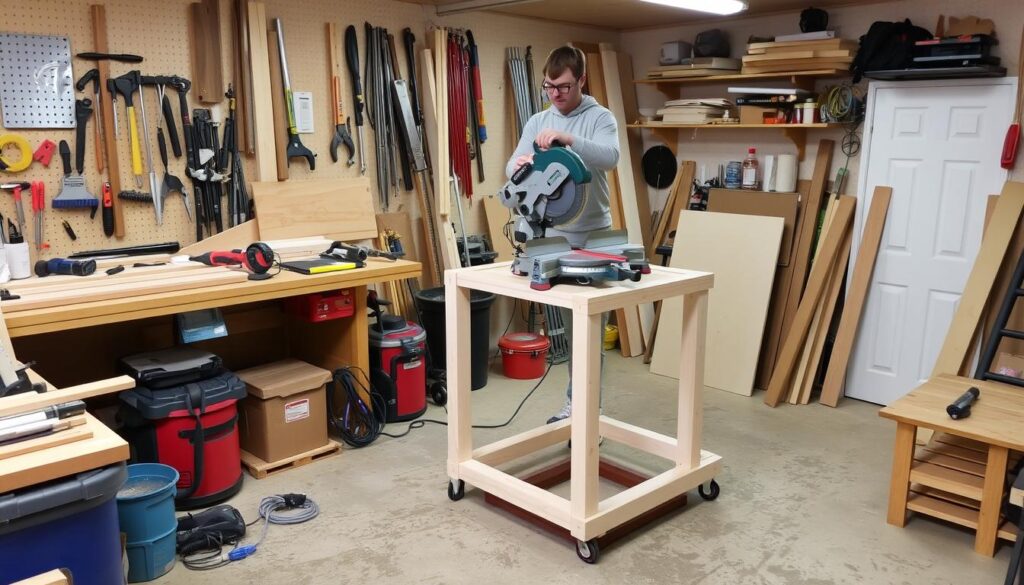
How to Create Mobile Miter Saw Stand with Wheels
Upgrading your miter saw to a mobile stand can revolutionise your woodworking experience by providing the flexibility to move your saw to different workstations as needed.
Selecting and Installing the Right Casters
When it comes to making your miter saw stand mobile, selecting the right casters is crucial. You need casters that can support the weight of your stand and saw, and that can lock in place to ensure stability during operation. Look for heavy-duty casters with a locking mechanism that prevents both rolling and swiveling. Proper installation is also key; ensure the casters are securely attached to the stand’s frame to prevent any wobbling or detachment during use.

Ensuring Stability When Mobile
Ensuring your mobile miter saw stand remains stable when in use is vital for safe and accurate cutting. To achieve this, consider the following:
- Properly installed locking casters are essential for stability—ensure the locking mechanism fully engages.
- Position heavier components, like your miter saw, lower in the stand to create a lower centre of gravity.
- The extension wings, when deployed, increase stability by widening the stand’s footprint.
- Consider adding diagonal bracing to the frame if you notice any racking or wobbling.
- Test the stability with the saw mounted before final assembly of the extension wings.
By following these steps, you can create astable and mobile miter saw standthat enhances your workshop’s functionality.
Constructing Foldable Extension Wings
Foldable extension wings are a game-changer for your mobile miter saw stand, providing extra support when needed. These wings enhance the functionality of your stand by offering additional workspace, making it easier to handle larger pieces of material.
Building the Wing Supports
To construct the wing supports, you will need to attach smaller hinges to the stand. These hinges allow the supports to swing out and provide support exactly where needed. Ensure the supports are sturdy and well-positioned to hold the weight of the material. The wing supports are critical in maintaining the stability of the extension wings.
When building the wing supports, consider the material you are using. ¼” plywood or similar material is recommended for the stop blocks that will hold the wing supports in place. This ensures the wings remain level with the miter saw deck.
| Component | Material | Function |
|---|---|---|
| Piano Hinges | Metal | Attach wings to the stand |
| Smaller Hinges | Metal | Attach wing supports to the stand |
| Stop Blocks | ¼” Plywood | Hold wing supports in place |
Installing Hinges and Stop Blocks
Installing piano hinges is crucial for the smooth operation of the extension wings. Cut the piano hinges to length using a hacksaw or reciprocating saw. Position them carefully to ensure the wings are perfectly level with your miter saw’s deck when deployed.
The stop blocks are equally important, as they ensure the wing supports position themselves correctly every time. Cut the stop blocks from ¼” plywood and position them to catch the wing support at the right angle, holding the wings level with the saw deck.
Adding Practical Storage Solutions
To maximise the functionality of your mobile miter saw stand, consider incorporating practical storage solutions. Effective storage enhances your workshop’s efficiency and keeps your tools organised.
Creating a Bottom Scrap Bin
A bottom scrap bin is a useful addition to your saw stand, helping to keep your workshop tidy by collecting cut-offs and debris. To create one, attach a bin or a box to the bottom of your stand using screws or brackets. Ensure it is easily removable for emptying. This simple addition can significantly reduce clutter and improve safety by preventing debris from spreading across your workshop floor.

Incorporating Tool Storage Areas
In addition to a scrap bin, you can enhance your miter saw stand by incorporating tool storage areas. Consider adding shelves for power tools, cubbies for hand tools, and dedicated spaces for frequently used accessories like clamps and measuring tools. You can also include magnetic strips for metal tools and accessories, keeping them visible and easily accessible. Dedicated storage areas ensure that everything you need is within reach during cutting operations, improving your workflow and productivity.
By thoughtfully designing your storage, you can create a more efficient and enjoyable working environment. Your DIY miter saw stand will become a central hub in your workshop, equipped with everything you need to complete tasks effectively.
Conclusion: Enjoying Your New Mobile Miter Saw Stand
With your mobile miter saw stand now complete, you’re poised to revolutionize your woodworking experience. Your new mobile miter saw stand combines functionality, mobility, and space-saving design, making it an invaluable addition to your workshop.
The mobility feature allows you to position your miter saw exactly where needed for each project, then store it away when not in use—perfect for space-constrained workshops. The foldable extension wings provide crucial support for longer workpieces, while the integrated storage solutions keep frequently used tools within reach.
By investing time in building this custom stand, you’ll enjoy improved comfort, reduced setup time, and enhanced cutting capabilities for all your future woodworking projects. Your DIY miter saw stand is a testament to your craftsmanship and dedication to your craft.


