Are you tired of echoes and reverberations ruining your conversations or music experiences at home or in the office? Improving the sound quality in your space can be simpler than you think.
Acoustic wall panels are becoming increasingly popular for both residential and commercial spaces due to their dual functionality of improving sound quality and enhancing interior aesthetics. By installing these panels on your wall, you can significantly reduce unwanted echoes, creating a more comfortable environment.
This comprehensive guide will walk you through the process of enhancing your space, from selecting the right acoustic panels to the final installation steps, ensuring both optimal acoustics and a visually appealing finish.
Key Takeaways
- Improve sound quality and reduce echo with acoustic wall panels.
- Enhance your interior design with aesthetically pleasing panels.
- Choose the right installation method for your wall type.
- Ensure a visually appealing finish that complements your space.
- Follow a comprehensive guide for a successful installation.
Understanding Acoustic Wall Panels and Their Benefits
When it comes to enhancing your space acoustically, understanding acoustic wall panels is key. These panels are designed to improve the sound quality within a room by reducing unwanted sound reflections.
What Are Acoustic Wall Panels?
Acoustic wall panels are specifically designed to absorb sound waves, thereby reducing reverberation and echo within a room. They are typically made from sound-absorbing materials such as fiberglass, mineral wool, or open-cell foam.
By installing panels on your wall, you can effectively minimise the negative impact of reflected sound on your listening experience.
How Acoustic Panels Improve Sound Quality and Aesthetics
Acoustic panels not only enhance the sound quality but also contribute to the aesthetic appeal of a room. They come in a variety of colours, textures, and patterns, allowing you to choose panels that complement your interior design.
| Benefits of Acoustic Panels | Description |
|---|---|
| Reduced Reverberation | Minimises echo and sound reflections, improving overall sound clarity. |
| Aesthetic Appeal | Available in various colours and designs, enhancing the visual appeal of a room. |
| Improved Listening Experience | Creates a more immersive environment for music and speech. |
By understanding the role of acoustic wall panels and their benefits, you can make informed decisions to enhance your space both acoustically and aesthetically.
Essential Tools and Materials for Installing Acoustic Wall Panels
Before you begin installing acoustic wall panels, it’s essential to have the necessary tools and materials at hand. This preparation will ensure a smooth installation process and optimal performance of your acoustic panels.
Required Tools for Professional Installation
For a professional installation, you’ll need a set of basic tools. These include a drill for making screw holes, a level to ensure straight alignment, and a measuring tape for accurate placement. A stud finder is also crucial for locating wall studs, especially when using screws for installation.
Materials You’ll Need for Different Installation Methods
The materials required can vary depending on the installation method. For screw mounting, you’ll need 30mm black plasterboard screws and wall plugs or dowels for masonry walls. If you’re creating a substructure, 45mm thick wooden battens will be necessary. For adhesive installation, a high-quality acoustic panel adhesive is required.
| Installation Method | Materials Needed |
|---|---|
| Screw Mounting | 30mm black plasterboard screws, wall plugs or dowels |
| Substructure | 45mm thick wooden battens |
| Adhesive Installation | Acoustic panel adhesive |
Additional materials like sandpaper for smoothing edges and fabric strips for finishing touches may also be necessary. By gathering these tools and materials, you’ll be well-prepared for a successful acoustic wall panel installation.
Preparing for Acoustic Wall Panel Installation
Before diving into the installation process, it’s crucial to prepare your space adequately. This involves two key steps: measuring your space and planning panel placement, and preparing the wall surface for installation.
Measuring Your Space and Planning Panel Placement
To begin, measure your wall space to determine the optimal placement for your acoustic panels. Consider the layout and how the panels will be distributed to achieve the best acoustic results. Use a pencil to mark the areas where the panels will be placed, taking into account any electrical wiring or other obstacles. Planning the placement carefully will ensure a more efficient installation process.
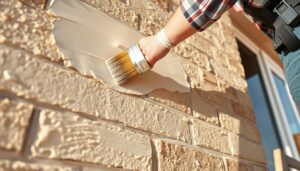
Preparing the Wall Surface for Installation
Next, check whether the surface is suitable for panel installation. If not, remove any dust, grease, or significant unevenness or dents. You can mark uneven areas and sand them down with an orbital sander if necessary. For any dents, use repair filler. Dust can be wiped away with a dry paper towel, while common degreasers work well for grease removal. Ensuring the wall is clean and even will help the panels adhere properly.
Some key steps to prepare the wall surface include:
- Thoroughly cleaning the wall to remove any dust or dirt.
- Inspecting for unevenness or dents and addressing them as needed.
- Removing any existing fixtures unless they will be covered by the panels.
- Checking for signs of moisture or water damage.
- Using a pencil to mark the locations of electrical wiring.
By following these steps, you can ensure a successful installation of your acoustic wall panels.
How to Install Acoustic Wall Panels Using Screws
To achieve a professional finish, it’s essential to understand how to install acoustic wall panels with screws correctly. This method provides a secure and durable hold, ensuring your panels remain in place over time.
Step-by-Step Guide to Direct Screw Installation
Begin by marking the wall where you intend to install the panel, using a spirit level to ensure accuracy. When you’re ready to drill, apply gentle pressure to avoid damaging the panel material or causing the drill bit to catch on the fabric. It’s crucial to create pilot holes in the wall that are slightly smaller than the screws you’ll be using.
Once you’ve drilled the holes, hold the panel against the wall and screw it into place. Make sure the panel is perfectly level before tightening the screws fully. This step is crucial for achieving a professional-looking finish.

Tips for Proper Spacing and Alignment
When installing panels side by side, maintaining a consistent gap is key to a professional finish. Aim for a gap of approximately 13mm between battens at the joints. You can use a spare batten or a spacer as a temporary guide to achieve this.
- Use a spirit level frequently to ensure each panel is perfectly horizontal or vertical.
- For precise spacing, consider using a spacer of the appropriate thickness between panels.
- Pay careful attention to the alignment of visible slats or patterns across adjacent panels.
- When installing around obstacles, measure and mark cutout locations carefully before making any cuts to the panel.
By following these guidelines and using screws to install your acoustic wall panels, you can achieve a high-quality finish that enhances the acoustic properties of your space.
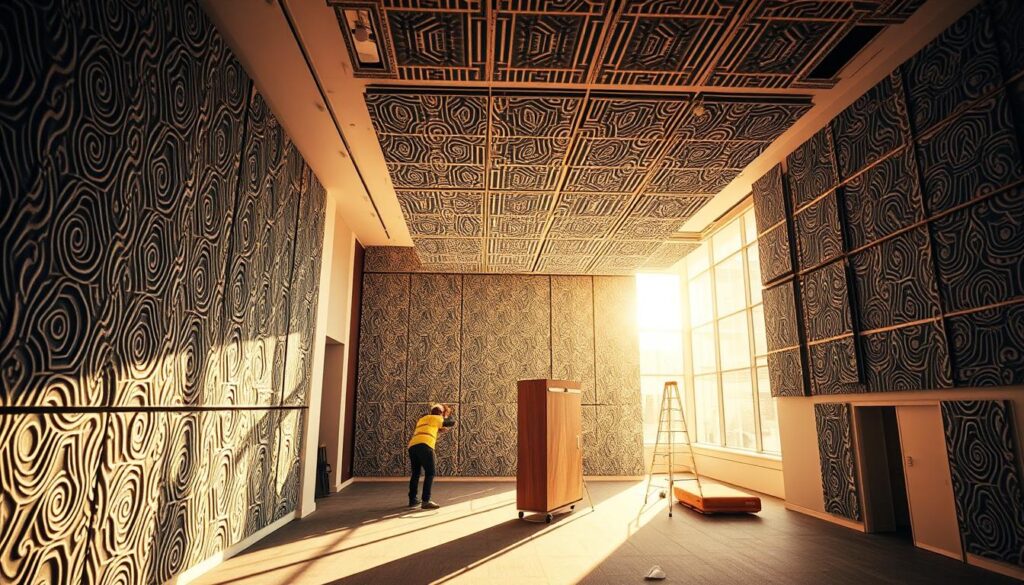
Installing Acoustic Panels with a Substructure
When installing acoustic panels, using a substructure can provide additional support and enhance sound absorption. This method involves creating a framework, typically using wooden battens, to which the acoustic panels are then attached.
Creating a Wooden Batten Substructure
To create a wooden batten substructure, start by measuring your wall and determining the optimal placement for the battens. Ensure they are evenly spaced to support the acoustic panels effectively. Secure the battens to the wall using appropriate fixings. If desired, you can fill the spaces between the battens with mineral wool or acoustic insulation to enhance sound absorption. For more detailed guidance on preparing your wall, you can refer to our previous section on preparing the wall surface.
| Material | Purpose |
|---|---|
| Wooden Battens | Creating the substructure framework |
| Mineral Wool/Acoustic Insulation | Enhancing sound absorption between battens |
Mounting Panels to the Substructure
Once the battens are secured to the wall, you can attach the acoustic panels to them. Position the first acoustic panel against the substructure, ensuring it’s level and properly aligned with your marked guidelines. Secure the panel to the wooden battens using screws that are long enough to penetrate the panel and grip firmly into the batten. Maintain consistent spacing between multiple panels and check frequently with a level to ensure the installation remains straight. For a professional finish, use fabric strips or trim pieces to cover any visible gaps between the wall and the edges of your substructure installation.
As highlighted by experts, “Proper alignment and secure fastening are crucial for the effective installation of acoustic panels.” Ensuring that your panels are correctly installed will significantly enhance the acoustic quality of your space.
- Position the first acoustic panel against the substructure, ensuring it’s level and aligned.
- Secure the panel using appropriate screws.
- Maintain consistent spacing between panels.
- Check alignment frequently with a level.
- Use fabric strips to cover gaps for a professional finish.
Using Adhesive to Install Acoustic Wall Panels
For a seamless installation, consider using adhesive for your acoustic wall panels. This method provides a clean and minimalist aesthetic, ideal for spaces where visible screws or nails are undesirable.
When to Choose Adhesive Over Screws
Adhesive installation is particularly suitable for surfaces where screwing or nailing is not feasible or could cause damage. It’s also a good option when you want to avoid the visible hardware that comes with screw or nail installation. Ensure that both the wall surface and the back of the acoustic panel are clean and dry to achieve optimal adhesion.
Step-by-Step Adhesive Installation Process
To install acoustic wall panels using adhesive, follow these steps:
- Thoroughly clean both the wall surface and the back of the acoustic panel to remove dust, grease, or contaminants.
- Apply acoustic panel adhesive or construction adhesive to the back of the panel in a zigzag or W-pattern, ensuring coverage around the edges and across the central area.
- Carefully position the panel against the wall at your marked location, then press firmly across the entire surface.
- Hold the panel in place for 20-30 seconds to allow the initial bond to form, checking with a spirit level to ensure it’s perfectly straight.
For heavier panels or those being installed on less-than-ideal surfaces, consider temporarily supporting the panel with tape or props until the adhesive fully cures, typically within 24-48 hours.

| Installation Method | Surface Preparation | Curing Time |
|---|---|---|
| Adhesive | Clean and dry | 24-48 hours |
| Screws | No specific requirement | Immediate |
Conclusion: Enjoying Your Enhanced Acoustic Space
After installing acoustic wall panels, you’ll notice a substantial reduction in echo and sound reflections. Your newly installed acoustic panels not only enhance the sound quality but also serve as striking design elements that elevate the overall aesthetics of your room.
To maintain your panels, occasional dusting or gentle vacuuming is recommended. Consider complementing your wall panel installation with other acoustic treatments for comprehensive sound management. The versatility of acoustic wall panels allows you to adapt and expand your installation as needed, ensuring improved sound and acoustics in your space.
Your investment in proper installation will continue to pay dividends in improved sound quality and reduced noise fatigue, creating a more comfortable environment for years to come.