Are you struggling to remove old silicone sealant from your tiles? You’re not alone. Cracked or peeling silicone can lead to water damage and mould growth, making it a task that requires prompt attention.
Knowing how to tackle this issue is crucial, especially for those who tile regularly. It’s a skill that should be learned alongside how to tile effectively. In this comprehensive guide, we’ll walk you through the process of removing silicone sealant safely and efficiently.
Removing old silicone sealant is just the first step. You’ll learn about the essential tools needed for the job and how to use them properly to avoid damaging your tiles. Whether you’re dealing with bathroom tiles or kitchen backsplashes, our step-by-step instructions will help you achieve professional results.
Key Takeaways
- Understand why removing old silicone sealant is necessary for maintaining your tiles.
- Learn the essential tools required for safe and effective removal.
- Discover both manual and chemical methods for removing silicone sealant.
- Prepare your tiles for a fresh application of sealant.
- Achieve a watertight finish with our step-by-step guide.
Why You Need to Remove Old Silicone Sealant
You need to remove old silicone sealant to prevent further damage. Silicone sealant is used in bathrooms and kitchens to prevent water from seeping into gaps and causing damage. Over time, silicone can crack, peel, or develop mould, compromising its effectiveness.
Preventing Water Damage
Cracked or peeling silicone allows water to seep into gaps, leading to water damage in walls, floors, and cabinets. Water damage can be extensive and costly to repair.
Avoiding Mould and Mildew Growth
Water trapped behind silicone creates a perfect environment for mould and mildew, posing health risks. Mould and mildew can cause respiratory issues.
Ensuring a Strong New Seal
Applying new silicone over old, damaged silicone won’t create a strong bond. Complete removal ensures a proper bond with the tile and other surfaces, providing better protection against water ingress.
| Reasons for Removal | Consequences of Not Removing |
|---|---|
| Preventing water damage | Extensive damage to walls, floors, and cabinets |
| Avoiding mould and mildew growth | Health risks, particularly for those with respiratory conditions |
| Ensuring a strong new seal | Ineffective sealant application, leading to further problems |
Essential Tools for Removing Silicone from Tiles
Before you start removing silicone, it’s crucial to have the right tools at hand. Having the correct equipment ensures the process is efficient and safe.
Cutting and Scraping Tools
A sharp utility knife or razor blade scraper is essential for cutting through and loosening the silicone from the tile surface. For delicate tile surfaces, a plastic scraper provides a safer alternative that minimises the risk of scratching or chipping.
Chemical Removers and Solvents
Silicone sealant remover is a chemical solution that helps soften and dissolve silicone for easier removal. Additionally, solvents like rubbing alcohol or acetone are effective for removing residual silicone that remains after the bulk has been scraped away.
Safety Equipment
Protective gloves prevent skin irritation from chemicals, while safety glasses shield your eyes. It’s also useful to have paper towels or clean cloths for wiping away dissolved silicone and cleaning solutions.
Preparing the Area Before Removal
Proper preparation of the workspace is essential for safe and effective silicone removal. You need to take a few crucial steps to ensure the area is ready for the removal process.
Clearing and Cleaning the Workspace
Clear all items from the immediate vicinity to prevent damage from tools or chemical removers. Ensure the area is completely dry before beginning, as moisture can interfere with the effectiveness of removal products. You should also cover adjacent surfaces that you’re not working on to protect them from accidental scratches or chemical spills.
- Remove any items such as shower caddies, soap dishes, or towels from the area.
- Lay down old towels or cloths at the base of the work area to catch drips and make cleanup easier.
- Ensure you have adequate lighting to clearly see the silicone you’re removing.
Ensuring Proper Ventilation
Ventilating the room is crucial, especially when using chemical solvents that release fumes. Open windows and doors to create cross-ventilation. If working in a bathroom or kitchen with limited natural ventilation, consider using an extractor fan to remove chemical vapours.
- Open windows and doors for cross-ventilation.
- Use an extractor fan if natural ventilation is limited.
By following these steps, you’ll be well-prepared for the removal of the old sealant, making the process safer and more efficient.
Step-by-Step: How to Remove Silicone from Tiles
You can successfully remove silicone sealant from tiles by following a simple, step-by-step guide. This process involves careful preparation and the right techniques to avoid damaging the tiles.
Scoring the Silicone Sealant
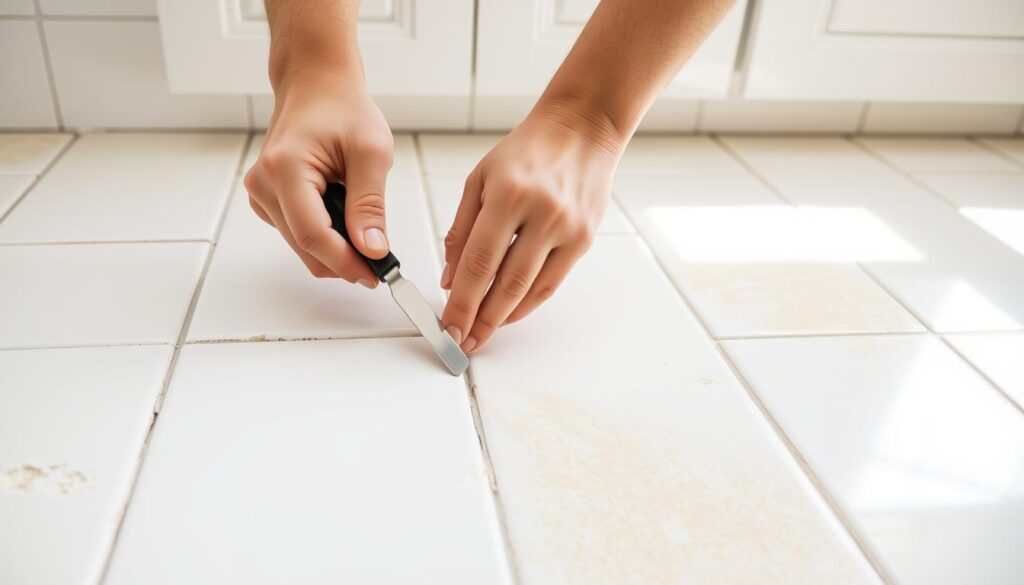
To start, use a utility knife or razor blade scraper to carefully score the silicone along its edges. Maintaining a shallow angle with your blade is crucial to avoid scratching or damaging the tile surface beneath. Make multiple light passes rather than trying to cut through the silicone in one go, which reduces the risk of slipping.

Removing the Bulk of the Silicone
After scoring, use a plastic scraper to gently lift the edge of the silicone, working slowly to separate it from the tile surface. For the bulk removal, pull the loosened silicone away at a 45-degree angle, which helps prevent it from breaking into small pieces. Work methodically along the entire length of the silicone bead, removing as much of the material as possible in this initial phase.
Dealing with Stubborn Silicone
Stubborn areas may require additional scoring or the application of a silicone sealant remover to soften the material. For particularly resistant silicone, allow chemical removers to sit for the full recommended time before attempting further removal. Be patient with the process, as rushing can lead to damaged tiles or incomplete removal that will affect the application of new sealant.
Using WD-40 to Remove Silicone Sealant
![]()
You can utilise WD-40 to loosen and remove silicone sealant from tiles with ease. This method is particularly effective for small sections or spot treatments.
Application Process
Begin by spraying a generous amount of WD-40 directly onto the silicone sealant, focusing on one small section at a time. Allow the product to penetrate the silicone for at least 5-10 minutes.
Scraping After Treatment
After the waiting period, test a small area with your scraping tool. If the silicone has softened, use a plastic or metal scraper to gently remove it. For stubborn areas, reapply WD-40 and wait longer before attempting removal again.
Cleaning Silicone Residue from Tiles
Removing silicone sealant is only half the task; cleaning the remaining residue is equally important. After you’ve removed the bulk of the silicone, your tiles may still have a thin layer of residue that needs to be cleaned.
Chemical Cleaners for Residue
You can use rubbing alcohol or acetone to clean the remaining silicone residue. Apply the rubbing alcohol to a clean cloth rather than directly to the tile, and rub in circular motions to lift the residue. For more stubborn residue, consider using commercial silicone residue removers.
| Cleaning Method | Effectiveness | Safety Precautions |
|---|---|---|
| Rubbing Alcohol | Effective for most residues | Test on an inconspicuous area first |
| Acetone | Stronger solvent for stubborn residues | Avoid prolonged exposure to tiles |
Manual Techniques for Stubborn Residue
For textured tiles or stubborn residue, you can use manual techniques like scraping with a plastic scraper or an old toothbrush dipped in rubbing alcohol to reach into grout lines or tile indentations. Ensure you rinse the area thoroughly with clean water after cleaning.
Inspecting for Damage Before Reapplication
You must check the area for any signs of damage or mould after removing the old silicone sealant. This step is crucial to ensure a successful reapplication.
Checking for Tile Damage
Inspect the tiles for chips, cracks, or scratches that might have occurred during the removal process. Also, check the grout between tiles for signs of deterioration, as damaged grout will need to be repaired before applying new silicone sealant.
| Type of Damage | Description | Action Required |
|---|---|---|
| Chips or Cracks | Visible breaks in the tiles | Repair or replace tiles |
| Grout Deterioration | Signs of wear or damage between tiles | Regrout or repair affected areas |
Identifying Mould Issues
Mould issues are particularly important to identify, as sealing over mould will trap it behind the new silicone, allowing it to spread. Look for black or green spots, and use a bright light to inspect corners and crevices where mould is most likely to develop.
Treating mould involves using a mould killer and allowing the area to dry completely before proceeding with the new silicone application. Ensuring the surface is completely dry is vital, as any trapped moisture will compromise the effectiveness of the new sealant.
Choosing the Right Silicone Sealant for Reapplication
To ensure a long-lasting seal, you need to choose the right silicone sealant for your needs. Selecting a high-quality silicone sealant designed for bathrooms or kitchens is crucial, as these are mould-resistant and waterproof.
![]()
Mould-Resistant Options
For bathroom applications, always choose a sealant specifically labelled as bathroom-grade or sanitary silicone. These contain fungicides that inhibit mould and mildew growth in humid environments, ensuring a healthier bathroom.
Waterproof Varieties
For areas with significant water exposure, such as shower enclosures, opt for sealants with enhanced waterproof properties. Consider the colour and flexibility rating of the sealant to match your tiles and withstand movement.
How to Apply New Silicone Sealant Properly
The key to a successful silicone sealant application lies in preparation and technique. Ensuring a proper seal is crucial for preventing water damage and maintaining the integrity of your tiles.
Preparing the Surface
Begin by ensuring the surface is clean, dry, and free from dust or debris. Use masking tape along the edges of the seam to create clean lines and prevent silicone sealant from spreading onto the tiles.
Application Techniques
Cut the nozzle of the silicone tube at a 45-degree angle to control the flow. Hold the nozzle with the bevel down and apply the sealant evenly along the seam using a caulk gun.
Smoothing and Finishing
Smooth the silicone sealant with a wet finger or a silicone smoothing tool to create a neat finish. Remove the masking tape immediately after smoothing to achieve clean, sharp edges.
| Step | Description |
|---|---|
| 1 | Prepare the surface by cleaning and drying it. |
| 2 | Apply masking tape to create clean lines. |
| 3 | Apply the silicone sealant using a caulk gun. |
| 4 | Smooth the sealant for a neat finish. |
![]()
Curing Time and Aftercare
Once you’ve applied the new silicone sealant, the next crucial step is ensuring it cures properly. This process is vital for the performance and longevity of the sealant.
Recommended Waiting Periods
Most silicone sealants develop a skin within 30-60 minutes, but full curing typically takes 24-48 hours, depending on the product, humidity, and temperature. It’s essential to follow the manufacturer’s instructions for curing time and avoid using the area until the silicone is fully cured.
Initial Maintenance Tips
After the initial curing period, gentle maintenance practices will help extend the life of your silicone sealant. Avoid using abrasive cleaners or scouring pads, and ensure regular ventilation to prevent moisture buildup.
| Curing Factor | Recommended Approach |
|---|---|
| Temperature and Humidity | Cooler, more humid conditions require longer curing periods. |
| Manufacturer’s Instructions | Follow the recommended curing time to ensure a strong seal. |
| Area Usage | Avoid using the sealed area until the silicone is fully cured. |
Preventing Future Silicone Sealant Issues
Maintaining your silicone seals is crucial to extend their lifespan and keep your bathroom or kitchen in top condition. To achieve this, you need to adopt a few simple practices.
Regular Cleaning Practices
Develop a regular cleaning routine that includes wiping down sealed areas to remove soap scum, body oils, and other residues. Use mild, non-abrasive cleaners specifically formulated for bathroom or kitchen surfaces to avoid degrading the silicone sealant. After showers or baths, use a squeegee to remove excess water from tiles and glass, reducing moisture that can penetrate the sealant.
Ventilation and Moisture Control
Ensure your bathroom has adequate ventilation – use extractor fans during and after showers to reduce humidity levels. Consider using a dehumidifier in particularly damp bathrooms to maintain lower humidity levels that discourage mould growth. By controlling moisture, you can significantly extend the life of your silicone seals.
Conclusion
With the right techniques and tools, you can easily remove silicone sealant from tiles and prepare them for a new application. This guide has walked you through every step, from understanding why removal is necessary to applying fresh sealant. Proper removal and cleaning ensure a strong, lasting seal.
Regular maintenance will extend the lifespan of your silicone sealant and help prevent water damage and mould growth, protecting your home from costly repairs.


