Are you tired of dealing with a steamy bathroom after every shower? Poor ventilation can lead to mould, mildew, and a host of other issues that make your bathroom an unpleasant space to be in. A well-functioning extractor fan is crucial for maintaining good air quality and preventing moisture-related problems.
Replacing your bathroom extractor grille is a simple yet effective way to improve ventilation and keep your bathroom fresh. In this guide, we’ll walk you through the process of replacing your extractor grille, from choosing the right replacement to installation and maintenance.
Key Takeaways
- Understand the importance of proper bathroom ventilation for a healthy environment.
- Learn how a well-functioning extractor grille contributes to good air quality.
- Discover the benefits of replacing your bathroom extractor grille.
- Get an overview of the replacement process and what to expect.
- Find out how to choose the right replacement grille for your extractor fan.
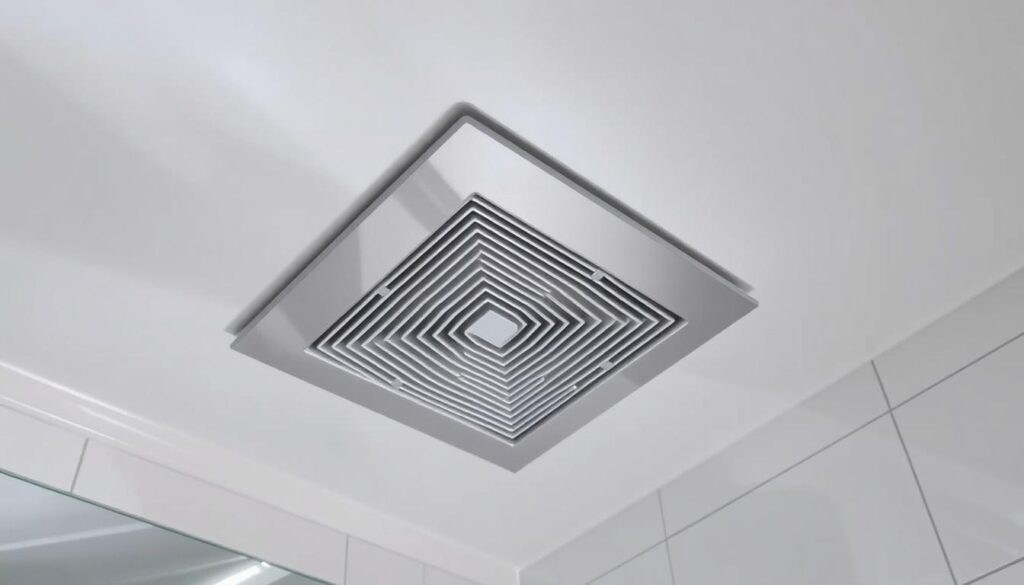
Understanding Bathroom Extractor Fans
In the context of bathroom ventilation, extractor fans serve as a critical mechanism for removing excess moisture and pollutants. Your bathroom extractor fan is an essential component in maintaining good air quality within your home.
The Purpose of Bathroom Extractor Fans
The primary function of bathroom extractor fans is to remove excess moisture, smoke, odours, and other pollutants from the air. This is crucial in preventing the growth of mould and mildew, especially in warm, moist environments like bathrooms. By effectively removing excess moisture, extractor fans help prevent damage to walls and ceilings and reduce health risks associated with mould exposure.
Bathroom extractor fans achieve this through several key benefits:
- Removing excess moisture and pollutants, thus improving air quality.
- Preventing the growth of mould and mildew by reducing humidity levels.
- Minimising condensation on surfaces such as walls, mirrors, and windows.
- Enhancing the overall hygiene and comfort of the bathroom environment.
To illustrate the importance of extractor fans, consider the following comparison:
| Feature | With Extractor Fan | Without Extractor Fan |
|---|---|---|
| Moisture Removal | Effective removal of excess moisture | High risk of moisture accumulation |
| Mould Growth | Reduced risk of mould and mildew | High risk of mould and mildew growth |
| Air Quality | Improved air quality through pollutant removal | Poor air quality due to pollutant accumulation |
By understanding the role and benefits of bathroom extractor fans, you can better appreciate the importance of maintaining and replacing components like the extractor grille to ensure optimal performance.
Why Your Bathroom Extractor Grille Matters
A well-functioning extractor grille is vital for effective bathroom ventilation. It plays a crucial role in ensuring that your bathroom extractor fan operates efficiently, removing moisture and airborne contaminants from the air.
The Role of the Grille in Fan Performance
The extractor grille affects your fan’s performance in several ways. Firstly, it influences airflow; a clean and undamaged grille ensures that air can pass through freely, allowing your fan to operate at its optimal level. Secondly, the grille’s design can impact noise levels; a poorly fitting or damaged grille can cause turbulence, leading to increased noise during fan operation. A well-designed grille can minimise noise and maximise airflow, making it an essential component of your bathroom’s ventilation system.
Signs Your Extractor Grille Needs Replacing
Several indicators suggest that your extractor grille needs replacement. These include:
- Visible damage such as cracks or discolouration
- Excessive noise during fan operation
- Persistent moisture issues despite regular fan use
- Difficulty cleaning the grille due to built-up grime
- Presence of mould or mildew on or around the grille
If you notice any of these signs, it’s likely time to consider replacing your extractor grille to maintain optimal fan performance and bathroom ventilation.
| Signs of Grille Damage | Impact on Fan Performance |
|---|---|
| Visible cracks or warping | Reduced airflow, increased noise |
| Excessive grime build-up | Difficulty in cleaning, potential for mould growth |
| Mould or mildew presence | Ineffective moisture removal, potential health risks |
Types of Bathroom Extractor Fans
Bathroom extractor fans come in various types, each designed to cater to different ventilation needs and installation requirements. Understanding these differences is crucial for selecting the most appropriate fan for your bathroom.
Axial Fans
Axial fans are a common choice for bathroom ventilation due to their straightforward installation and operation. They work by drawing air into the fan and expelling it out through the ducting system. Axial fans are generally suitable for most standard bathroom setups.
Centrifugal Fans
Centrifugal fans, on the other hand, use a different mechanism to move air. They are more powerful than axial fans and are particularly effective in situations where the ducting run is longer or more complex. Centrifugal fans are ideal for bathrooms that require more robust ventilation.
Inline Fans
Inline fans represent a highly effective solution for bathroom ventilation, especially in situations where space allows for installation within the ducting system, typically in a loft or ceiling void. They offer extraction rates up to 245m³/hr, making them three times more powerful than standard axial fans. Inline fans are particularly beneficial for installations requiring longer ducting runs or for bathrooms with serious mould or condensation issues.
| Fan Type | Extraction Rate | Installation Location |
|---|---|---|
| Axial | Up to 80m³/hr | Directly in the bathroom |
| Centrifugal | Higher than axial, variable | Can be in the bathroom or ducting system |
| Inline | Up to 245m³/hr | Within the ducting system, typically in loft or ceiling void |
The choice of extractor fan significantly impacts the ventilation efficiency and overall comfort of your bathroom. By understanding the characteristics of axial, centrifugal, and inline fans, you can make an informed decision that suits your specific needs.
Choosing the Right Replacement Grille

A well-chosen replacement grille is vital for the efficient operation of your bathroom extractor fan. The right grille not only enhances the fan’s performance but also complements your bathroom’s design.
Material Options for Extractor Grilles
Modern extractor grilles are made from a variety of materials, each offering unique benefits. When selecting a replacement grille, consider the material’s durability, resistance to moisture, and aesthetic appeal. Common materials include plastic, metal, and ABS, with some grilles featuring additional coatings for enhanced durability.
Size and Compatibility Considerations
Ensuring the replacement grille is compatible with your existing fan is crucial. Check the diameter of the spigot at the back of the fan, typically 100mm or 4 inches, to ensure the new grille fits perfectly. Some fans may have different sizes, such as 6 inches or 150mm, so it’s essential to verify the size before making a purchase.
Design and Aesthetic Choices
Modern extractor grilles come in a range of designs, from minimalist flat panels to decorative patterns. Consider the overall style of your bathroom when selecting a grille. Contemporary bathrooms often benefit from sleek, simple grilles, while traditional spaces may suit more ornate designs. Additionally, consider the colour options available, including chrome, brushed nickel, and matte black, to match your bathroom’s palette.
Some designer grilles incorporate LED lighting features, combining ventilation with ambient illumination. The positioning of your grille, whether on the ceiling, wall, or within a shower enclosure, will influence which design works best both functionally and aesthetically.
Tools and Materials Needed to Replace Bathroom Extractor Grille
The right tools and materials are crucial for a successful bathroom extractor grille replacement. Having everything you need within reach will make the process smoother and more efficient.
Essential Tools for the Job
To start, you’ll need some basic tools to remove the old grille and install the new one. These include a screwdriver, which is necessary for removing the screws that hold the grille in place. You may also find it helpful to have a soft microfiber cloth or towel on hand to clean any dust or debris from the area.
Additionally, a duster can be useful for removing dust from the fan blades and surrounding areas. Warm, mild soapy water and a soft sponge can also be used to clean the fan and grille.
Optional Tools That Make the Job Easier
While not essential, some tools can make the replacement process easier and more efficient. A cordless drill with screwdriver bits can speed up the removal and installation process, particularly when dealing with multiple fixing points.
Other useful tools include needle-nose pliers for manipulating small parts, a small brush set for detailed cleaning of fan blades and impeller components, and an air duster can or compressed air tool for removing dust from intricate parts of the fan.
| Tool | Purpose |
|---|---|
| Screwdriver | Removing screws that hold the grille in place |
| Cordless Drill | Speeding up removal and installation |
| Needle-nose Pliers | Manipulating small parts |

Safety Precautions Before Starting
When it comes to replacing your bathroom extractor grille, safety precautions are essential. Ensuring your safety is crucial when working with electrical appliances, particularly in areas prone to moisture like the bathroom. You need to be aware of the potential hazards and take necessary measures to mitigate them.
Electrical Safety Measures
Electrical safety is paramount when replacing your extractor fan grille. You should always switch off the power supply to the fan at the consumer unit or fuse box before starting work. This simple step can significantly reduce the risk of electrical shock.
Additionally, using a voltage tester can provide extra assurance that the circuit is dead. It’s also a good practice to keep the work area well-lit and dry to prevent accidents. By taking these precautions, you can ensure a safe working environment.
Bathroom Zones and IP Ratings Explained
Bathroom electrical installations are governed by strict safety regulations that divide the room into zones based on proximity to water sources. There are three main zones to consider: Zone 0, Zone 1, and Zone 2, each with specific requirements for electrical appliances. Understanding these zones is crucial for safe installation.
The IP (Ingress Protection) rating of your extractor fan and grille is also vital. The IP rating consists of two digits, indicating protection against solid objects and water resistance, respectively. For bathroom extractor grilles, a minimum IP44 rating is recommended, offering protection against objects larger than 1mm and water splashed from any direction.
Step-by-Step Guide to Replace Bathroom Extractor Grille
Replacing your bathroom extractor grille is a straightforward process that can significantly improve your fan’s performance. Before you start, ensure you have the necessary tools and a replacement grille that is compatible with your extractor fan model.
Removing the Old Grille
To begin, you need to remove the old grille. This is typically done by unscrewing the screws or releasing the clips that hold it in place. Make sure to switch off the power to the fan at the circuit breaker or fuse box before starting to avoid any accidents.
Once the old grille is removed, inspect the area for any dust or debris that may have accumulated. This is a good opportunity to clean the surrounding area to ensure a smooth installation of the new grille.
Cleaning the Fan Unit
With the grille removed, you have access to the fan unit. Use this opportunity to clean the fan blades and the surrounding area. Use a soft brush or a cloth to gently remove any dust or debris. After cleaning, allow everything to dry completely before proceeding.
You can use a cloth or kitchen roll paper to help dry the area. If you’ve also cleaned the cover or grille, allow that to dry as well. Once everything is dry and clean, you can reattach the cover using the screws or clips.
Installing the New Grille
Before installing the new grille, check that it is the correct size and compatible with your fan model by temporarily positioning it over the fan opening. If the new grille uses a different mounting system, you may need to drill new holes or use adapters.
- For screw-mounted grilles, position the grille squarely over the fan opening and secure it with screws, starting with opposite corners.
- When installing clip-on grilles, align the clips with their receiving slots and press firmly until they engage.
- Avoid overtightening screws, as this can damage the grille.
- Once installed, wipe the grille with a clean, dry cloth to remove any fingerprints or debris.
- Test the fan operation to ensure the grille doesn’t rattle or vibrate excessively.
- For wall-mounted installations, consider applying a thin bead of bathroom-grade silicone sealant around the edge of the grille.
By following these steps, you can successfully replace your bathroom extractor grille, ensuring your fan operates efficiently and effectively, whether it’s mounted on the wall or ceiling.
Dealing with Common Challenges
As you replace your bathroom extractor grille, be prepared to tackle some common problems that may arise during the process. While the task is generally straightforward, certain issues can complicate the installation.
Handling Non-Standard Sizes
One common challenge is dealing with non-standard sizes. If your new grille doesn’t fit the existing opening, you may need to consider alternatives. Checking the manufacturer’s specifications can help you identify the correct size. In some cases, you might need to adapt the ducting or use a different grille that matches your fan’s dimensions.
Addressing Wall or Ceiling Damage
Another issue you might encounter is damage to the wall or ceiling around the extractor fan. Before installing the new grille, assess any damage and make necessary repairs. This might involve patching holes or cracks in the surface to ensure a secure fit for the new grille.
Troubleshooting Fit Issues
Fit issues can be frustrating, but there are several solutions to consider. If the new grille sits proud of the wall or ceiling surface, check whether the fan housing is protruding too far and can be pushed back further into the duct. For grilles that sit too deep, spacer rings or mounting frames can bring them forward to create a flush finish.
| Issue | Solution |
|---|---|
| Grille sits proud of surface | Push fan housing back into duct |
| Grille sits too deep | Use spacer rings or mounting frames |
| Mounting holes don’t align | Use universal mounting bracket |
| Rattling noises after installation | Check for debris or obstructions |
Some other common fit issues include rattling noises after installation, grilles that keep falling off, and uneven surfaces. For rattling noises, remove the grille and check for debris or obstructions in the mounting area. For grilles that fall off, consider using stronger fixings or additional mounting points, particularly in bathrooms with high humidity. When dealing with uneven surfaces, use weatherstripping or foam tape behind the grille to create a secure fit.
Improving Your Extractor Fan’s Performance
The right extractor grille can make a substantial difference in your fan’s efficiency. By choosing a grille that is designed to work in harmony with your extractor fan, you can enhance airflow, reduce noise, and improve energy efficiency.
Optimising Airflow with the Right Grille
Optimising airflow is crucial for effective ventilation. A well-designed grille can improve airflow by reducing resistance and ensuring that the fan operates at its optimal level. Consider a grille with precision-engineered openings to maximise airflow efficiency.

Reducing Noise with Modern Grilles
Modern grilles are designed not only to improve airflow but also to reduce noise levels. By incorporating features such as sound-absorbing materials or streamlined designs, these grilles can help minimise the noise produced by your extractor fan, making it more comfortable to use.
Energy Efficiency Considerations
Energy efficiency is a key consideration when selecting an extractor grille. Look for grilles that are designed to work with energy-efficient fans, such as those with EC (electronically commutated) motors. These grilles can help reduce energy consumption by up to 70% compared to older models.
| Grille Feature | Airflow Improvement | Energy Efficiency |
|---|---|---|
| Precision-engineered openings | Up to 10% improvement | Reduced energy consumption |
| Backdraught shutters | Prevents heat loss | Improved thermal efficiency |
| Smart features with humidity sensors | Optimised extraction rates | Energy use optimisation |
By considering these factors and choosing the right extractor grille, you can significantly improve your extractor fan’s performance, reducing noise and energy consumption while enhancing overall efficiency.
Maintenance Tips for Your New Extractor Grille
To keep your bathroom extractor fan in optimal condition, regular maintenance is crucial. This not only ensures the fan operates efficiently but also prolongs its lifespan.
Regular Cleaning Schedule
It’s recommended to give your extractor fan a thorough clean every six months. If you notice it becoming clogged or noisy, it may be time for a clean sooner. Regular cleaning helps maintain airflow and reduces the risk of dust buildup.
- Wipe the visible surface of the grille with a microfiber cloth weekly to prevent dust accumulation.
- Apply a thin layer of anti-static spray to the clean grille to repel dust particles.
- Ensure adequate ventilation during and after showers by running the fan for at least 20 minutes.
Preventing Dust and Grease Build-up
To prevent dust and grease from building up on your extractor grille, consider a few additional measures. In bathrooms near kitchens, using grilles with finer mesh can help prevent cooking grease from entering the fan system. Regular use of bathroom dehumidifiers can reduce ambient moisture, making it harder for dust to stick to surfaces.
- Consider using air purifiers in adjacent spaces to reduce overall dust levels in the air.
- For bathrooms in particularly dusty environments, protective pre-filters can be installed over the grille.
For more detailed guidance on maintaining your extractor fan, you can refer to resources like this article on extractor fan maintenance.
When to Consider a Complete Fan Replacement
If your extractor fan is nearing or has exceeded its typical ten-year lifespan, it’s time to consider whether a simple grille replacement will suffice or if a full fan replacement is necessary. Your bathroom’s ventilation and overall condition depend on making the right choice.
Signs Your Fan Unit Is Failing
Several indicators suggest that your fan unit is failing and may need replacement. These include reduced airflow despite a new grille, increased noise levels, visible signs of wear or damage on the fan blades or motor, and failure to turn off or on properly. When you notice any of these signs, it’s crucial to assess whether the issue lies with the fan unit itself or other factors.
Cost Comparison: Grille Replacement vs. Full Fan Replacement
Replacing just the extractor grille is generally cheaper, costing between £10-£30. However, a complete fan unit replacement, which can range from £50-£200, may offer better long-term value, especially for fans over seven years old. Consider installation costs, energy efficiency improvements, and warranty periods when making your decision.
- Installation costs: Grille replacement is often DIY, while full fan replacement usually requires a professional electrician.
- Energy efficiency: Newer fan models can save £10-£20 annually.
- Warranty: Complete fan units often come with longer warranties (3-5 years) compared to grilles (1-2 years).
For homeowners planning to stay long-term, the extended benefits of a full fan upgrade often outweigh the initial cost savings of just replacing the grille.
Upgrading Your Bathroom Ventilation System
Enhancing your bathroom ventilation system is crucial for maintaining a healthy and comfortable environment. Modern extractor fans offer a range of advanced features that can significantly improve your bathroom’s hygiene and ambiance.

Modern Features in Extractor Fans
Modern extractor fans come equipped with innovative features such as intelligent humidity sensors that detect steamy showers and adjust ventilation accordingly. These fans can also be controlled via smartphone apps, allowing you to customise settings to suit your needs.
The sensor timer and switch functionalities enable you to manage when and how your fan operates, providing flexibility and energy efficiency. With adjustable humidity sensitivity thresholds, you can tailor the ventilation to your bathroom’s specific requirements.
Smart Bathroom Ventilation Options
Smart bathroom ventilation systems offer unprecedented customisation and control. Some key benefits include:
- App-controlled ventilation systems that allow for adjustable humidity sensor thresholds and fan speed settings.
- Intelligent humidity sensors that distinguish between a steamy shower and general ambient humidity, preventing unnecessary activation.
- Sensor timer and geofencing features that trigger ventilation based on your proximity to home.
- Integration with other smart home devices for coordinated operation, such as working in tandem with smart lighting or heating systems.
By upgrading to a smart bathroom ventilation system, you can enjoy a more comfortable, healthy, and energy-efficient bathroom environment.
Troubleshooting After Replacement
Replacing your bathroom extractor grille is just the first step; you may need to troubleshoot some common problems that arise afterward. Ensuring your extractor fan operates efficiently is crucial for maintaining good air quality in your bathroom.
Addressing Noise Issues
If your extractor fan is making unusual noises after replacing the grille, it could be due to improper installation or debris obstructing the fan blades. Check that the new grille is securely fastened and that there are no obstructions. If the noise persists, it might be worth inspecting the fan motor for any signs of wear or damage.
For instance, a grinding noise could indicate that the fan motor is malfunctioning or that there’s an issue with the ducting. In such cases, it’s essential to address the problem promptly to prevent further damage.
Fixing Airflow Problems
Poor airflow can be frustrating, especially after you’ve replaced the extractor grille. Ensure that the new grille is properly fitted and that there are no blockages in the ducting. Check if the fan is working correctly and that it’s set to the correct speed. If the problem persists, it might be worth considering upgrading to a more powerful fan or checking for any structural issues around the fan installation, such as damage to the wall or ceiling.
When to Call a Professional
While many issues can be resolved through DIY troubleshooting, there are times when it’s necessary to call a professional. If you notice electrical issues, such as tripping circuit breakers or the fan failing to start, consult a qualified electrician immediately.
| Issue | Possible Cause | Action |
|---|---|---|
| Electrical issues | Faulty wiring or installation | Consult a qualified electrician |
| Noise or vibration | Improper installation or debris | Check installation and clean fan |
| Poor airflow | Blockages or inadequate fan capacity | Check ducting and consider upgrading fan |
In cases where you identify complex issues, such as persistent moisture problems or signs of water damage around the fan installation, it’s advisable to seek professional help. Experts can assess the situation and provide solutions to ensure your bathroom ventilation system operates efficiently and safely.
Conclusion
Improving your bathroom’s air quality can be achieved by replacing the extractor grille, a task that’s easier than you think. This simple update not only enhances the aesthetic appeal of your bathroom but also significantly contributes to the overall performance of your extractor fan.
When selecting a replacement grille, consider factors beyond appearance. Material durability, airflow efficiency, and compatibility with your existing fan are equally important. Most standard bathroom fans use 4-inch grilles, but verifying measurements before purchase saves time and prevents installation headaches.
- Replacing your bathroom extractor grille is a relatively simple yet effective way to improve ventilation efficiency and update your bathroom’s appearance.
- Regular maintenance of both the grille and fan unit is essential for preventing mould growth and ensuring healthy air quality.
- For older fan units, consider whether a complete replacement might offer better long-term value through improved energy efficiency and modern features.
With proper installation and maintenance, your new bathroom extractor grille should provide years of reliable service, helping to maintain a dry, well-ventilated bathroom space. By focusing on these key aspects, you can enjoy improved air quality and reduced risk of mould, ensuring a healthier environment.