Dealing with a faulty light switch can be frustrating and disrupt your daily routine. Understanding when to replace it is crucial for maintaining your home’s electrical system.
Replacing a faulty light switch is a relatively straightforward DIY task that can save you money on electrician fees. However, it requires careful attention to safety precautions and proper wiring techniques.
By following our comprehensive guide, you’ll be able to identify the right type of switch for your needs and install it correctly, ensuring your home’s functionality and safety.
Key Takeaways
- Identify when your light switch needs replacing.
- Understand the essential safety precautions for DIY electrical work.
- Learn how to choose the correct type of switch for your needs.
- Follow step-by-step instructions for a successful installation.
- Ensure proper wiring techniques for safe and efficient operation.
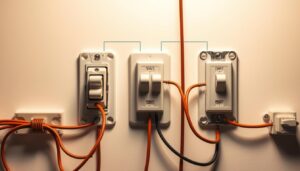
Understanding Light Switch Problems
Light switch problems can be tricky to diagnose, but there are clear signs to look out for. Before you start investigating the electrical circuit, it’s essential to rule out simple causes.
Signs of a Faulty Light Switch
A faulty light switch can manifest in various ways. For instance, if your light switch doesn’t turn on or off, or if the dimmer switch isn’t functioning correctly, it’s likely that the switch is faulty. Sometimes, the issue might be as simple as a blown light bulb. To confirm, try replacing the light bulb with a known working one.
Determining If You Need a New Switch
To determine if you need a new switch, inspect the existing one. Check if the issue persists across multiple bulbs. If so, it may indicate a problem with the switch rather than the bulb. You should also inspect the wires for any damage or disconnections by turning off the power and removing the switch plate. Consider the age of your switch and whether it’s been exposed to moisture or excessive dust.
Other factors to consider include the switch’s amperage rating and whether it’s suitable for the load it’s controlling. Testing for power at the switch location using a voltage tester can also help confirm if the circuit is functioning properly.
Safety First: Precautions Before You Begin
Ensuring your safety is paramount when dealing with electrical components like a faulty light switch. Electrical work can be hazardous if not done correctly, so it’s crucial to follow proper safety protocols to avoid electrical shock or other injuries.
Proper Circuit Isolation Procedures
To work safely on your lighting circuit, you first need to isolate it from the power source. This involves locating the correct circuit breaker and switching it off. Verify that you’ve identified the right breaker by checking which lights or appliances are affected when you flip the switch.
After switching off the breaker, use a reliable voltage tester to confirm that there’s no power flowing to the light switch you’re about to replace. This step is crucial for your safety.
Testing for Dead Circuits
Using an approved voltage tester, you can now test your lighting circuit. This will tell you for certain that the circuit you intend to work on is dead and safe to touch. It’s a simple yet effective way to ensure your safety before starting work.

Essential Safety Equipment
When working with electrical components, having the right safety equipment is vital. Some essential items include:
- Insulated screwdrivers with rubber handles to protect against accidental contact with live wires.
- Safety glasses to safeguard your eyes from sparks or debris.
- A reliable voltage tester to confirm the circuit is dead before you begin.
- Rubber-soled shoes for additional insulation against electrical current.
By taking these precautions and using the right safety equipment, you significantly reduce the risk of electrical shock or injury when working with electrical systems, ensuring a safe working environment.
Tools and Materials You’ll Need
To successfully replace a light switch, you’ll need to have the right tools and materials at hand. This ensures the job is done efficiently and safely.
Essential Tools for the Job
When it comes to replacing a faulty light switch, having the correct tools is crucial. You’ll need a screwdriver, typically a flathead or Phillips head, to remove the screws holding the switch in place. It’s also advisable to have a voltage tester to ensure the circuit is dead before you start working on it. Additionally, you’ll need wire strippers if your new switch requires adjusting the wire ends.
Choosing the Right Replacement Switch
Selecting the correct replacement switch is vital for a successful DIY project. First, ensure the new switch matches the functionality of the old one—whether it’s a single-pole, three-way, or dimmer switch. Consider the amperage rating of your circuit; most residential lighting circuits use 15-amp switches. Also, check the type of wire connection the new switch requires and ensure it fits with your existing wiring setup. Don’t forget to check that the new switch comes with the appropriate screws for mounting.
Here’s a summary of what you need to consider when choosing a new switch:
| Switch Type | Amperage Rating | Wire Connection Type |
|---|---|---|
| Single-pole, three-way, or dimmer | 15-amp for most residential circuits | Back-wiring or side terminals |
| Decorative switches | Check compatibility with existing wiring | Some require a neutral wire |
When purchasing a new switch, ensure it fits in the same switch box as the old one. Some modern switches may have different dimensions or require a neutral wire, which older installations might not have. Keeping the original mounting screws is advisable, as newer switches might come with metric screws that don’t fit older boxes.
Types of Light Switches Explained
When it comes to lighting control, understanding the different types of light switches is crucial. The right switch can enhance the functionality and efficiency of your lighting system.
Single-Pole vs Two-Way Switches
Single-pole switches are the most common type, used to control a light fixture from one location. Two-way switches, on the other hand, allow you to control a light fixture from two different locations, making them ideal for hallways, staircases, or large rooms.
Dimmer Switches and Their Installation
Dimmer switches offer more than just on/off functionality; they allow you to adjust the brightness of your lights. For guidance on choosing the correct dimmer switch, consider factors like compatibility with your existing lighting and the type of bulbs you’re using.
Special Considerations for Bathrooms
Bathrooms require special consideration due to moisture and safety regulations. Ensure that any light switch installed in a bathroom is suitable for the environment and complies with local electrical standards.
Motion Sensor Switches
Motion sensor switches automatically turn on lights when they detect movement, making them perfect for utility areas, garages, or anywhere hands-free lighting control is beneficial. These switches can enhance convenience and energy efficiency.
| Type of Switch | Functionality | Ideal Use |
|---|---|---|
| Single-Pole | Control from one location | Most rooms |
| Two-Way | Control from two locations | Hallways, staircases |
| Dimmer | Adjust brightness | Living areas, dining rooms |
| Motion Sensor | Automatic on/off with motion detection | Utility areas, garages |
Step-by-Step Guide to Replacing a Faulty Light Switch
The process of replacing a faulty light switch involves several key steps, from preparing your work area to testing the new switch. Ensuring that you follow these steps carefully will help you complete the task safely and efficiently.
Preparing Your Work Area
Before you begin, make sure your work area is clear and safe. Turn off the power to the circuit at the consumer unit and verify that the light switch is dead using a voltage tester. Clear the area around the switch of any clutter or obstructions.
Removing the Old Switch
To remove the old switch, start by taking out the screws that hold the switch plate cover in place. Gently pull the cover away from the wall to access the switch. You will then need to remove the mounting screws that secure the switch to the back box.
Documenting the Wiring
Before disconnecting any wires, take a moment to document how they are connected to the old switch. This can be done by taking a photo or making a note of the wire colours and their corresponding terminals. This step is crucial for ensuring that the new switch is wired correctly.
Disconnecting the Wires
Carefully disconnect the wires from the old switch, taking note of any earth wires that need to be connected to the new switch. Use a screwdriver to loosen the terminal screws, then gently pull the wires free. If the wires are stuck, do not force them as this could damage the wiring.
Installing the New Switch
With the old switch removed and the wiring documented, you can now install the new switch. Ensure that the new switch is compatible with your electrical system and wiring.
Connecting the Wires Correctly
Connect the cores to the correct terminals of the new switch, and tighten the screws. Then check they’re clamping the cable cores firmly by giving the wires a slight tug. If there isn’t one already, fit a length of brown PVC sleeving over the blue core (or the black core if your wiring is in the old colours) to show it can be live.
- Carefully fold wires into the back box, ensuring none are pinched or strained when the switch is pushed back.
- Align the switch with the mounting holes in the back box and insert the mounting screws.
- Tighten the mounting screws evenly until the switch is firmly secured against the wall without overtightening.
- Ensure the switch is level and properly aligned before final tightening of the mounting screws.
- Return to the consumer unit and restore power to the circuit to test the new installation.
- Test the switch operation several times to ensure it functions smoothly and consistently.
- Listen for any unusual sounds like buzzing or clicking that might indicate a problem with the installation.
- If the switch doesn’t work properly, turn off power again and recheck all connections before troubleshooting further.
- Once satisfied with the operation, attach the switch plate cover and secure it with its screws.
- Perform a final test of the switch after the cover is installed to ensure everything works correctly.
| Step | Description | Notes |
|---|---|---|
| 1 | Prepare your work area | Clear the area and turn off power |
| 2 | Remove the old switch | Take out screws and gently pull the cover away |
| 3 | Document the wiring | Take a photo or note wire colours and terminals |
| 4 | Install the new switch | Ensure compatibility and correct wiring |
| 5 | Test the new switch | Restore power and test operation |
Understanding Earthing and Why It Matters
Proper earthing is a fundamental component of a safe electrical system. Earthing provides a safe path for electrical current to flow to the ground, protecting you and your home from electrical shock.
The Importance of Proper Earthing
Proper earthing is crucial for safety. It ensures that if there’s a fault in your electrical system, the current is directed harmlessly into the ground, preventing electrical shock. This is particularly important in homes with metal light switches or other metal components.
How to Earth a Metal Light Switch
When installing a metal light switch, it’s essential to earth the switch correctly. For a metal mounting box with a plastic faceplate, connect the earth wire directly to the earthing terminal on the box. If you have a metal faceplate, connect the main earth wire to the faceplate and then run a supplementary earth wire to the mounting box.
| Component | Earthing Requirement |
|---|---|
| Metal Mounting Box with Plastic Faceplate | Connect earth wire to the earthing terminal on the box |
| Metal Faceplate | Connect main earth wire to faceplate, then run supplementary earth wire to mounting box |
| Plastic Mounting Box and Faceplate | Use green/yellow sleeving on bare earth cores and clamp with a connector |

Always use green and yellow sleeving on bare earth wires to identify them clearly. Ensure that earth wires are securely connected to the earthing terminals by tightening the terminal screws fully. If your home’s wiring doesn’t include earth wires, consult an electrician before installing metal switches or faceplates.
Conclusion
Replacing a light switch is a simple yet effective way to improve your home’s functionality. By following the steps outlined in this guide, you can ensure a successful replacement that meets your needs. Always make sure to isolate the circuit and test for dead circuits before beginning work. Choosing the right new switch is crucial for compatibility and safety. Properly documenting the original wiring configuration and ensuring all connections are secure and earthed will help you achieve a professional result. If you’re unsure, don’t hesitate to consult a qualified electrician.
With the right approach, replacing a faulty light switch can be a cost-effective and satisfying DIY project, enhancing both the functionality and appearance of your home.