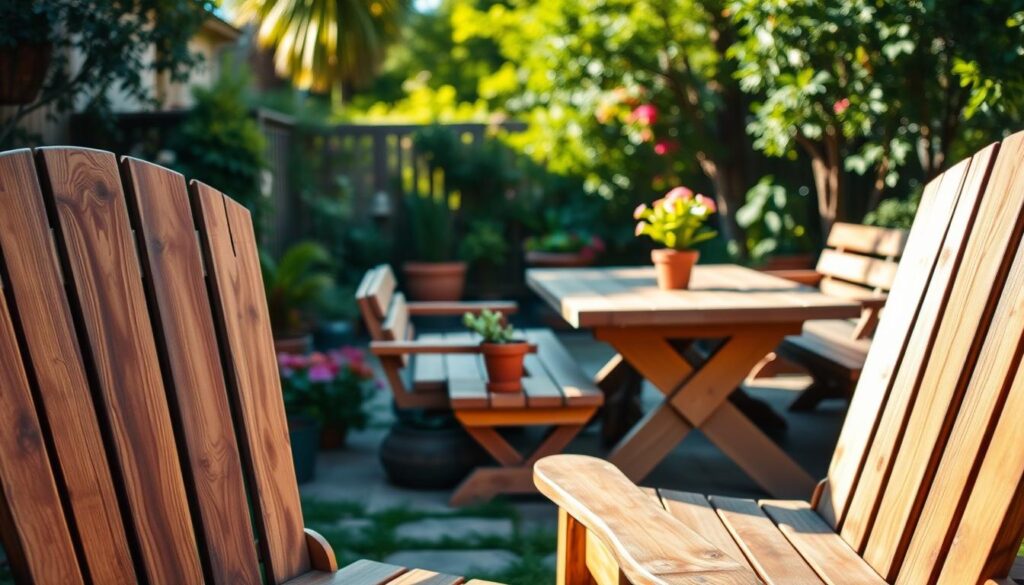
As the seasons change, your outdoor furniture can become worn and weathered, even if it’s been covered during the winter months. Constant exposure to the elements can leave your wooden furniture looking tired and faded.
Re-staining is a simple yet effective way to breathe new life into your weathered outdoor furniture, restoring both its appearance and protective qualities. With the right tools and techniques, you can transform greyed-out, rough furniture into pieces that look nearly new again.
By re-staining your wooden furniture, you’ll not only enhance your outdoor decor but also extend the lifespan of your furniture, saving you the cost of replacement.
Key Takeaways
- Re-staining can restore the appearance and protective qualities of your outdoor furniture.
- Proper tools and techniques are essential for a successful restoration.
- Re-staining can extend the lifespan of your furniture and save you money.
- Regular maintenance can prevent damage from the elements.
- Restoring your furniture can enhance your outdoor decor.
Why Your Wooden Patio Furniture Weathers
Your wooden patio furniture is susceptible to weathering due to environmental factors. Prolonged exposure to sunlight, rain, and temperature fluctuations can cause the wood to deteriorate, affecting both its appearance and durability.
The Impact of Weather Elements
The weather elements play a significant role in the weathering of your wooden patio furniture. UV rays can cause the wood to fade and lose its natural colour, while rain and moisture can lead to warping and cracking. The combination of these factors accelerates the weathering process, damaging the wood grain and compromising the furniture’s structural integrity.
Signs Your Furniture Needs Re-Staining
Several signs indicate that your wooden patio furniture needs re-staining. These include:
- A grey or silvery appearance, indicating worn-off protective finish and UV damage.
- A rough texture, suggesting broken-down wood fibres and deteriorated protective coating.
- Water soaking into the surface quickly, showing a broken waterproof seal and vulnerability to moisture damage.
- Visible cracks, splits, or checking, indicating advanced weathering that requires immediate attention.
- Faded or uneven colour, suggesting worn-off stain in areas with higher exposure, creating an aesthetically unpleasing appearance.
Re-staining can restore the original look and protect the furniture from further damage, ensuring it remains in good condition for years to come.
Essential Tools and Materials for Re-Staining
The key to a successful re-staining project lies in selecting the right tools and materials for the job. To achieve a professional finish, you’ll need to gather the necessary equipment and supplies.
Sanding Equipment
Effective sanding is crucial for a smooth finish. You’ll need sandpaper in various grits, a sanding block, and possibly an orbital sander for larger areas. For intricate designs, consider using a detail sander or sanding by hand.
Cleaning Supplies
Before applying stain, your furniture must be clean. Use a wood cleaner suitable for your furniture’s material, along with a soft-bristled brush and clean rags. For teak furniture, consider using a teak cleaner to remove dirt and grime.
Stains and Sealers
Choose between penetrating oil-based stains that soak into the wood or film-forming water-based stains that create a protective layer. Consider a product that combines stain and sealer, like Varathane’s outdoor stain and sealer in Natural Cedar, to save time and ensure compatibility. Always test the stain colour on an inconspicuous area first.
By selecting the right tools and materials, you’ll be well-prepared to re-stain your patio furniture effectively, achieving a beautiful and durable finish.
Preparing Your Patio Furniture for Re-Staining
The key to successfully re-staining your patio furniture lies in proper preparation. Before you begin the re-staining process, it’s essential to inspect, clean, and prepare the surface of your furniture to ensure a smooth and even finish.
Inspecting for Damage and Repairs
Begin by inspecting your patio furniture for any damage or wear. Check for loose joints, cracks, or rotting wood. Make any necessary repairs before proceeding to avoid further deterioration. Use a durable wood glue to reinforce loose joints and replace any severely damaged pieces.
| Type of Damage | Repair Action |
|---|---|
| Loose Joints | Apply wood glue and clamp |
| Rotting Wood | Replace the damaged section |
Cleaning Techniques for Different Wood Types
Different types of wood require specific cleaning techniques. For instance, oak and teak can withstand more aggressive cleaning, while pine and cedar require gentler care. Use a mild wood cleaner suitable for your furniture’s wood type, and avoid using harsh chemicals that can damage the surface.
Removing Old Finishes Effectively
To remove old finishes, start by assessing the current finish type. For light weathering or thin finishes, sanding alone may suffice, beginning with medium-grit sandpaper (80-100) and progressing to finer grits (150-220). For stubborn finishes, use a chemical stripper designed for outdoor use, following the manufacturer’s instructions. 
After removing the old finish, thoroughly vacuum all surfaces and wipe with a tack cloth to remove fine dust particles, ensuring a clean surface for the new stain.
By following these steps, you’ll be able to prepare your patio furniture for re-staining, achieving a beautiful and long-lasting finish.
The Complete Sanding Process
Sanding is a crucial step in reviving your weathered patio furniture. It helps to remove dirt, grime, and old finishes, preparing the surface for a new stain.
Choosing the Right Sandpaper Grit
Selecting the appropriate sandpaper grit is vital for effective sanding. For most wooden patio furniture, start with a medium-grit sandpaper (around 120-150 grit) to remove old finishes and smooth out the wood. Progress to finer grits (220-240) for a silky finish.
Proper Sanding Techniques
To sand effectively, work in small sections, sanding with the grain to avoid scratches. Apply moderate pressure, using a sanding block if necessary to keep the sandpaper flat against the wood. This helps prevent uneven sanding and reduces the risk of creating debris.
Finishing Touches Before Staining
After sanding, use a soft bristle brush to remove any dust and debris. Then, follow these steps:
- Thoroughly vacuum all surfaces using a brush attachment to remove loose dust from the wood grain and crevices.
- Wipe down the entire piece with a tack cloth to capture fine dust particles that vacuuming might miss.
- Inspect the piece in good lighting, running your hands over surfaces to feel for any rough spots.
- Address any remaining imperfections with spot sanding, blending these areas with the surrounding wood.
- Allow the furniture to sit in a dust-free environment for at least an hour before staining.
| Sanding Step | Purpose | Tools/ Materials |
|---|---|---|
| Initial Sanding | Remove old finishes and smooth out wood | Medium-grit sandpaper (120-150 grit) |
| Fine Sanding | Achieve a silky smooth finish | Fine-grit sandpaper (220-240 grit) |
| Final Cleaning | Remove dust and debris | Soft bristle brush, vacuum, tack cloth |
By following these steps and taking your time, you’ll achieve a beautifully sanded surface ready for staining.
How to Re-Stain Weathered Patio Furniture
With the right techniques and materials, you can easily re-stain your weathered patio furniture. The process involves selecting the appropriate stain, applying it correctly, and allowing it to dry properly.
Selecting the Right Stain for Your Furniture
Choosing the correct stain is crucial for achieving a durable and attractive finish. Consider the type of wood your furniture is made of and the level of protection it needs. For instance, if your wooden patio furniture is exposed to direct sunlight, look for a stain that offers UV protection.

Application Methods and Techniques
To apply the stain effectively, use a high-quality brush or roller that suits the texture of your furniture. Work in small sections to maintain even coverage, and always follow the manufacturer’s instructions. It’s also essential to apply the stain in the direction of the wood grain to avoid damaging the wood.
If a second or third coat is required, then always leave it fully dry for at least 2 hours between coats.
Drying Times and Multiple Coats
The drying time between coats can vary significantly depending on the product, temperature, and humidity. Typically, you should wait between 2 to 24 hours before applying the next coat. It’s crucial to test the dryness by lightly touching an inconspicuous area. If it feels tacky, more drying time is needed.
| Drying Time | Conditions |
|---|---|
| 2 hours | Minimum drying time between coats |
| 4 hours | Drying time before use |
| 24-48 hours | Final drying time before exposure to weather |
By following these guidelines and using the right stain and sealer, you can restore your furniture to its original beauty and ensure it remains protected against the elements for a long time.
Protecting and Maintaining Your Newly Stained Furniture
Protecting your newly stained furniture is vital to maintaining its appearance and longevity. After re-staining, your wooden garden furniture is more resistant to the elements, but it still requires care to withstand the sun, water, and other weather conditions.
Applying Sealers and Protective Finishes
Applying a sealer or protective finish is a crucial step in safeguarding your furniture. It helps to shield the wood from moisture and UV damage, ensuring your furniture remains in good condition for years to come. Choose a high-quality sealer that is suitable for outdoor use and follow the manufacturer’s instructions for application.
Seasonal Maintenance Tips
Regular maintenance is key to extending the life of your furniture. During the winter months, it’s essential to protect your furniture from harsh weather conditions. You should also inspect your furniture regularly for signs of wear and tear, addressing any issues promptly to prevent further damage.
- Check for loose joints or cracks in the wood and repair them as needed.
- Reapply protective finishes as recommended by the manufacturer.
- Keep your furniture clean and dry to prevent the growth of mould and mildew.
Covering and Storing Recommendations
When not in use, cover your garden furniture with a high-quality, waterproof yet breathable cover to protect it from the elements. Ensure the furniture is completely dry before covering, and remove the cover periodically to allow air circulation. For long-term storage, choose a dry location with stable temperature and humidity levels, and consider elevating the furniture off the floor to improve airflow.
Conclusion
By following the steps outlined in this guide, you can successfully re-stain your patio furniture and extend its lifespan. Re-staining weathered wood furniture is a rewarding project that combines DIY satisfaction with significant cost savings. With proper care and regular maintenance, your re-stained furniture can continue to look beautiful and provide comfortable outdoor living space for many years to come.
For more detailed guides on refinishing outdoor furniture, you can visit our comprehensive guide on how to refinish outdoor furniture. The skills you’ve learned can be applied to other wooden items around your garden, extending their life and beauty. Using teak oil can help protect wood and maintain its natural look.