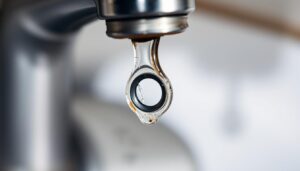
Is your kitchen sink constantly plagued by drainage issues or the unpleasant smell of sewer gases? The culprit could be a faulty drain trap, a crucial component of your sink’s plumbing system.
A trap is designed to prevent sewer gases from entering your home while allowing wastewater to flow freely. However, when it becomes corroded or develops leaks, it can cause significant problems.
If you’re experiencing issues with your sink drain, it may be time to replace the trap assembly. Fortunately, this is a relatively straightforward DIY task that can be completed with basic plumbing knowledge and tools.
Key Takeaways
- Identify when your sink trap needs replacement due to corrosion or leaks.
- Understand the function of a kitchen sink trap in preventing sewer gases.
- Learn how to replace your kitchen sink trap in under an hour.
- Select the correct replacement trap for your sink configuration.
- Test your installation for proper function and troubleshoot common issues.
Understanding Kitchen Sink Traps
Understanding the function and importance of your kitchen sink trap is essential for maintaining a healthy and odour-free kitchen environment. The sink trap is a crucial component that prevents sewer gases from entering your home.
What Is a Drain Trap and Why It’s Important
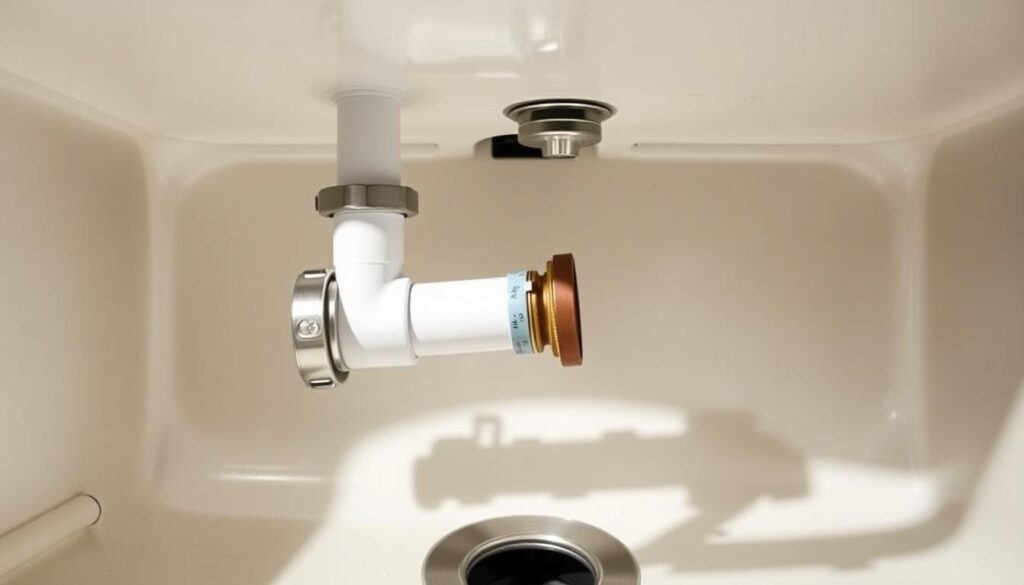
A drain trap, commonly referred to as a P-trap, is a curved pipe under your sink that holds a small amount of water, acting as a barrier against foul odours and gases. This water seal is vital for maintaining a pleasant kitchen environment. Typically, pipes of P-trap are assembled with PVC, Metal, or ABS materials, which are prone to corrosion, leaks, and damage over time.
Signs Your Sink Trap Needs Replacement
Several indicators suggest that your sink trap may need replacement. These include persistent leaks around the trap connections, visible corrosion or rust on metal components, and foul odours emanating from under your sink. Additionally, slow drainage, physical damage to the trap, or discoloration and mineral buildup inside the pipe are also signs that it’s time to replace your kitchen sink trap.
| Signs of Failure | Description |
|---|---|
| Persistent Leaks | Leaks around the trap connections that don’t resolve after tightening |
| Corrosion or Rust | Visible deterioration on metal trap components |
| Foul Odours | Unpleasant smells coming from under your sink |
Types of Sink Traps Available
Selecting the right sink trap for your kitchen involves understanding the different types, sizes, and configurations available. The correct trap ensures efficient waste disposal and prevents siphoning of water from the trap, which can lead to foul odors.
PVC vs Metal Traps
Sink traps are typically made from either PVC or metal. PVC traps are resistant to corrosion and are generally more affordable, while metal traps offer greater durability and can withstand higher temperatures. Your choice between PVC and metal will depend on your specific needs and local plumbing codes.
Different Configurations and Sizes
Kitchen sink traps come in various configurations and sizes to accommodate different sink designs and plumbing setups. Common sizes include 1½-inch and 2-inch diameters, with the larger size being standard for most modern kitchen installations. The configuration may vary depending on whether you have a single or double bowl sink. 
The distance between your sink drain and the branch pipe in the wall determines the length of the trap arm needed. Some configurations include additional inlets for dishwasher or washing machine drainage connections. When measuring for a replacement trap, consider both the pipe diameter and overall configuration to ensure a proper fit.
Tools and Materials Needed to Replace Kitchen Sink Trap
To replace your kitchen sink trap, you’ll need to gather a few necessary tools and parts. The task requires some preparation to ensure a smooth and successful installation.
Essential Tools for the Job
You will need a few essential tools to complete the task. These typically include an adjustable wrench or basin wrench for loosening and tightening slip nuts, and a pair of slip-joint pliers or channel-type pliers for gripping small parts. Having a bucket or container to catch any water spillage is also advisable.
Choosing the of the Right Replacement Kit
When selecting a replacement kit, ensure it matches your existing plumbing’s material—be it PVC, ABS plastic, or metal—for compatibility. Measure your existing trap’s pipe diameter, typically 1½ or 2 inches for kitchen sinks, to purchase the correct size. Consider kits with additional components like tailpiece extensions if required by your sink configuration.
Preparing for the Replacement
Proper preparation is key to a successful kitchen sink trap replacement. Before you begin, ensure you have a clear understanding of the steps involved and the necessary precautions to take.
Safety Precautions
When working under your kitchen sink, safety is paramount. Position a bucket under the trap to catch any water and debris. Having rags or towels ready can help contain spills and protect your cabinet surfaces.
Setting Up Your Work Area
To work efficiently, clear all items from under your sink to create adequate workspace. Lay down old towels or rags around your work area and set up adequate work lighting. Consider using a headlamp or portable work light to illuminate the dark space. Arrange your tools and replacement parts within easy reach, and keep a rubbish bag handy for disposing of old parts and soiled rags.
How to Remove the Old Sink Trap
Removing the old kitchen sink trap is a crucial step in the replacement process. This task requires careful handling to avoid damaging the surrounding pipes or the sink itself.
Disconnecting the Trap Bend
The first part of the old sink trap to be removed is typically the trap bend. To do this, you will need to loosen the nuts that hold it in place. Use a pair of pliers or a wrench to loosen these nuts, turning them counterclockwise until they are loose enough to remove by hand.
Once the nuts are removed, gently pull the trap bend away from the sink drain and the waste pipe. Be cautious, as the trap may still contain some residual water.
Removing the Trap Arm
To remove the trap arm, locate the slip nut that secures it to the drain pipe in the wall. Loosen this nut by turning it counterclockwise; you may need to use pliers for this. Support the trap arm while removing the nut to prevent strain on the wall pipe connection.
- Gently pull the trap arm straight out from the wall drain pipe once the nut is removed.
- If the arm is stuck, apply gentle twisting motions while pulling to break any seal that may have formed.
- Inspect the wall drain opening for any damage, debris, or corrosion that might affect the new installation.
- Clean any buildup or residue from the wall drain opening before proceeding.
Installing the New Sink Trap
With the old sink trap removed, you’re ready to install the new one. This process involves several key steps to ensure a watertight seal and proper drainage.
Test-Fitting the New Components
Before tightening any connections, test-fit the new components to ensure they align properly. Begin by inserting the trap arm into the drain opening in the wall, making sure the washer is correctly positioned.
Preparing the Trap Arm and Slip Nuts
Next, fit the trap bend over the end of the trap arm and onto the sink tailpiece. Slide the slip nuts against the fittings and loosely thread them onto the threaded hubs.
Assembling the New Trap
To assemble the new sink trap, follow these steps:
- Join the trap bend to the trap arm, creating the characteristic P-shape of the assembly.
- Hand-tighten all slip nuts initially to allow for adjustments.
- Ensure the entire assembly maintains a slight downward slope toward the wall drain.
| Component | Function |
|---|---|
| Trap Arm | Connects to the wall drain |
| Trap Bend | Forms the P-trap with the trap arm |
| Slip Nuts | Secures connections |
Once all components are aligned, tighten the slip nuts further, avoiding over-tightening. Verify that the trap assembly doesn’t put stress on any connections.
Ensuring Proper Installation
With the new sink trap in place, the next step is to test its installation and performance. Ensuring the trap is correctly aligned and functions without leaks is crucial for preventing future plumbing issues.
Checking for Correct Alignment and Slope
First, verify that the trap is correctly aligned with the sink drain and waste pipe. The slope of the trap should allow for smooth flow without kinking or sagging, which can impede water flow or cause blockages. A correctly aligned trap minimises the risk of clogs and odors.

Testing for Leaks
To test for leaks, turn the sink faucet on full volume and let the water run down the drain while checking the slip nut connections for signs of leakage. If you notice any leaks, gently tighten the nuts with pliers until the leak stops. Be cautious not to over-tighten, especially with plastic components. You can also fill the sink basin with water, then release it all at once to simulate maximum flow conditions and inspect for leaks under stress.
As a plumber once said, “A leak is like a tiny hole in your wallet, draining your resources away.” Regular checks can prevent such issues, ensuring your kitchen sink’s trap and drain system operates efficiently.
Troubleshooting Common Issues
Even with careful installation, issues can arise with your kitchen sink trap. Ensuring proper function requires addressing potential problems promptly.
Dealing with Leaks After Installation
Leaks can occur if connections are not tightened properly or if there’s damage to the pipe or trap components. Check all slip nuts and washers for any signs of damage or misalignment. Tightening the connections or replacing damaged parts usually resolves the issue.
Addressing Alignment Problems
Alignment issues can lead to poor drainage or clogs. If the trap doesn’t align with the sink tailpiece and wall drain, consider using adjustable traps or offset connectors. Ensure the trap arm slopes downward toward the wall to prevent slow drainage or gurgling sounds.
- If the trap doesn’t align properly, consider using different components or an adjustable trap.
- Traps that sit at an angle may not drain properly and can lead to clogs—adjust components to ensure proper alignment.
- For sinks with garbage disposals, special offset connectors are available to accommodate different heights.
Conclusion
Replacing your kitchen sink trap is a manageable DIY plumbing project. With the right tools and approach, you can resolve drainage issues and prevent water damage. Regular maintenance of your sink trap can prevent more serious problems. By understanding your drain system, you’ll be empowered to address minor issues before they become major problems, saving you time.