Having intact window screens is crucial for maintaining a comfortable and pest-free home. When the mesh becomes torn, it not only detracts from your home’s appearance but also allows insects to enter. Replacing the damaged screen is a simple DIY task that can save you time and money.
You might be surprised at how a damaged window screen can affect your home’s overall comfort and energy efficiency. By learning how to repair or replace the torn mesh, you can ensure fresh air circulates freely while keeping unwanted pests out.
Key Takeaways
- Replacing torn mesh is a straightforward DIY project.
- Intact screens are essential for keeping insects out.
- Damaged screens can reduce your home’s kerb appeal.
- Repairing or replacing mesh can improve energy efficiency.
- This DIY task can be completed in under an hour.
Understanding Window Screen Damage
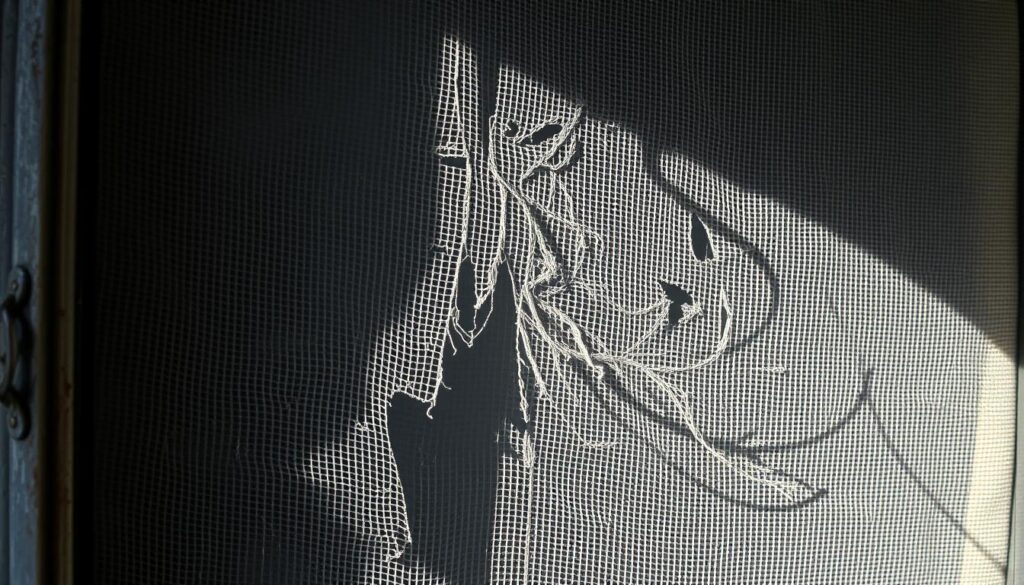
Damage to window screens can occur due to a range of factors, from accidental impacts to natural wear and tear. As a homeowner, it’s essential to understand the common causes of screen damage to determine the best course of action for repair or replacement.
Common Causes of Torn Screens
Torn screens are often the result of pet claws, weather exposure, or accidental impacts. Environmental factors like strong winds and debris can also contribute to screen wear and tear, particularly in coastal or wooded areas. As “the screen’s effectiveness is compromised, allowing unwanted pests to enter your home”, it’s crucial to address the issue promptly.
When to Replace vs. When to Repair
When assessing screen damage, it’s vital to determine whether to repair or replace the screen. Small holes or tears can often be repaired with simple patching techniques, while more extensive damage may require complete replacement. Consider factors like the extent of damage, age of the screen, and available materials when making your decision.
Tools and Materials You’ll Need

Gathering the right tools and materials is the first step in replacing your window screen mesh. You’ll need a few essential tools to get started.
Essential Tools for Screen Replacement
To replace your window screen mesh, you’ll require a utility knife for cutting the screen material, scissors for more precise cuts, and a spline roller tool to secure the new screen in place. A flat-head screwdriver can also be useful for removing the old screen and spline.
Types of Screen Mesh Materials
Choosing the right screen mesh material is crucial. Options include fiberglass, which is common and affordable, and aluminium, which offers durability. For homes with pets, consider pet-resistant screening. The spline should match your window frame’s specifications to ensure a snug fit.
Consider purchasing an all-in-one screen replacement kit that includes the necessary tools and materials, making it a cost-effective option for first-time DIYers.
Preparing for the Replacement Process
Before you start replacing your torn window screen mesh, it’s essential to prepare properly. This involves several key steps to ensure the process goes smoothly and that you achieve professional-looking results.
Measuring Your Window Screen
Accurately measuring your window frame is crucial to purchase the correct amount of screen material. You should measure the width and length of the frame, taking note of any obstructions. It’s also important to add an extra margin, typically 1-2 inches on all sides, when cutting your screening material to allow for proper tensioning during installation.
Creating a Suitable Workspace
You should set up an appropriate workspace with adequate lighting, a clean flat surface, and enough room to manoeuvre the frame without obstruction. Using a flat work surface, like a table, can make the task easier. Clear the area around the window, removing any obstacles or debris that could interfere with your work.
Safety Considerations
When working with sharp tools like utility knives and handling window frames, review essential safety precautions. Wearing appropriate gloves can prevent cuts, and ensuring the workspace is well-ventilated is also important, especially when cutting or trimming the screen material.

Removing the Old Window Screen
Before installing a new screen, you’ll need to take out the old window screen from its frame. This process involves understanding the different mechanisms used to secure screens in various window types.
Taking the Screen Out of the Window Frame
To remove the screen, you may need to pull in tabs or use a tool like a flat-head screwdriver to pry it out gently. Be cautious not to damage the window frame or the screen itself.
Removing the Old Spline
The old spline holds the screen in place within the window screen frame. Use a flathead screwdriver to pry it out of the groove. Once you get a bit out, it should be easy to remove entirely.
Cleaning the Frame
With the old screen and spline removed, clean the frame channel to remove dirt and debris. This ensures a smooth installation for the new screen mesh.
How to Replace Torn Window Screen Mesh
Replacing a torn window screen mesh is a straightforward DIY task that requires some basic tools and patience. To start, you’ll need to position the new screen material correctly.
Positioning the New Screen Material
Take your new screening and lay it across the window frame, leaving at least a few inches on every side. It’s essential to centre the mesh and ensure it extends beyond all edges. “A well-positioned screen mesh is crucial for a successful replacement,” as it prevents wrinkles and bubbles during installation.

Cutting the Screen to Size
Use scissors or electric scissors to cut the excess screening, leaving enough material to secure it firmly in the frame groove. It’s crucial to cut the screen material to the appropriate size to avoid unnecessary strain on the mesh.
Ensuring Proper Tension
Smooth the new screening down from the top to the bottom and then from right to left to remove any creases, wrinkles, or bubbles. Use your spline roller tool to pre-roll the screen into the grooves, keeping tension on the screen to keep it flat. As proper tension is key to a successful installation, working from the centre outward can help achieve an even surface.
By following these steps, you can achieve a professional-quality result with minimal effort. Remember to maintain even tension across the entire screen mesh surface to prevent wrinkles, bubbles, or sagging after installation.
Installing the Spline
Installing the spline is a delicate process that requires attention to detail. To secure your window screen mesh effectively, you must follow a systematic approach.
Using the Spline Roller Tool
To start, take the new spline and begin at the top corner of the screen frame. Place it into the groove and use your spline roller tool to push it into position. Move the tool back and forth over the spline until it’s securely wedged into the groove. This technique helps prevent the mesh from tearing or becoming overstretched.
Working with Corners
Corners can be challenging when installing a spline. To ensure a secure fit, take your time when working around the corners of the screen frame. Use your spline roller tool to gently push the spline into place, making sure it’s firmly seated in the groove.
Troubleshooting Common Spline Issues
Common issues when installing a spline include the spline popping out, uneven tension, or difficulty inserting the spline into tight frame grooves. To troubleshoot these issues, check that you’re using the correct spline diameter for your specific frame. Adjust your technique if the spline is too tight or too loose.
| Issue | Cause | Solution |
|---|---|---|
| Spline popping out | Incorrect spline diameter | Use correct diameter |
| Uneven tension | Inconsistent installation | Work systematically around the frame |
| Difficulty inserting spline | Tight frame grooves | Use spline roller tool gently |
Finishing the Screen Replacement
The final stage of replacing your window screen involves a few crucial steps to guarantee a professional finish. With your new screen material installed, you’ll need to attend to the details to ensure a neat and functional result.
Trimming Excess Screen Material
To achieve a clean finish, you’ll need to trim the excess screen material. Using a utility knife, carefully run the blade along the edge of the spline, removing the surplus screen. Be cautious not to cut too deeply and damage the newly installed mesh.
Checking for Proper Tension
Once the excess material is removed, check the screen for proper tension. Gently press on the mesh to identify any areas of looseness or sagging. A properly tensioned screen should be taut but not overly tight, ensuring optimal functionality.
Reinstalling the Screen in the Window
With the screen material trimmed and tension checked, you can now reinstall the screen frame into the window. Ensure it fits securely and operates smoothly. Your newly replaced screen is now ready for use.
- Learn to trim excess screen material using a utility knife for a clean finish.
- Understand the importance of checking for proper tension to ensure the screen’s functionality.
- Master the process of reinstalling the screen frame securely into the window.
Special Considerations for Different Screen Types

Choosing the right window screen material is crucial for homeowners, especially those with pets or specific energy efficiency needs. The most common materials used are aluminium and fiberglass, each with its own set of benefits.
Fiberglass vs. Aluminium Screens
Fiberglass screens are lightweight and affordable, making them suitable for areas with less wear and tear. In contrast, aluminium screens are durable, rust-resistant, and offer a sleek appearance, ideal for high-traffic areas or homes near coastal regions.
Pet-Resistant Screen Options
For homeowners with pets, pet-resistant window screens made from materials like stainless steel or aluminium-coated fiberglass are available. These screens are designed to withstand scratches and punctures, reducing the likelihood of a hole window screen. You can find more information on pet-resistant screens in our guide on choosing the right replacement window screens.
Solar and Insect Screens
Solar screens can block UV rays and reduce heat gain, benefiting south-facing windows. Insect screens with finer mesh keep out smaller pests. These specialised screens enhance the functionality of your window screening system.
Maintaining Your Window Screens
Whether you’re looking to preserve the effectiveness of your screens or simply want to maintain a clear view, regular upkeep is essential. Proper maintenance can significantly extend the lifespan of your screens and reduce how often you may need to replace them.
Regular Cleaning Tips
Regularly clean your window screens using a mild detergent and water to remove accumulated dirt or debris. This simple practice helps maintain airflow and ensures your screens work effectively.
Preventing Future Damage
To prevent future damage, consider applying a screen coating or protectant. If you have pets or live in an area with high insect activity, upgrading to pet-resistant or heavy-duty screen materials can better withstand the increased wear and tear.
Conclusion
By following the steps outlined in this guide, you’ve successfully replaced your torn window screen mesh. This DIY project is accessible to homeowners of all skill levels, and by doing it yourself, you’ve saved money compared to hiring a professional or replacing the entire window unit.
To maintain your newly repaired screen, regular cleaning and inspections are crucial. Check your window screens for damage and consider whether they’re due for maintenance or repair. Keeping spare screen material slightly larger than needed and having the proper tools on hand will make future repairs a breeze.
Whether you’re dealing with torn mesh or punctured holes, timely repair will protect your home from insects while maintaining good ventilation. By following these steps and tips, you can enjoy a pest-free home with functional and clean window screens.